Share your love
Install Webmin on Debian 12 From Command Line: Easy Guide
In this tutorial, you learn to Install Webmin on Debian 12 from the Command Line. Webmin is a web-based system administration tool. It has a user-friendly graphical interface that allows you to manage different system tasks, including system configuration, user account management, file sharing, package installation, network configuration, etc.
Here on the Orcacore website, we try to show you the Webmin installation on Debian 12 by using the automatic setup script provided by the official website.
Table of Contents
Quickly Install Webmin on Debian 12 From the Command Line
To Install Webmin on Debian 12, you must access your server with root privileges and set up a basic firewall. For this purpose, you can check the Initial Server Setup with Debian 12.
Now follow the steps below to Install Webmin on Debian 12.
Step 1 – Webmin Installation with Setup Script on Debian 12
First, you must run the system update and install some required packages by using the following commands:
# apt update
# apt install gnupg2 curl -y
Then, you need to navigate to your /tmp directory:
cd /tmpNow use the fowling curl command to download the Webmin automatic setup script:
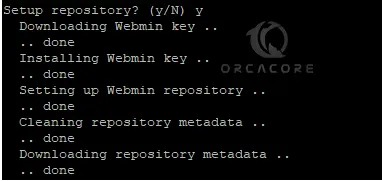
curl -o setup-repos.sh https://raw.githubusercontent.com/webmin/webmin/master/setup-repos.shNext, run the script to start your Webmin setup on Debian 12:
sh setup-repos.shPress Y to start your setup.
Finally, run the system update and Install Webmin on Debian 12:
# apt update
# apt install webmin --install-recommends -y
Step 2 – Start and Enable Webmin Service on Debian 12
At this point, you can easily start and enable your Webmin service by using the following commands:
# systemctl start webmin
# systemctl enable webmin
Then, check your Webmin service is active and running on Debian 12:
systemctl status webmin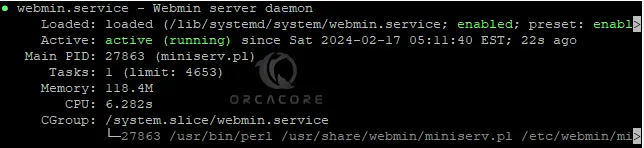
Step 3 – Firewall Rules For Webmin on Debian 12
At this step, we assumed that you have enabled the UFW firewall. The listening port of Webmin is 10000. So you need to allow port 10000 through your UFW firewall. To do this, you can run the command below:
ufw allow 10000Then, reload the firewall to apply the new rules:
ufw reloadNote: you can check UFW Firewall Configuration on Debian 12 to get more information.
Step 4 – Access Webmin Dashboard from the Web Interface
Once your setup is completed, you can access your Webmin dashboard by typing your server’s IP address in your web browser followed by 10000:
https://server-ip:10000Note: You can find your public IP address by visiting this guide on 4 Linux Commands to Get Public IP Address.
You will see the Webmin Login screen. Enter your root username, and password, and click on the Sign in button.

Now you should see your Webmin web-based dashboard on Debian 12:
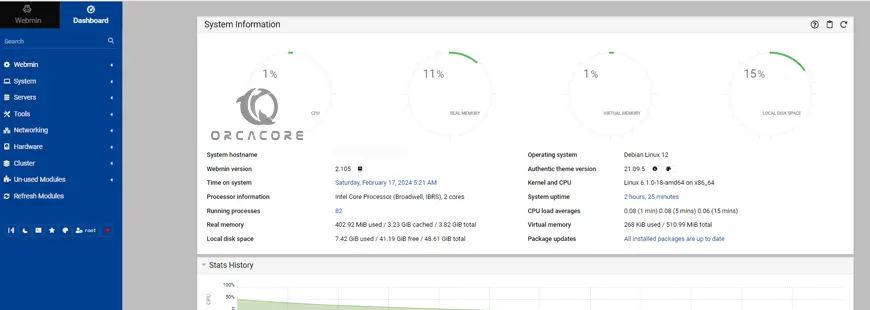
From the dashboard, you can start doing your system tasks including system configuration, user account management, file sharing, package installation, network configuration, etc.
Now let’s see some of the usage of the Webmin dashboard.
Step 5 – Command Shell in Webmin
Webmin has a feature that you can access your Linux terminal and run your commands. This feature is called Command Shell. To access it, from your dashboard navigate to the Tools => Command Shell.

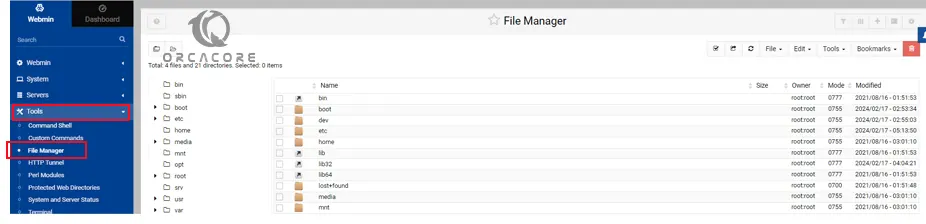
Step 6 – Webmin File Manager
This feature on the Webmin dashboard allows users to browse, manage, and manipulate files and directories on Debian 12. To access it, navigate to Tools => File Manager.
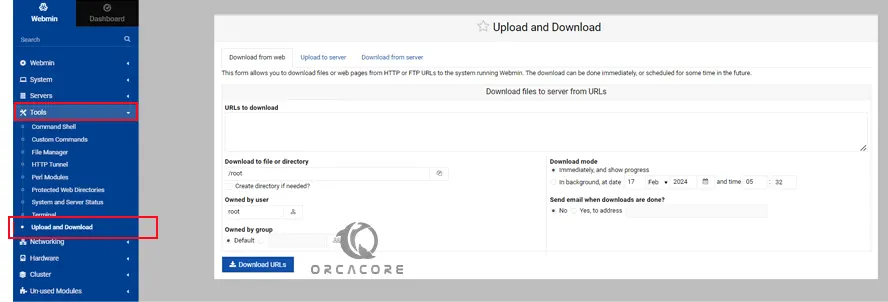
Step 7 – Upload and Download in Webmin
This allows you to download files or web pages from HTTP or FTP URLs to the system running Webmin. The download can be done immediately, or scheduled for some time in the future. To access this feature, navigate Tools => Upload and Download.
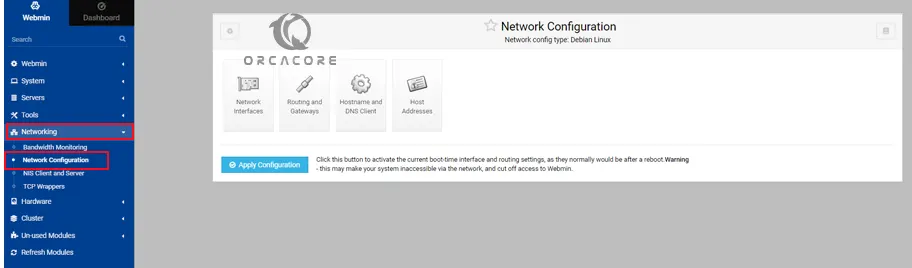
Step 8 – Network Configuration in Webmin
In Webmin, the Network Configuration module allows you to manage different network-related settings and configurations on your server. This module allows you to configure network interfaces, set up networking parameters, manage routing tables, configure network services, and more.
To access this module, click on the Networking => Network Configuration.
For more information, you can visit the official docs page.
Final Words on Webmin Setup on Debian 12
In conclusion, installing Webmin on Debian 12 offers a simple way to manage system administration tasks through a web-based interface. By following the installation process, users gain access to a comprehensive set of tools and modules for configuring, monitoring, and maintaining their servers. Hope you enjoy it.
Also, you may like to read the following tutorials:
Plesk Installation on Debian 12 From Command Line
Install and Use Webmin on Rocky Linux 9