Share your love
Comprehensive Guide To Install XWiki on Debian 12
This guide intends to teach you to Install XWiki on Debian 12 Bookworm. XWiki is an open-source and free wiki software platform written in Java. It allows users to create collaborative websites to easily create and share content, collaborate on projects, and manage knowledge within an organization or community. Also, it has amazing features such as page editing, version control, access control, plugins, macros, and a powerful search capability.
In this article on the Orcacore website, we try to show you a step-by-step guide to install and configure XWiki on Debian 12.
Table of Contents
Step-by-Step Learn To Install XWiki on Debian 12
Before you start your XWiki setup, you must access your server as a non-root user with sudo privileges. For this purpose, you can check the Debian 12 Initial Setup Guide.
Also, you must install Nginx on your server, which is a reverse proxy for XWiki. You can check Nginx Web Server Installation on Debian 12 to do this.
Because XWiki is written in Java, you must install Java on your server. For this purpose, you can install JDK by using Install Java with Apt on Debian 12 Bookworm.
You need a valid domain name that is pointed to your server’s IP address.
Once you are done, follow the steps below to complete this guide.
Step 1 – Configure XWiki APT Repository on Debian 12
First, you need to verify your Java installation with the command below:
java --version
Then, you need to add the XWiki GPG key and Repo to the Debian 12 server. To do this, you can run the following commands:
# sudo wget https://maven.xwiki.org/xwiki-keyring.gpg -O /usr/share/keyrings/xwiki-keyring.gpg
# sudo wget "https://maven.xwiki.org/stable/xwiki-stable.list" -O /etc/apt/sources.list.d/xwiki-stable.list
Next, run the system update to apply the repository:
sudo apt updateStep 2 – Install XWiki on Debian 12
At this point, you can use the command below to list available XWiki packets:
sudo apt-cache search xwikiIn your output, you will see:
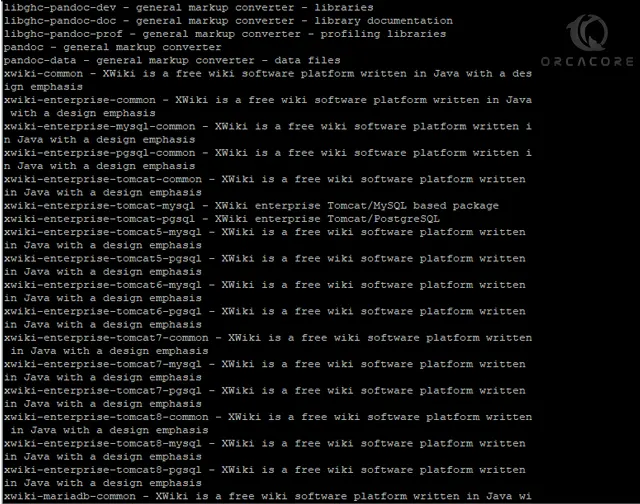
Note: Debian decided to remove the tomcat9 package. So you can use another package like Xjetty. In this guide, we install XWiki with Xjetty and MariaDB.
To install XWiki, you can run the command below:
sudo apt install xwiki-xjetty-common xwiki-xjetty-mariadb During the installation, a configuration setup window will open. First, you need to configure the XWiki database and select Yes to continue.
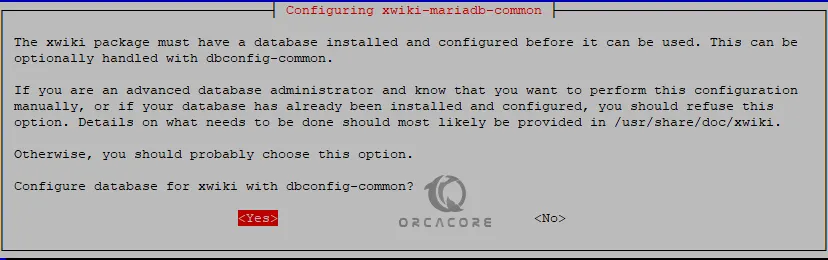
Then, set a password for MySQL App for XWiki and click OK.
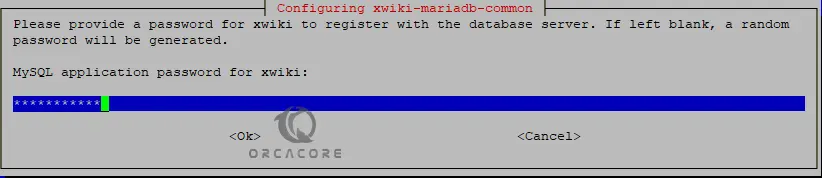
Confirm your password.

Once your installation is completed, proceed to the next steps to configure Nginx as a reverse proxy, access the XWiki web interface, and continue the setup configuration.
Step 3 – Nginx Configuration for XWiki on Debian 12
To access XWiki from the web interface, you need to configure your Nginx web server and create a virtual host file. Create and open the file with your desired text editor like Vi Editor or Nano Editor:
sudo vi /etc/nginx/conf.d/xwiki.conf
Add the following content to the file:
server {
 listen 80;

 server_name example.com;

 access_log /var/log/nginx/xwiki-access.log;
 error_log /var/log/nginx/xwiki-error.log;

 location / {
 proxy_set_header   X-Real-IP $remote_addr;
 proxy_set_header   Host      $host;
 proxy_http_version 1.1;
 proxy_set_header   Upgrade $http_upgrade;
 proxy_set_header   Connection 'upgrade';
 proxy_cache_bypass $http_upgrade;
 proxy_pass         http://127.0.0.1:8080;
 }
 }
When you are done, save and close the file.
Then, activate your created file:
sudo ln -s /etc/nginx/conf.d/xwiki.conf /etc/nginx/sites-enabled/Now you need to open the Nginx config file and increase the hash_bucket size value:
sudo vi /etc/nginx/nginx.confAt the file, search for the following line and uncomment it by removing the #:
server_names_hash_bucket_size 64;Once you are done, save and close the file.
Restart Nginx to apply the changes.
Step 4 – XWiki Setup From Web Interface
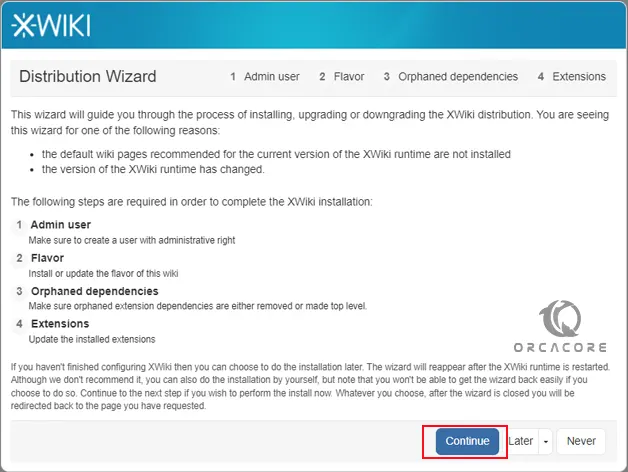
At this point, you can access your XWiki app from the Web GUI. To do this, type your server’s IP address in your web browser followed by 8080/xwiki:
http://your-server-IP:8080/xwikiYou will see the distribution wizard. Press Continue.
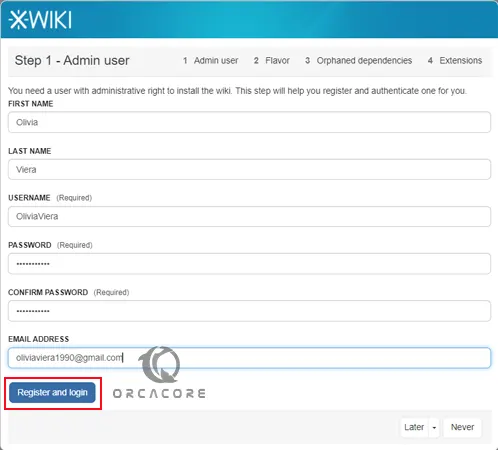
Then, you need to set up your Admin user for XWiki on Debian 12. Enter the required information and click Register and Login.
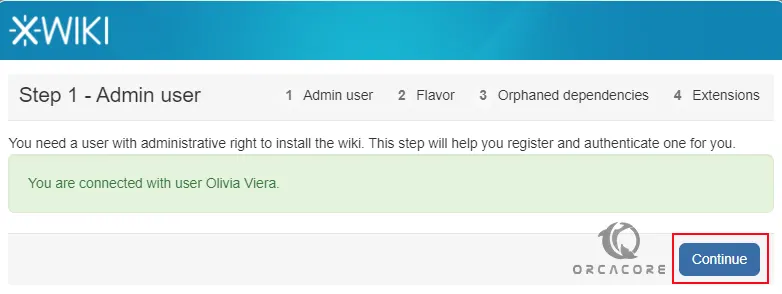
Once your admin user setup is completed, click on Continue.
Now you need to install a Flavor. Users can choose the XWiki flavor that best suits their needs, whether it’s for personal projects, academic institutions, enterprises, or community-driven collaborations. Here we choose XWiki Standard. Click on Install this flavor.
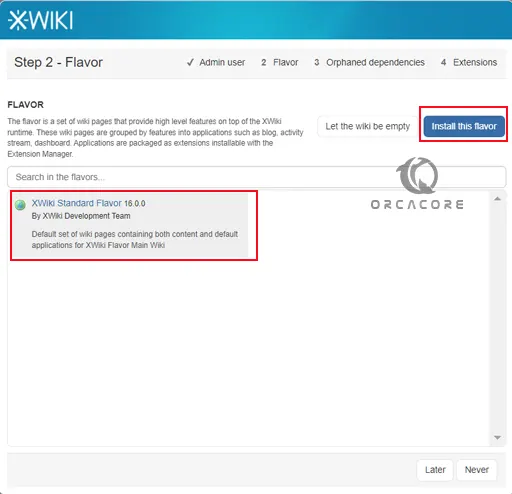
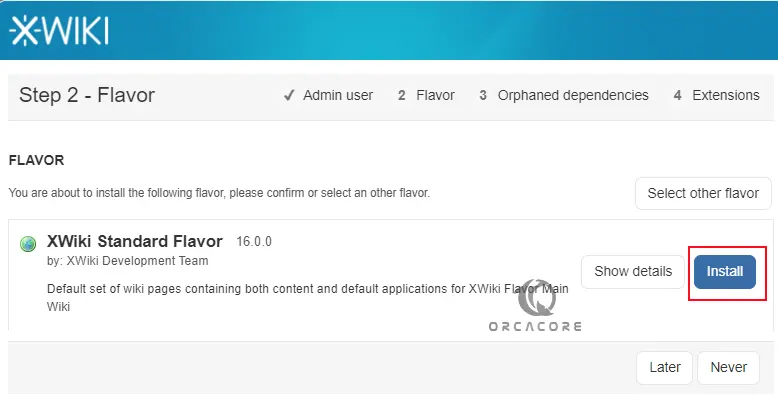
Make sure you have selected the right flavor and click Install.
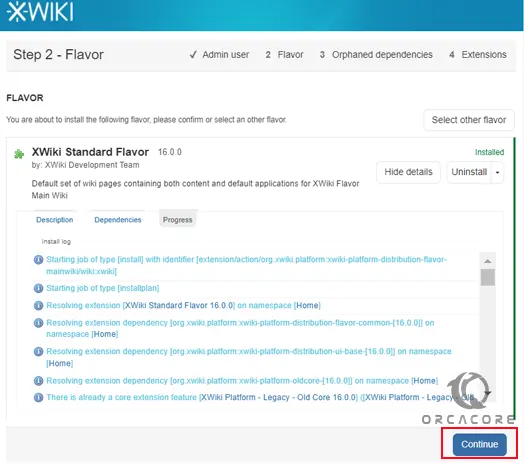
Once your installation is completed, click Continue.
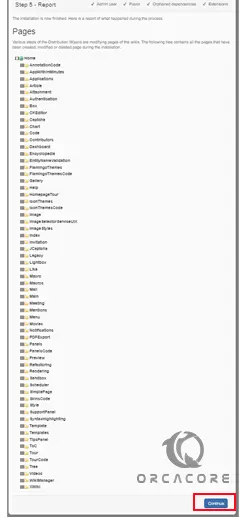
Review your pages and click Continue.
Finally, you will see your XWiki dashboard on Debian 12.
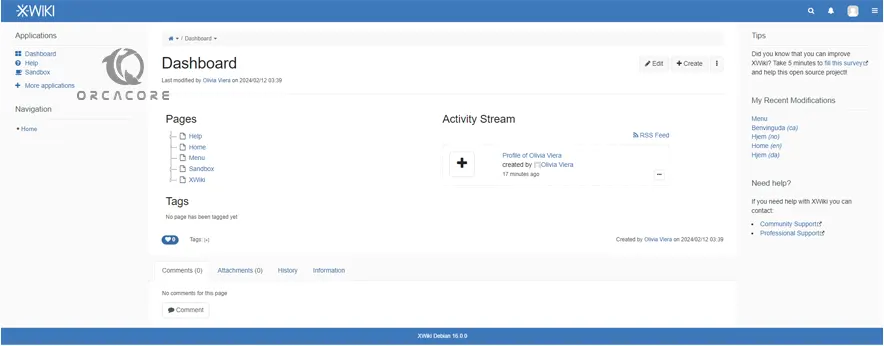
From the XWiki dashboard, users can perform various tasks related to content creation, collaboration, and administration.
Conclusion
XWiki dashboard serves as a centralized hub for users to access, create, manage, and collaborate on content within the wiki environment. At this point, you have learned to Install and Configure XWiki on Debian 12 Bookworm by using the Xjetty and MariaDB packets. Hope you enjoy it.
Also, you may like to read the following articles:
Learn SFTP Server Setup on Debian 12
Install Apache Maven on the Debian 12 Command Line