Share your love
Introduce and Use KiTTY ssh on Windows
In this article, we want to teach you to Introduce and Use KiTTY SSH on Windows.
KiTTY is a fork from version 0.74 of PuTTY, the best telnet / SSH client in the world.
It is only designed for the Microsoft Windows platform.
Introduce KiTTY ssh
As we mentioned above, KiTTY SSH is a fork from version 0.74 of PuTTY.
It is a terminal emulator that allows you to get remote access to another computer.
KiTTY has the same features and functions as PuTTY. It also has its own features such as a session filter, an automatic login script, a session launcher, an automatic password, and much more.
This program is free and open-source just like its original PuTTY software was.
This program has over 25 extra features that the PuTTY emulator does not, and it even has two bonus features that include a light chat server that is hidden away, and a hidden text editor.
Also, it is more secure than PuTTY.
Steps To Use KiTTY SSH on Windows
First of all, you need to download KiTTY on the latest version.
Download KiTTY ssh
Go the fosshub.com and search for Download KiTTY. You will see the KiTTY windows as classic, portable, and with no compression. You can choose each of them and download the KiTTY SSH.
After you have downloaded it, open the app. You will see the KiTTY configuration window like this:
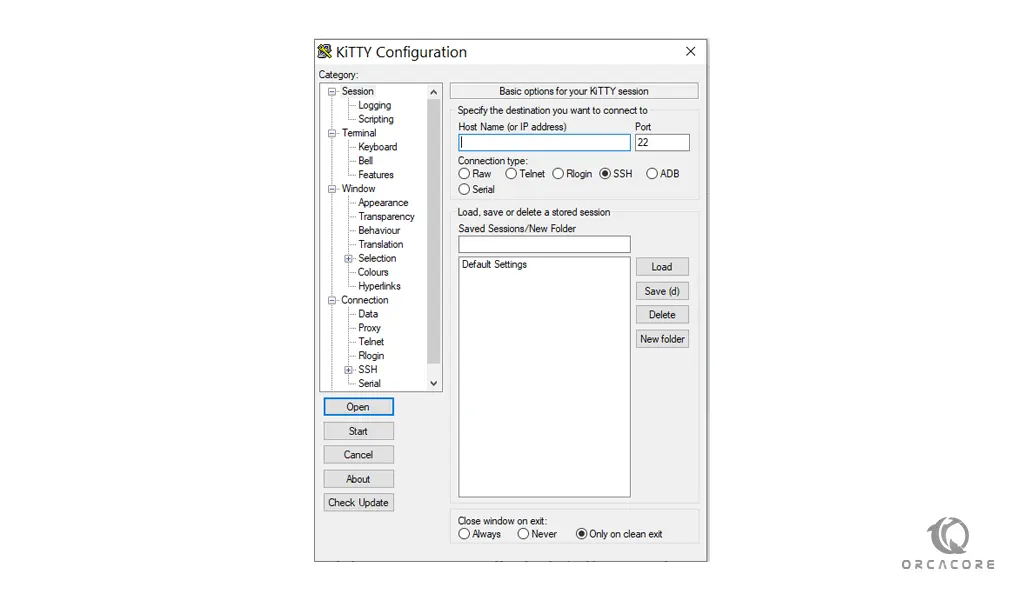
In the session category, you can enter your hostname or IP address. then, you can choose a name for it and save it to the saved session. every time you want to connect to that you have it in your saved session.
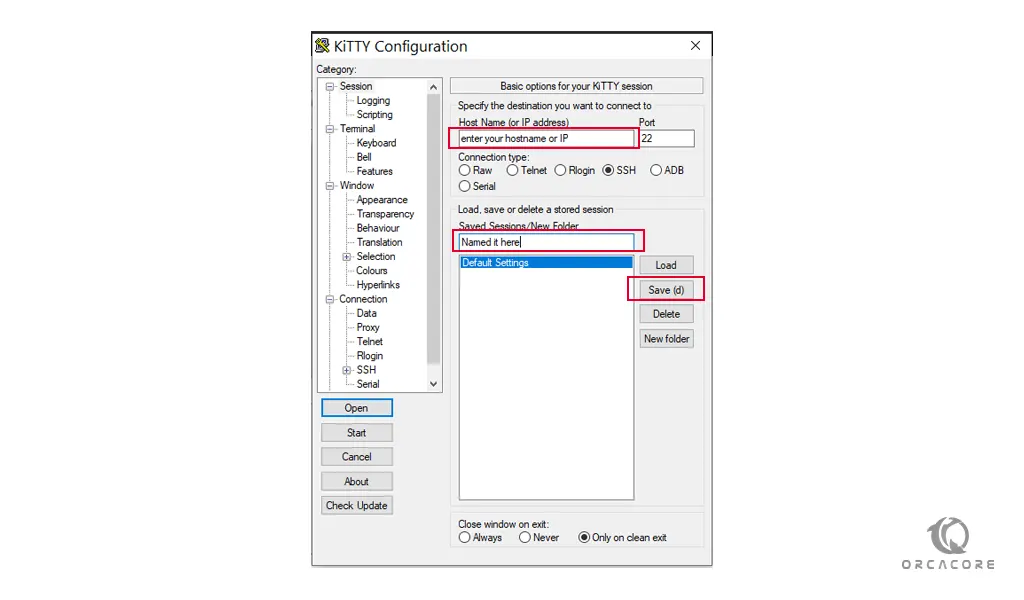
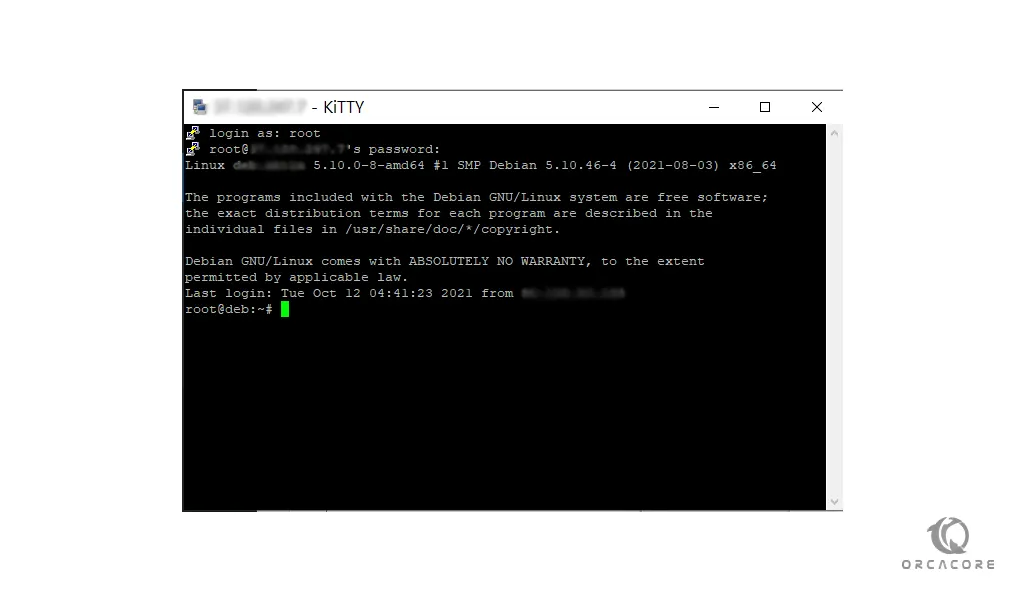
Then, press open to get into the KiTTY terminal.
KiTTY ssh Terminal
KiTTy Config
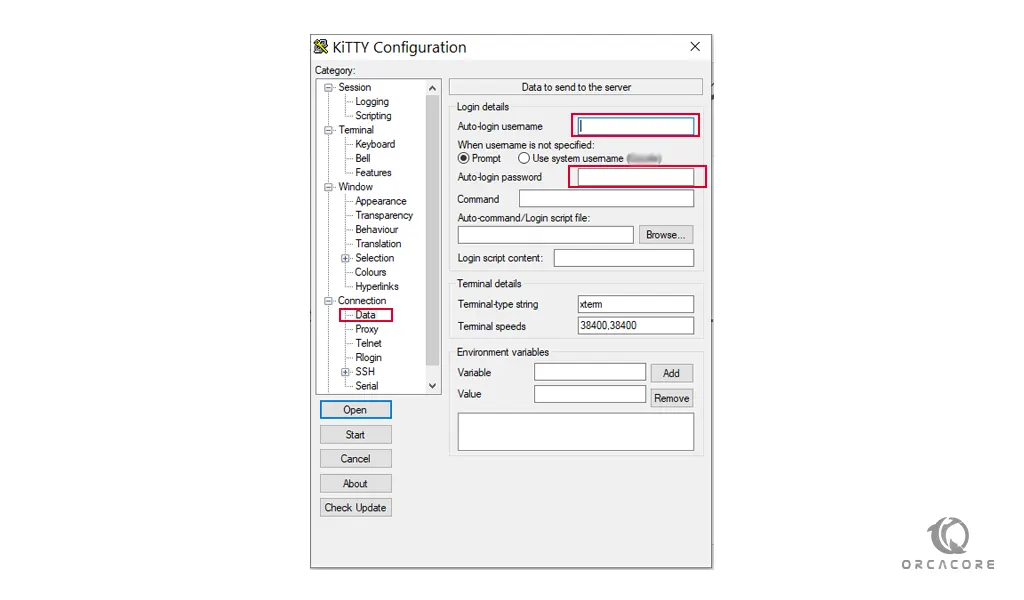
In the KiTTY configuration window, in the connection category, select the Data. and you can enter your username in the Auto login-username and enter your password in the Auto login-password field. with this option, you can automatically log in to the KiTTY terminal.
Note: Remember after these changes go back to the session category and click save to store the settings that you have set.
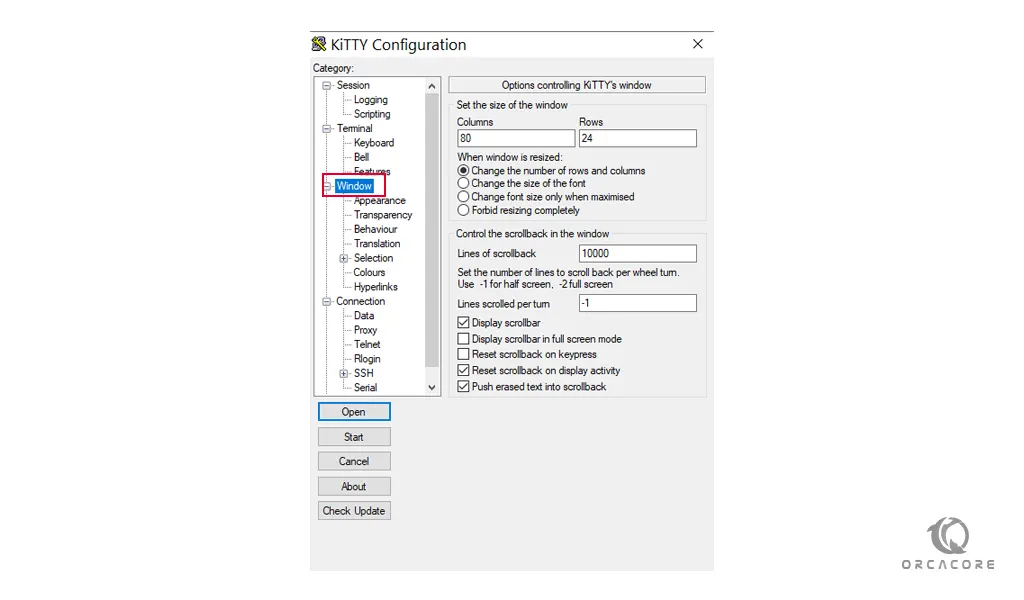
In the window category, you can set the size of the window. and you can change the font size when the window is resized. Also, you can control the scrollback in the window.
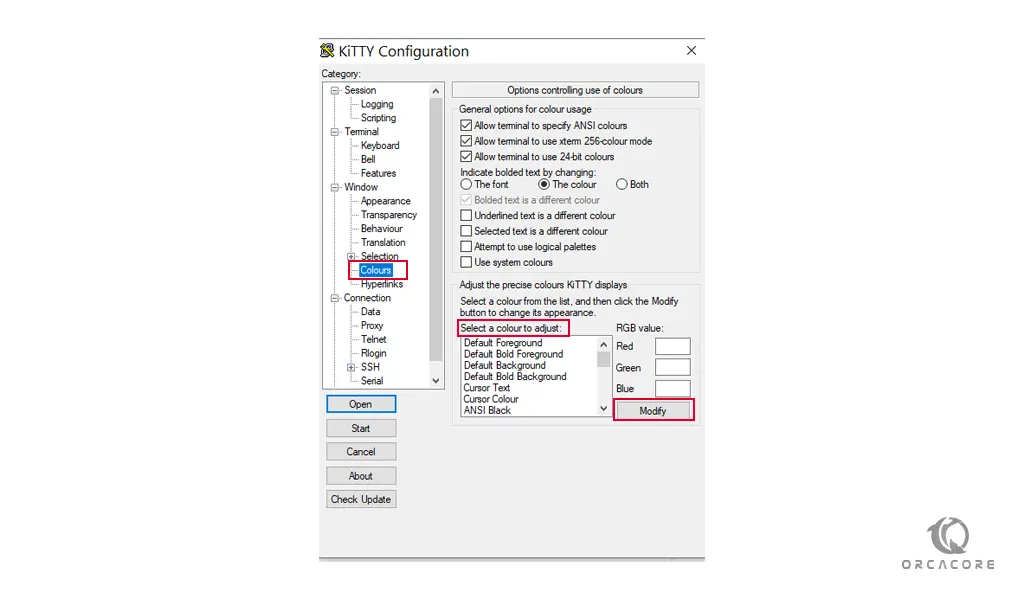
In the colors section, you can adjust the precise colors KiTTY displays.
Select a color from the list, and click the Modify button to change its appearance.
Conclusion
At this point, you are able to connect to the KiTTY SSH terminal.
Also, you get familiar with some categories in the KiTTY configuration window.
Hope you enjoy this guide on Introduce and Use KiTTY SSH on Windows.
May this article about How To Use PuTTY on Windows be helpful for you.