Share your love
Work with Recipes in Virtualizor: Easy Guide Steps

In this tutorial, we want to describe what is a recipe and how it works in the Virtualizor panel. Therefore, it is very important you read our last post about “Create a new VPS on Virtualizor“.
Table of Contents
What are Recipes in Virtualizor?
Virtualizor has an option named recipes that allows you to have more power to make a new VPS wonderful. The recipe is pre-defined codes (sh shell, bash, ksh, zsh) that allow you to make some changes on a new VPS operation system (OS) after creating it. Assume that you want to change a Linux VPS hostname automatically after you create it. Although you can change it manually. This is where Recipes can help you. Follow us to learn how we can work with recipes in the Virtualizor.
Step 1 – How to add a recipe in Virtualizor?
Here we are going to learn how we can add a recipe in a Virtualizor panel. Therefore, Please login to your Virtualizor panel by entering ServerIP:4085 on a browser and log in with credentials. Then navigate to the “Recipes >> Add Recipe” menu from the left panel.
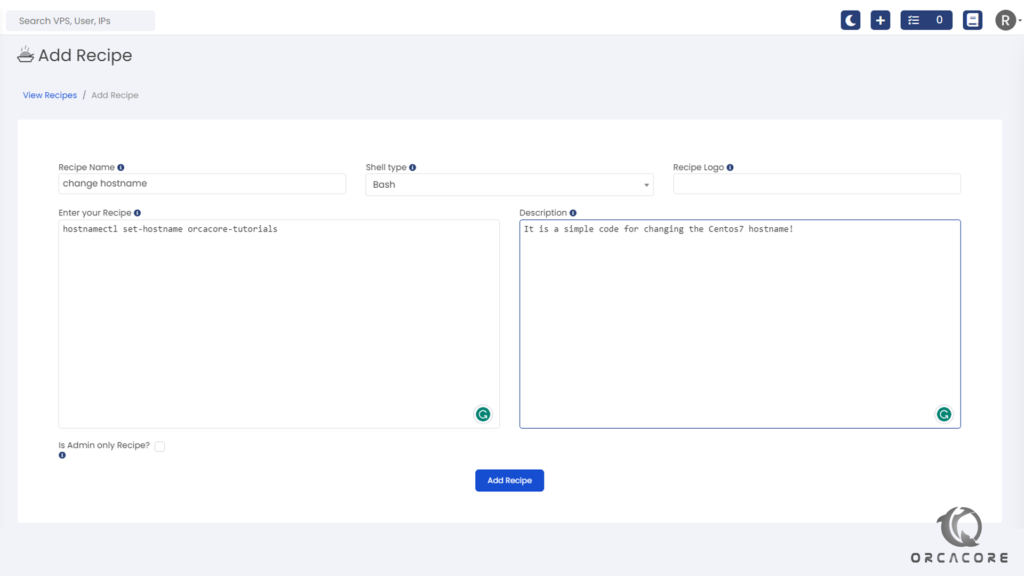
As you see in the image, we have some basic fields to complete. Please enter a name for the new recipe and select the shell type that you want to run. Also, In the recipe Logo, you can enter an icon URL to this new item. Although the logo field is optional it makes our panel more beautiful.
Enter your Recipe (codes you want to run inside of a new VPS) in the box and set a wonderful Description for it. It can make some details for other users.
NOTE: Like any control panel, the description section is limited. Therefore, Please use <br> <br/> <p> <a> <b> <span> tags.
You can use the below variables in your bash code:
{tvpsid}} : VPS ID
{{vps_name}} : VID
{{vps_hostname}} : VPS Hostname
{{username}} : User Email
{{root_pass}} : Root Password
{lips} : 1Pv4 IPs
{{ips6}} : IPV6 IPs
{{ips6_subnet}} : IPv6 subnets
NOTE: Please note that #!/bin/sh will be added automatically at the first line of the script.
If you want to show this recipe only for admin, then check the “Is Admin only Recipe?” checkbox.
In the end, Click on “Add Recipe” to save it in Virtualizor.
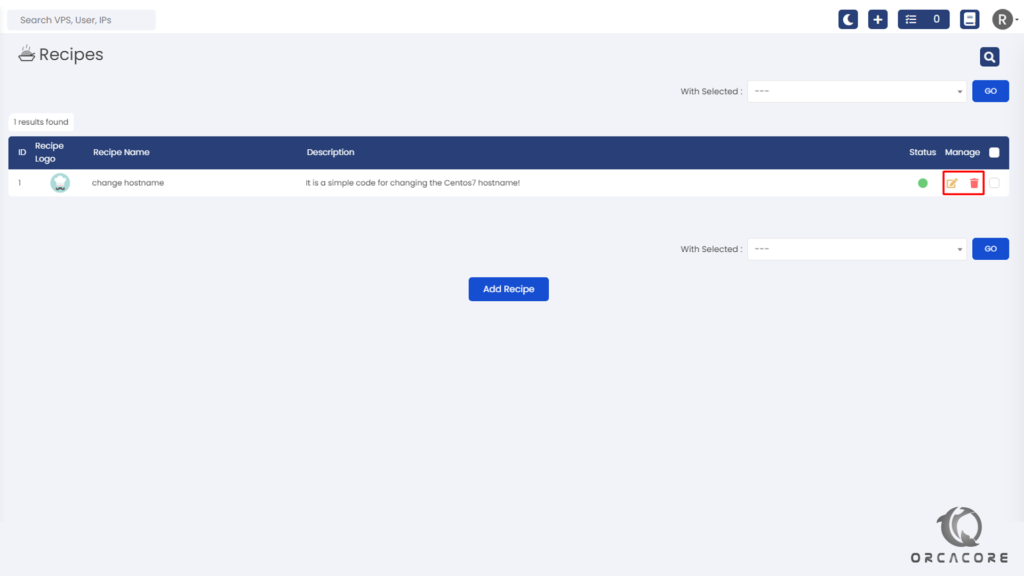
Step 2 – How to manage Recipes in Virtualizor?
In the second step, we describe the ability to manage a recipe on a Virtualizor panel. therefore, you can Edit and Delete each recipe you want by clicking on the icons at the end of each line.
Step 3 – Use Recipes in OS installation
You can add the recipe to a plan or you can select to be executed manually when you create a new VPS. You can read Define Plans on a Virtualizor panel for more information. After a VPS is created successfully and its OS is brought up, the selected recipe will be executed.
Note: After configuring the recipe to run on VPS, Please give more time to the new VPS after booting up.
Conclusion
In this article, we learned about recipes in Virtualizor and how to use and manage them. I hope you enjoy reading this article and it is useful for you.
Therefore, Please don’t hesitate to contact us by commenting if you have any questions.