Share your love
Samba File Sharing Setup on Ubuntu 24.04 | Fast And Secure

This guide will teach you to complete Samba File Sharing Setup on Ubuntu 24.04 Noble Numbat step-by-step. Samba file sharing on Ubuntu 24.04 allows seamless file and printer sharing between Linux and Windows systems. It enables secure, cross-platform collaboration in home and business networks.
Samba packages are available by default in the Ubuntu 24.04 APT repository. You can now proceed to the guide steps below on the Orcacore website to install and configure Samba file sharing on Ubuntu 24.04.
Table of Contents
Steps To Install and Configure Samba File Sharing on Ubuntu 24.04
To install Samba on Ubuntu 24.04, log in to your Ubuntu server as a non-root user with sudo privileges. For this purpose, you can check the following guides:
Create a user with sudo privileges on Ubuntu 24.04
Once you are done, follow the steps below to complete your Samba setup on Ubuntu 24.04.
Also, you can look for the Video Tutorial Here:
1. Install Samba File Share on Ubuntu 24.04
First, you need to run the system update with the following command:
sudo apt updateThen, you can easily use the APT package manager to install Samba. To do this, you can run the command below:
sudo apt install samba smbclient cifs-utils -yThe above command will install required packages and dependencies for Samba File sharing on Ubuntu 24.04. Once your installation is completed, verify it by checking your Samba version:
samba --versionOutput
Version 4.19.5-UbuntuNow you can proceed to the next steps to start your Samba File Sharing Configuration on Ubuntu 24.04.
2. Modify Samba File Share Global Settings
At this point, we want to modify the Samba global settings in the Samba config file. You can modify it in the Samba configuration file at the /etc/samba/smb.conf directory. Open the file with your desired text editor like Vi Editor or Nano Editor:
sudo vi /etc/samba/smb.confAt the file look for the Global section, and find the workgroup line and make sure it is set to WORKGROUP. It should look like this:

Once you are done, close the file.
3. Creating Samba Shared Directories
Now you must create your Samba shared directories on Ubuntu 24.04, including Public and Private. To do this, run the following commands:
# sudo mkdir /public
# sudo mkdir /private
Then, you must add the Samba shared directors with their authentication methods to the Samba configuration file. For this purpose, open the Samba config file again and add the following shared directories to the end of the file:
sudo vi /etc/samba/smb.conf[public]
comment = Public Folder
path = /public
writable = yes
guest ok = yes
guest only = yes
force create mode = 775
force directory mode = 775
[private]
comment = Private Folder
path = /private
writable = yes
guest ok = no
valid users = @smbshare
force create mode = 770
force directory mode = 770
inherit permissions = yesIt should look like this:

Once you are done, save and close the file.
4. Configure Samba File Share User and Group
In this step, you must create a Samba share user group to access the Private and Public shared as specified in the config file above. To create the Samba group on Ubuntu 24.04, run the command below:
sudo groupadd smbshareThen, you must set the correct permissions for Samba group access to shared directories:
# sudo chgrp -R smbshare /private/
# sudo chgrp -R smbshare /public
Also, set the correct permissions for the Samba shared directories:
# sudo chmod 2770 /private/
# sudo chmod 2775 /publicNote: The value 2 at the beginning of the above commands, stands for the SGID bit. This allows newly created files to inherit the parent group.
Now you should create a no-login local user to access the shared directories by using the command below:
sudo useradd -M -s /sbin/nologin sambauser
Then, add the user to the Samba share group on Ubuntu 24.04 with the following command:
sudo usermod -aG smbshare sambauserAlso, you need to set a password for your Samba user with the command below:
sudo smbpasswd -a sambauser
Finally, enable the created account by using the following command:
sudo smbpasswd -e sambauserOutput
Enabled user sambauser.Once you are done, you can now test your Samba File Sharing Configuration on Ubuntu 24.04 by using the command below:
sudo testparmPress Enter to see your Samba configuration is set up correctly:

5. Create Samba Sample Files
At this point, we want to show you how to create demo files and access them from the local machine, Windows client, and Linux client. To create a sample file, you can run the commands below:
# sudo mkdir /private/demo-private /public/demo-public
# sudo touch /private/demo1.txt /public/demo2.txt
Then, restart Samba file sharing on Ubuntu 24.04 to apply the changes:
sudo systemctl restart nmbdAlso, you can check the Smaba service status with the command below:
sudo systemctl status nmbd
Note: If you have a firewall running, you need to allow remote access from the specified IP range as shown below:
sudo ufw allow from 192.168.205.0/24 to any app Samba6. Access Samba File Share From the Local Machine
In this step, you can check and access your Samba share files from your local machine. To do this, run the command below with:
smbclient '\\localhost\private' -U sambauserEnter your Samba user password, you will access the Samba command line, then enter the ls command to check your Samba demo files:

You can type exit to close the Samba shell.
7. Access Samba Shared Folders From a Windows Client
If you want to access your share files from your Windows client, you can follow the steps below.
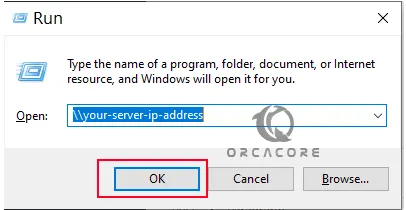
First, you need to open a run box using Win+R and enter your Ubuntu 24.04 IP address in the box and click Ok:
Then, the Samba shared folders on Ubuntu 24.04 should appear as below:
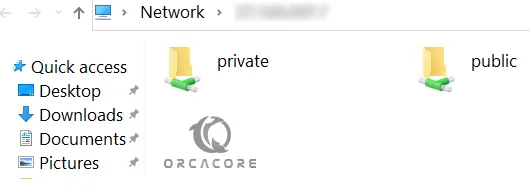
From there, you can open the folders and create new files, and you can also see them from your local machine.
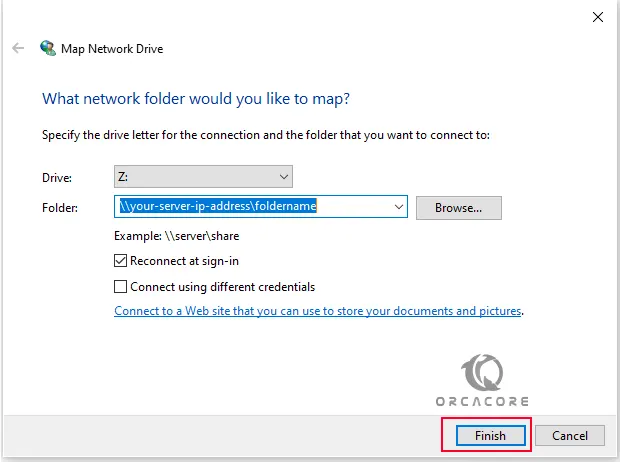
How to mount a Samba share permanently on Windows?
At this point, you can mount the Samba share permanently on your Windows system. Click on This PC->Map Network Drive. This will open a window for you, provide the Path details and click Finish.
Then, enter the Samba user credentials and click ok. You will have the share available on your This PC.
8. Access Samba Shared Folders From a Linux Client
At this point, you can access the share folders from a Linux client. To do this, you need to have Samba packages installed on your server. We assume that you have an Ubuntu client machine.
sudo apt install samba-client cifs-utils -yThen, navigate to File Manager ->Other locations and add your share using the syntax below.
smb://server-name/Share_nameEnter the credentials for the Samba user. That is it! You have your Samba share on your Linux client machine.
That’s it, you are done with Samba File Sharing Setup on Ubuntu 24.04.
Conclusion
Samba file sharing on Ubuntu 24.04 provides a powerful and flexible way to share files across different operating systems. With the right configuration, it ensures secure, efficient, and seamless collaboration in any network environment.
At this point, you have learned to install and configure Samba file share on Ubuntu 24.04, create shared directories, create demo files, and access them from local, Windows, and Linux machines.
Hope you enjoy it. Please subscribe to us on Facebook, YouTube, and X.
Also, you may be interested to read the following articles:
Top Linux Desktop Distros for Teams to Access Remotely
Linux kernel 6.14 Features and Release Date
Resolve Error pkgproblemresolver Held Broken Packages in APT
Install Docker Compose on Ubuntu 24.04
FAQs
How to start Samba on Ubuntu?
You can use the command below:sudo systemctl start nmbd
Why am I getting “Access Denied” when trying to connect to a Samba share from Windows?
An “Access Denied” error can occur due to incorrect Samba user credentials or insufficient permissions on the shared directory. Ensure that the Samba user exists and has the correct password.