Share your love
Best SQL Server Setup on Ubuntu 22.04 Without Docker

This guide will teach you MS SQL Server Setup on Ubuntu 22.04 without using Docker. SQL Server is a comprehensive and feature-rich database platform that provides reliability, performance, security, and scalability for mission-critical applications and data-driven businesses. You may know that you can use Docker to pull and install the MS SQL Server image and install it. Another way is to add an SQL Server repository to Ubuntu 22.04 and use APT to install it.
If you plan to use Docker for installing SQL server, you can check this guide on Install Latest MS SQL Server with Docker on Ubuntu 22.04. But if you want to use the official APT repo, you can follow the steps below on the Orcacore website.
Table of Contents
Learn SQL Server Setup on Ubuntu 22.04 without Docker
Before you start your SQL Server setup on Ubuntu 22.04, you must access your server as a non-root user with sudo privileges. To do this, you can check the Ubuntu 22.04 initial setup guide.
Then, proceed to the following steps to complete your SQL server setup on Ubuntu 22.04.
Step 1 – Add MS SQL Server APT Repository
At this point, you can use the following curl command to add the SQL Server GPG key to your Ubuntu 22.04:
curl -fsSL https://packages.microsoft.com/keys/microsoft.asc | sudo gpg --dearmor -o /usr/share/keyrings/microsoft-prod.gpgThen, run the following command to add the latest SQL server’s official APT repository:
curl -fsSL https://packages.microsoft.com/config/ubuntu/22.04/mssql-server-2022.list | sudo tee /etc/apt/sources.list.d/mssql-server-2022.listTo apply the repositories, run the system update:
sudo apt updateNote: During the update process, you may receive some warnings about your public keys. To resolve them, you can add the following command and then rerun the update command:
# curl https://packages.microsoft.com/keys/microsoft.asc | sudo tee /etc/apt/trusted.gpg.d/microsoft.asc
# sudo apt update
Step 2 – Manually SQL Server Setup on Ubuntu 22.04
At this point, you can simply use the APT to install the SQL server on Ubuntu 22.04. To do this, run the command below:
sudo apt install mssql-server -yOnce your installation is completed, proceed to the next step to configure your SQL server setup.
Step 3 – Configure SQL Server Setup on Ubuntu 22.04
At this point, you can use the following setup script to configure your SQL Server. Run the following command:
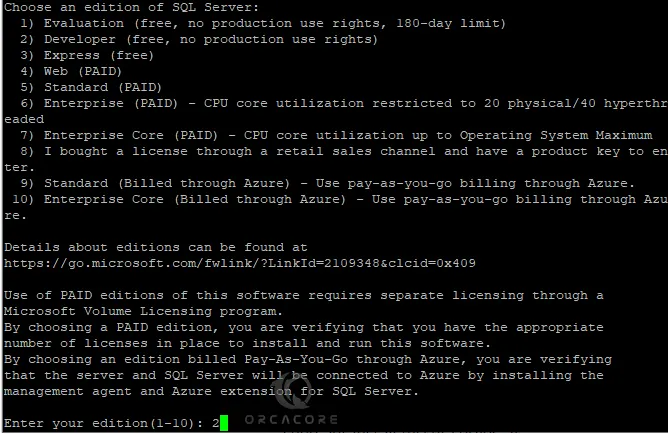
sudo /opt/mssql/bin/mssql-conf setupFirst, you will be asked to choose a SQL server edition. In this guide, we select Developer Edition.
Then, accept the license agreement by pressing Yes.

Next, set up a strong password for the SQL server admin user and confirm it on Ubuntu 22.04.

Once your setup is completed, you will get the following output:

Step 4 – Check MS SQL Service Status
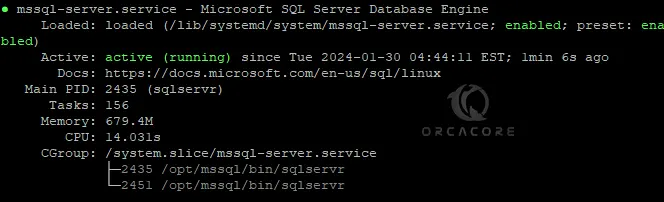
Now you can verify your SQL Server is active and running on Ubuntu 22.04. To do this, you can run the command below:
sudo systemctl status mssql-server --no-pager
Step 5 – Install SQL Server CLI Tools on Ubuntu 22.04
At this point, you can easily install the CLI tools for the SQL server. To do this, import the GPG key with the command below:
curl https://packages.microsoft.com/keys/microsoft.asc | sudo tee /etc/apt/trusted.gpg.d/microsoft.ascThen, add the repository list with the command below:
curl https://packages.microsoft.com/config/ubuntu/22.04/prod.list | sudo tee /etc/apt/sources.list.d/mssql-release.listFinally, run the system update and install command line tools:
# sudo apt update
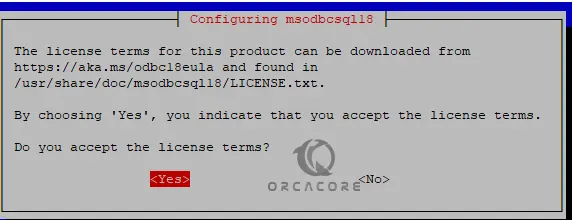
# sudo apt install mssql-tools18 unixodbc-dev -yAccept the license agreement during the installation.
Step 6 – Set Environment Variable Path for sqlcmd and bcp (Optional)
At this point, you can add the /opt/mssql-tools18/bin/ to your PATH environment variable in a bash shell.
For login sessions, you can use:
echo 'export PATH="$PATH:/opt/mssql-tools18/bin"' >> ~/.bash_profileFor interactive/non-login sessions, you can use:
# echo 'export PATH="$PATH:/opt/mssql-tools18/bin"' >> ~/.bashrc
# source ~/.bashrcNote: To explore the differences between login and non-login shells, you can check the following guide:
Understanding Login Shell and Interactive Shell in Linux
Step 7 – How to Run SQL Server on localhost in Ubuntu?
To verify your SQL server is working correctly, you can connect to it locally by using the following command:
sqlcmd -S localhost -U sa -P 'your-password'Note: If the connection doesn’t succeed, you can add the -No option to sqlcmd to specify that encryption is optional, not mandatory.
sqlcmd -S localhost -U sa -N -P 'your-password'Note: If you get ODBC Driver 18 for SQL Server error, you can resolve it by adding the -C option to trust the server certificate:
sqlcmd -S localhost -U sa -P 'your-password' -COnce you launched your shell, you can check your system databases with the following commands:
1> select name,database_id from sys.databases;
2> go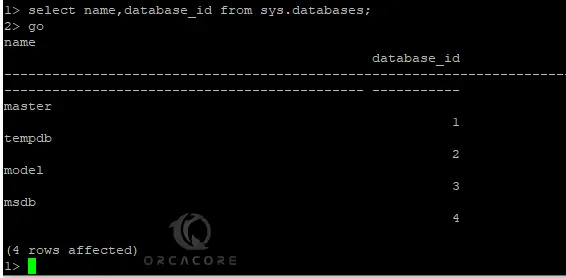
To end your session, you can use:
exitConclusion
By following the guide steps, you can successfully finish SQL Server Setup on Ubuntu 22.04 without Docker, and access your shell locally. It provides a powerful and reliable database platform for your applications and data storage needs.
Also, you may like to read the following articles:
Install MS SQL Server 2022 on Debian 12
MS SQL Server Setup with Docker on RHEL 9