Share your love
Activate and Use Defender Firewall on Windows 11: Best Setup

This guide intends to show you how to Activate and Use Defender Firewall on Windows 11. As you may know, Microsoft Defender Firewall is the default firewall available in Windows. It protects your system from outside attacks etc. Also, if an app wants to communicate with your Windows system, you must allow it through your Firewall settings. With Microsoft Defender, you can easily manage your Firewall settings in Windows 11. Follow the guide steps provided by the Orcacore website to Activate and Use Defender Firewall on Windows 11.
Table of Contents
Guide To Activate and Use Defender Firewall on Windows 11
To Activate and Use Defender Firewall on Windows 11, you must have access to your Windows client and follow the steps below.
Step 1 – Enable Windows 11 Defender Firewall
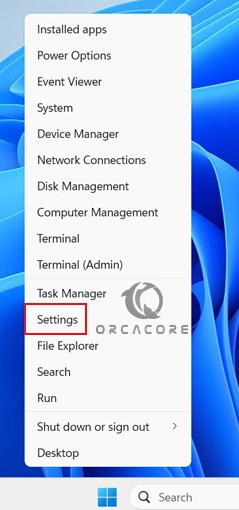
First, you must be sure that your Windows Defender firewall is activated. To do this, right-click on the Windows icon from your taskbar. Then, click on Settings.
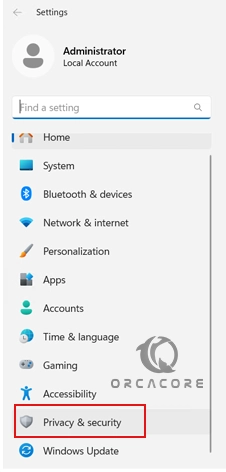
Next, from the left-hand panel, click on Privacy and Security.
Open Windows Security.
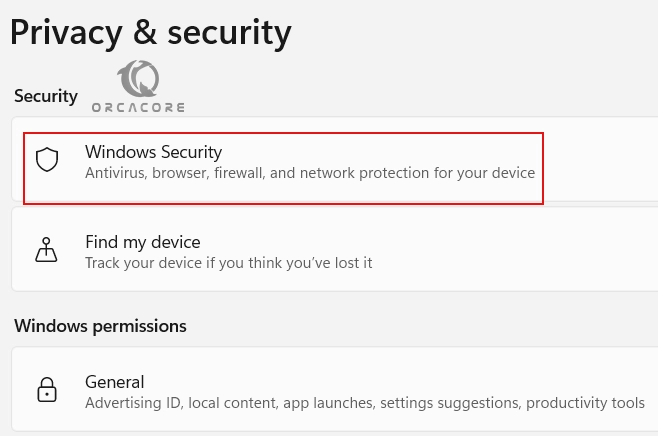
Then, open Firewall and Network Protection.
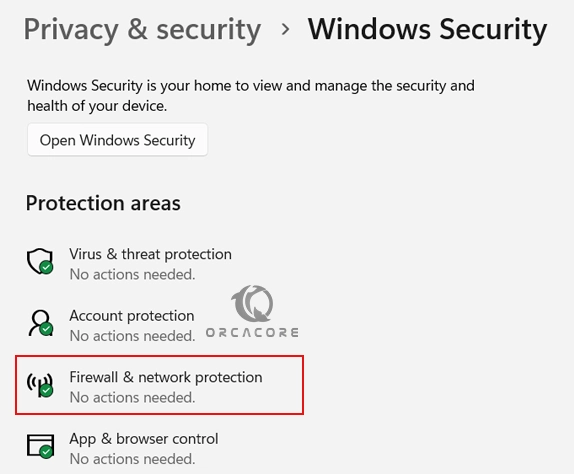
You must see that your Firewall settings must be On. Click on Public Network.
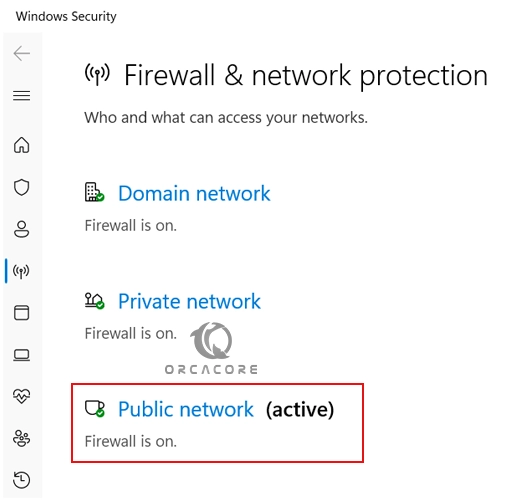
From there, you can activate your Windows 11 Defender Firewall.
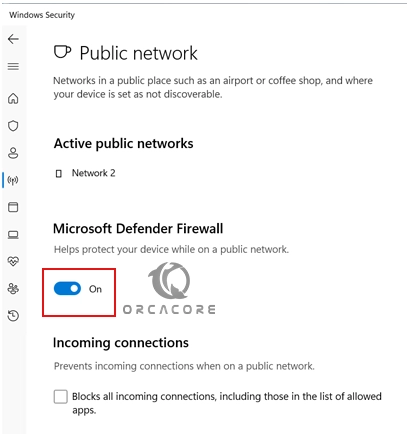
Note: Remember to not turn Windows Defender off, because your system may cause danger and risk.
Step 2 – Allow Apps Through Windows 11 Firewall
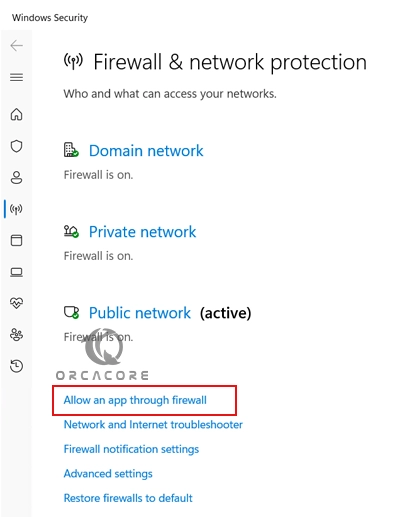
At this point, you can start to use Windows Firewall. For example, to allow an app through your firewall, you can go back to your Firewall and Network Protection screen. From there, click on Allow an app through Firewall.
From there, click on Change settings, and find the desired app you want to allow through the firewall. For example, remote desktop.
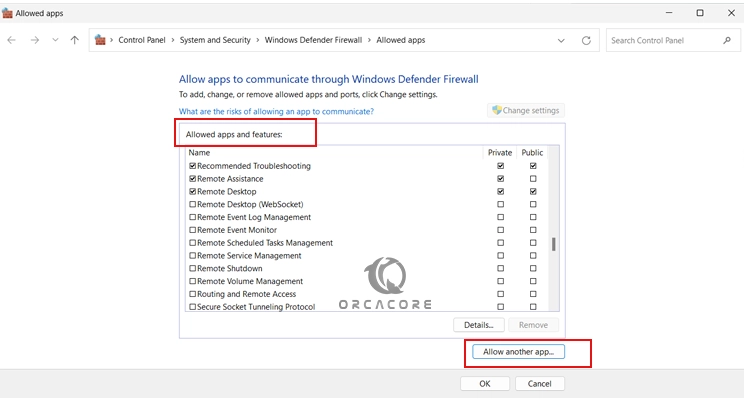
Note: If the app doesn’t appear in the list, you can click on Allow another app and locate your application.
Note: You can choose the private option for home or work, and choose public for public places.
Finally, click OK.
Step 3 – Block Apps From Windows Firewall
If you plan to block an app from your Windows firewall, you can do the same above steps. But you just need to uncheck the boxes next to your app or feature that you want to deny and block. Then, click OK.
Conclusion
At this point, you have learned to Activate Windows 11 Defender Firewall and Start to Use it by allowing and denying apps and features through Windows firewall settings. Hope you enjoy it.
Also, you may like to read the following guides:
Manage Firewalld in Fedora 39 From Terminal