Share your love
Add External Storage to Nextcloud with Amazon S3 Bucket: Easy Steps
This guide intends to teach you to Add External Storage to Nextcloud with Amazon S3 Bucket. External storage in Nextcloud refers to the capability to connect and integrate different storage services and devices into the Nextcloud platform. This feature allows users to access and manage data from other external sources directly from the Nextcloud. External storage can include cloud, network, or local storage services.
Amazon S3 (Amazon Simple Storage Service) is a scalable, high-speed, web-based cloud storage service designed for online backup and archiving of data and applications. In this guide from the Orcacore team, we want to show you how you can use Amazon S3 for file storage in Nextclould.
Table of Contents
Steps To Add External Storage to Nextcloud with Amazon S3 Bucket
To complete this guide, you must log in to your Nextcloud dashboard and follow the steps below. If you are looking for Nexcloud installation steps, you can visit the Orcacore website and look for the Nextcloud articles. For example, you can check these guide steps for Debian 12, AlmaLinux 9, and Ubuntu 22.04:
Install Nextcloud on Ubuntu 22.04
Install and Configure Nextcloud on AlmaLinux 9
Install Nextcloud with LAMP stack on Debian 12 Bookworm
Requirements To connect an Amazon S3 bucket to Nextcloud
Before you start to add External Storage to Nextcloud with Amazon S3 Bucket, you need the following requirements:
- S3 bucket name
- S3 access key
- S3 secret key
- S3 region (if Amazon hosted) or S3 hostname (if non-Amazon hosted)
- Or you can use Wasabi Bucket and URL.
Now follow the steps below to complete Nextcloud S3 External Storage Setup.
Step 1. Enable External storage support application in Nextcloud
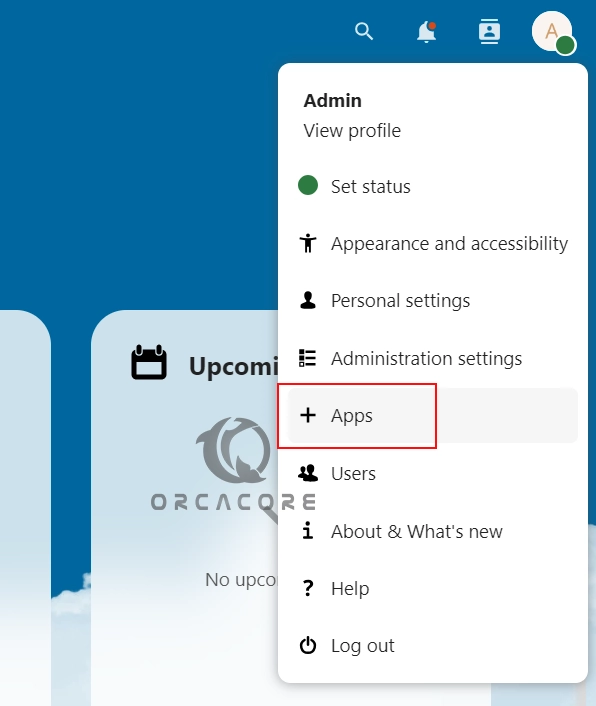
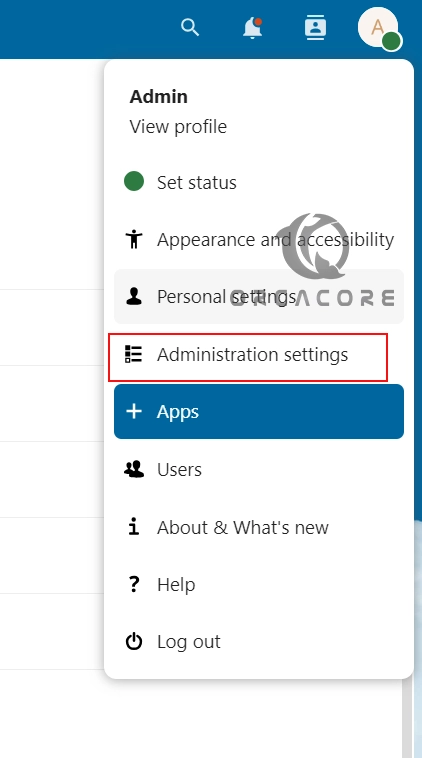
First, you must activate the external storage support app in Nexcloud. To do this, click on your profile at the top right and click on Apps.
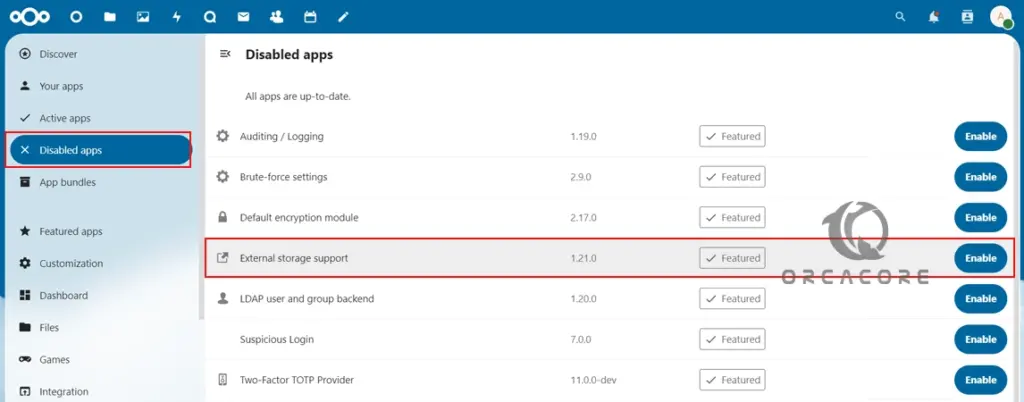
Then, at the left panel choose Disabled Apps. Next, choose External Storage Support Application and click Enable.
Once you are done, you can proceed to the next step to start your configuration.
Step 2. Configure External Storage in Nextcloud
At this point, you can start to Add External Storage to Nextcloud with Amazon S3 Bucket. From your profile at the top right click on Adminstration Settings.
Then, on the left panel click on External Storage. In this guide, we use the Wasabi bucket. In the folder name enter the desired name like Wasabi. Select Amazon S3 Type.
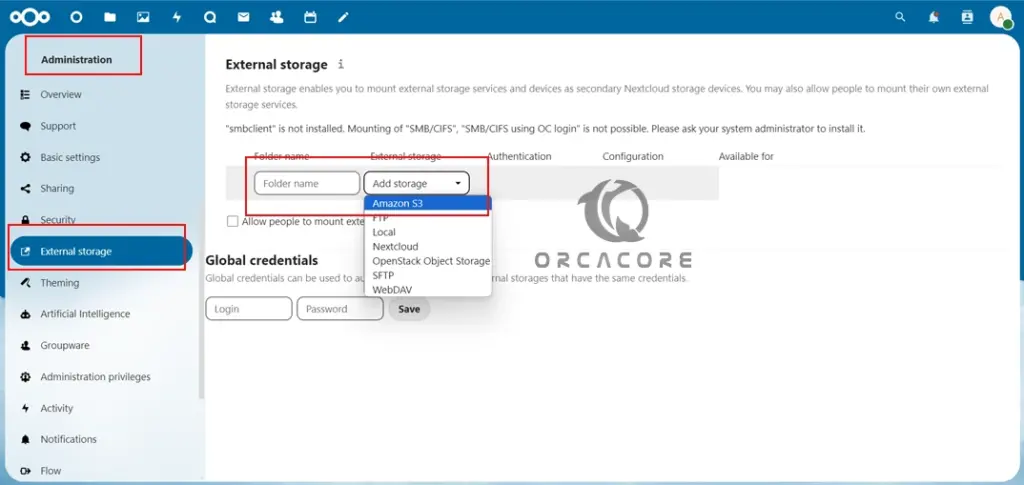
In the configuration field, you need to enter your credential details. Because we use Wasabi, we enter the Wasabi bucket name and URL and enter the Wasabi region. Also, you need to select the access key and enter the secret and access key. You can also allow people to mount external storage. Finally, be sure your configuration is validated.
Note: You can check Service URLs for Wasabi’s Storage Regions From the Official Wasabi Docs page.

Finally, open the Files application, select the External storage menu, and then select your bucket. You should see something similar to this. From there, you can upload files, add folders, etc.

That’s it, you are done. You can get more information by visiting the Nextclod Docs page.
Conclusion
At this point, you have learned to Add External Storage to Nextcloud with Amazon S3 Bucket. First, you must install and configure your Nextcloud and access your dashboard. From there, you can do the guide steps and easily configure your external storage. Also, Nextclod is integrated with Wasabi. In this guide, we use the Wasabi region and URL’s.
Hope you enjoy using it. Also, you may like to read the following articles:
Install ownCloud on Ubuntu 22.04