Share your love
CyberPanel Email Server Setup and Configuration 7 Easy Steps

This guide intends to teach you to CyberPanel Email Server Setup and Configuration. As you may know, CyberPanel is not an email server by itself. It includes functionality for setting up and managing email services through its integration with popular email servers. With the Email options in CyberPanel, you can do many tasks including:
- Email Server Integration
- Setting Up an Email Account
- Domain Management
- SSL/TLS Security
- Spam Filtering
- Webmail Access
- SMTP and IMAP Support
- Backup and Restore
- Server Resource Management
- Community and Support
Now proceed to the following steps on the Orcacore website to start your Email server configuration on CyberPanel.
Table of Contents
A Comprehensive Guide For CyberPanel Email Server Setup and Configuration
Before you start your Email server setup, you need to access your CyberPanel dashboard. For this purpose, you can check the following installation guides:
Install CyberPanel on Ubuntu 22.04
Install CyberPanel on AlmaLinux 8
Also, you need to be sure you have added a domain as a website in CyberPanel. To do this, you can check the Create a Website with Domain Name on CyberPanel.
Now follow the steps below to complete CyberPanel Email Server Setup and Configuration.
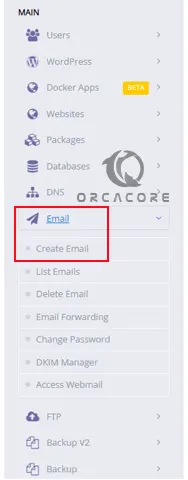
Step 1 – Create an Email on CyerPanel
From your left-side menu, you can click on Email > Create Email.
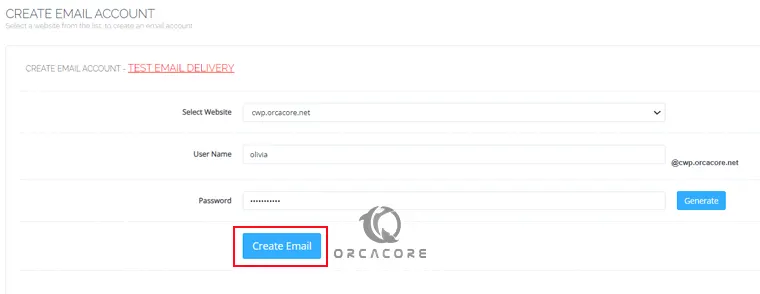
Then, select your website in CyberPanel. Set a username and strong password. Finally, click on Create Email account on CyberPanel.
Once your email account is created, you will get the following message:
Mailbox with username: your-email-address has been successfully created.Step 2 – Change or Reset Email Password on CyberPanel
If you plan to change your email account password, you can simply click on Email > Change Password.
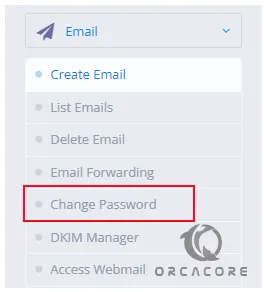
From there, you can select your website and email account, and enter your desired password.

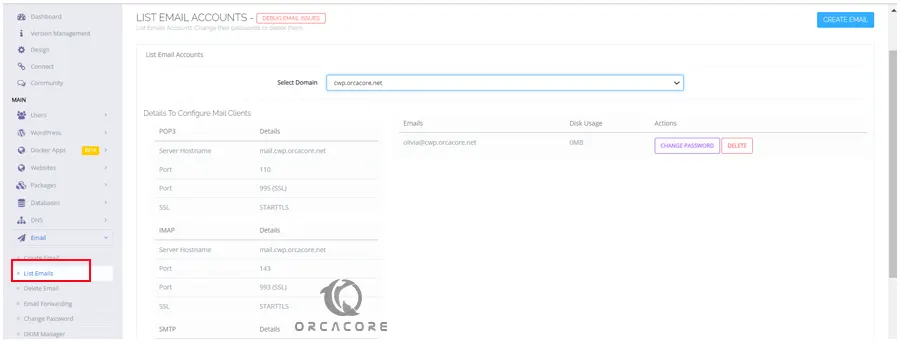
Step 3 – Listing Email Accounts and Information in CyberPanel
To get email client information and list email accounts, click on Email > List Emails. From there, select your website to get your detailed info on email clients.
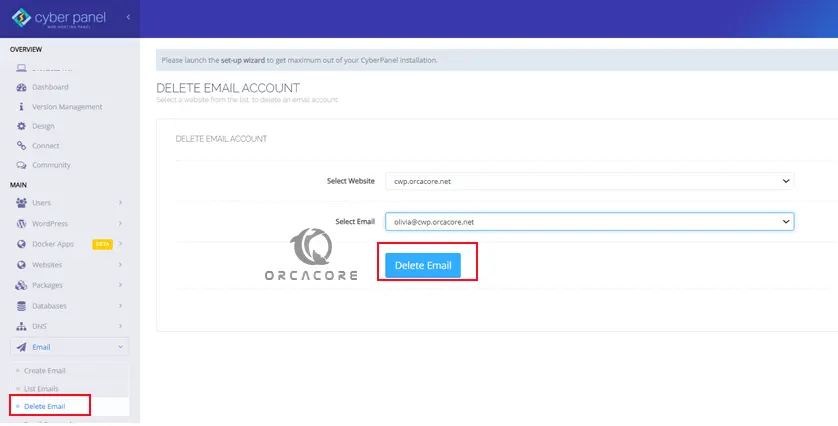
Step 4 – Delete Email Accounts
You can simply delete or remove an email account from CyberPanel. To do this, click on Email > Delete Email. Select your website and the desired email account you want to delete. Then, click on Delete Email.
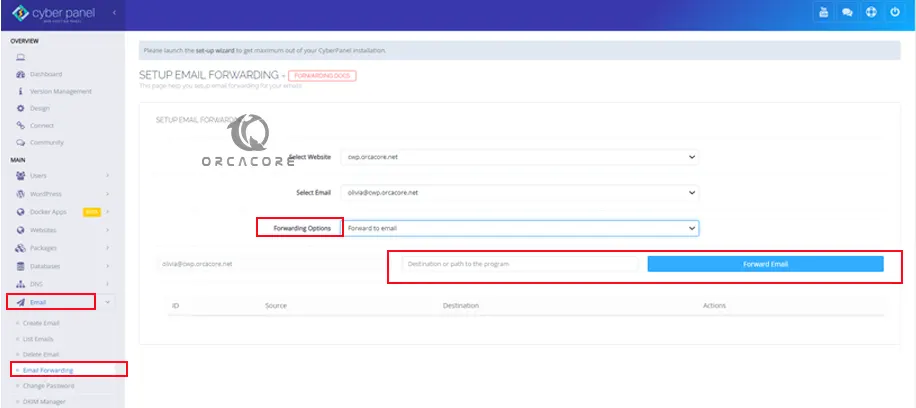
Step 5 – Email Forwarding Setup on CyberPanel
For some reason, you may need to redirect your email communications to another email account. So you can easily use email forwarding.
To do this, click on Email > Email Forwarding. Select the Website and Email account. Choose your forwarding options. Enter your destination email. Then, click on Forward Email.
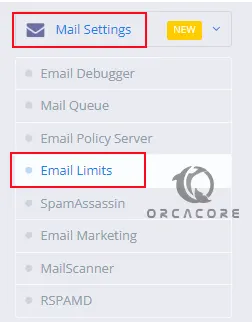
Step 6 – Email Limits on CyberPanel
The Email Limits option will control how many emails can be sent from a domain and email accounts per month and hours. This is a great option for spam attacks.
From the left-side menu, click on Mail Settings > Email Limits.
Then, you will see that you need to enable Email Policy Server on CyberPanel. Select Enable now.
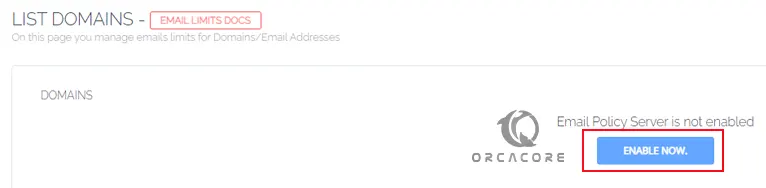
From there, turn on the status and back to your Email Limits page.

Now you manage email limits for Domains and Email Addresses. Simply click on the Manage button.

Next, you can click on the Edit button to the monthly and hourly sending limit.
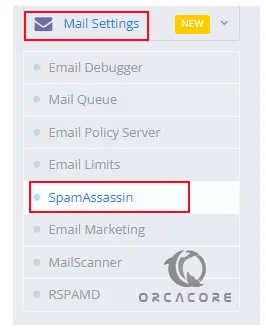
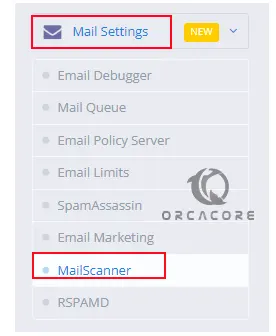
Step 7 – Spam Filtering and Mail Scanner on CyberPanel
CyberPanel has two Mail security plugins which are spam Filtering and Mail Scanner. The spam filtering is called SpamAssassin. To access it, click on Mail Settings > SpamAssassin.
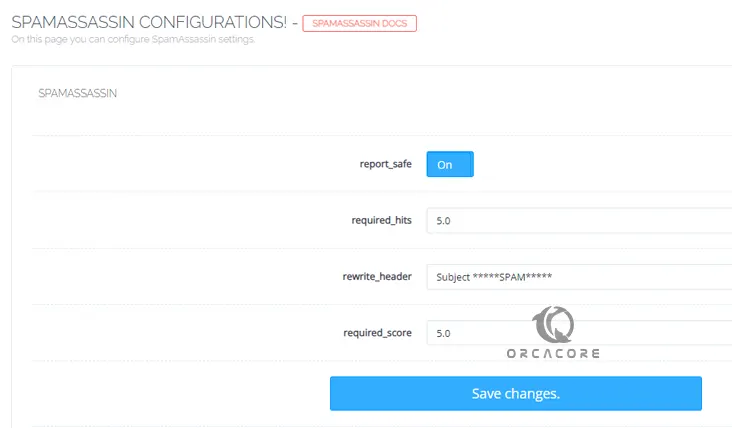
This option, lets you control how many suspicious indicators must be present before an email is flagged as spam. You need to install the plugin and then start using it.
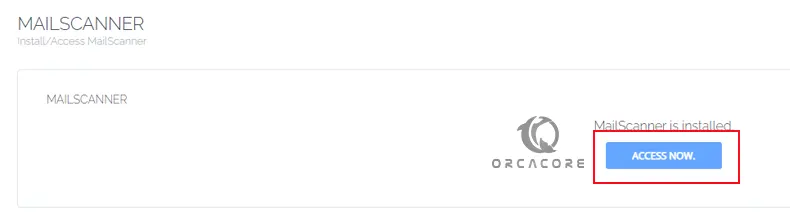
Another security plugin is Mail Scanner. This option uses the MailWatch graphical interface, scans for malware, manages blocklists, and more.
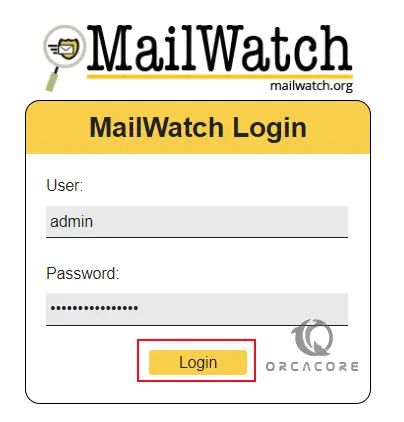
Once you installed the plugin, click on Access Now to see your MailWatch login screen.
Enter your CyberPanle login credentials.
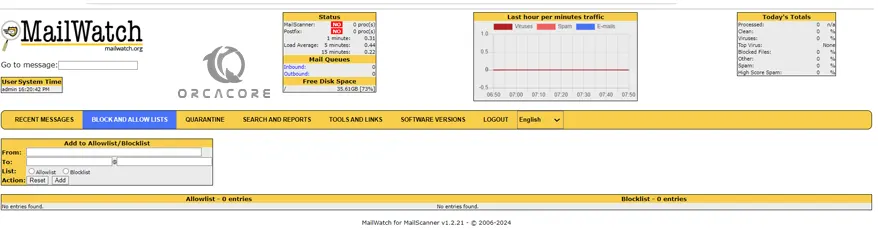
From there, you can easily scan malware, manage your block-allow lists, etc.
It’s important to note that the specific features and functionalities related to email services in CyberPanel may depend on the version and configuration.
For more information, you can visit the Official Email Docs Page.
Summing Up
At this point, you have learned CyberPanel Email Server Setup and Configuration including creating accounts, email limits, email forwarding, mail scanning, etc. Hope you enjoy it. If you need any help, please comment for us.
Also, you may like to read the following articles: