Share your love
Best Steps To Install and Configure MAMP on Windows 11
This guide intends to show you how to Install and Configure MAMP on Windows 11. MAMP allows us to create a local development environment. This allows us to run php (but also Perl or Phyton) and MySQL on our local computers. Follow the guide steps below on the Orcacore website to complete MAMP Setup on Windows 11.
Table of Contents
Steps To Install and Configure MAMP on Windows 11
MAMP is an easy-to-use application. You can install it on your macOS and Windows. It is particularly best suited for WordPress to run locally on your computer.
In this tutorial, you will learn how to Install MAMP Stack on Windows 11 and how to change MAMP server ports. Now follow the steps below to complete this guide.
1. Set up MAMP Stack on Windows 11
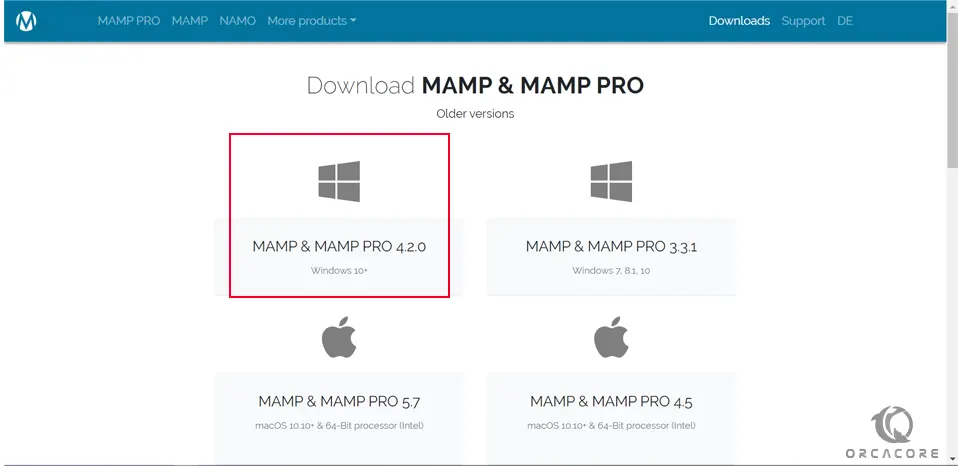
First, you need to visit the Mamp Downloads page and click on the Windows version to download it to your system.
Download MAMP Stack For Windows
When your download is completed, click on it to open the setup wizard.
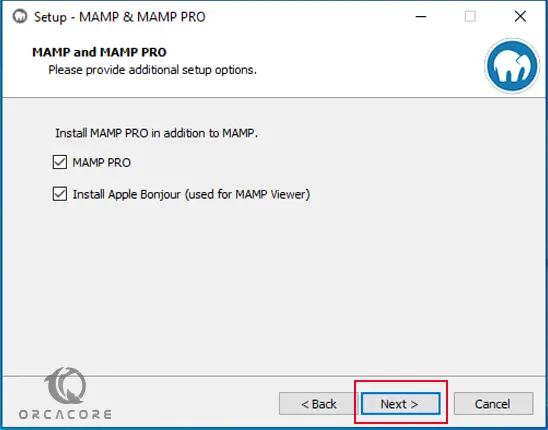
MAMP Setup Wizard
In the Welcome MAMP Setup Wizard on Windows 11, click Next.
Then, tick both checkboxes in the next screen to add the additional setup options and click Next.
In the license agreement screen, accept the agreement and click Next.
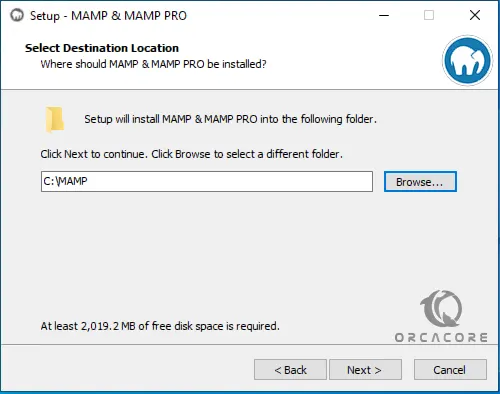
Then, you must select the destination folder. By default, it chooses the C:/ drive, but it is not a good practice to install it on C:/ drive because if Windows gets corrupt or stops working, you will lose your data as well. You can choose another file and click Next.
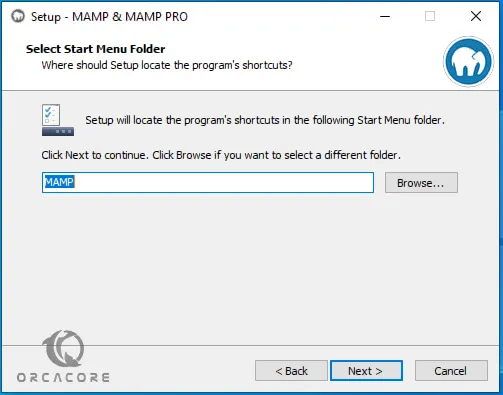
Next, you must select the start menu folder and click Next.
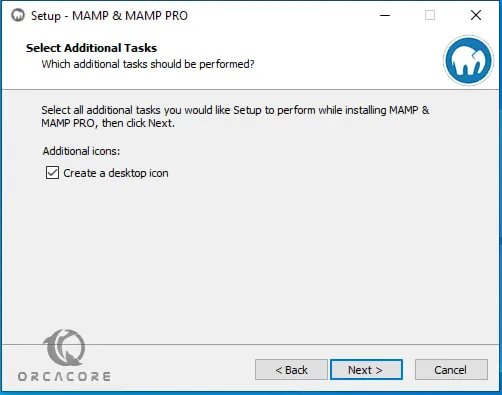
At this point, you must select the additional tasks for MAMP on Windows 11 and click Next to continue.
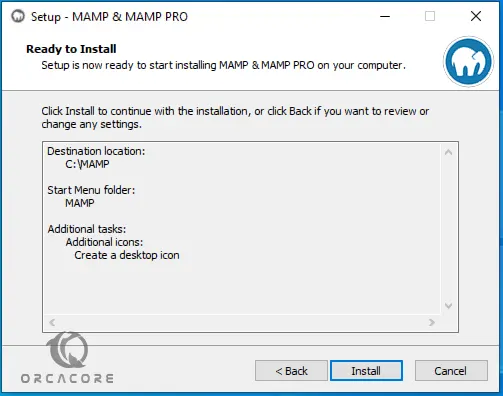
Install MAMP Server
At this point, your MAMP is ready to install on your Windows system. Click Install.
It takes a little time to complete your MAMP installation. Click Finish. From your desktop, you can see that both MAMP & MAMP PRO have been installed.
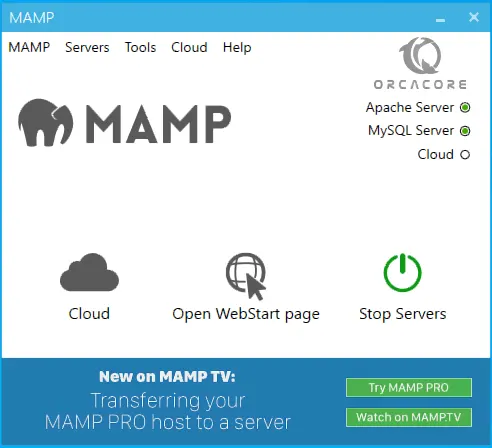
At this point, you must open your MAMP. If your Apache and MySQL are active you will see:
Windows will issue an alert window. you must allow Apache to communicate on private networks:
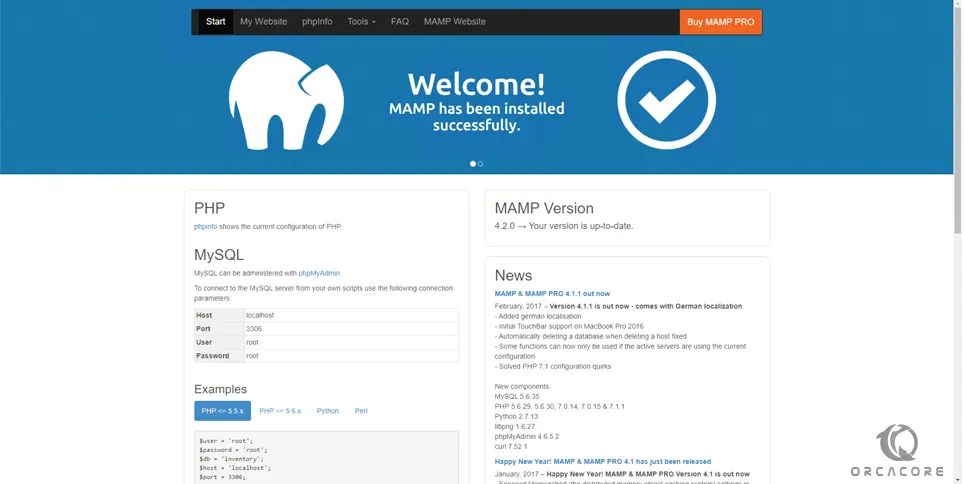
Then, click on the Open WebStart Page and you will see the welcome screen:
Note: If you open your MAMP on Windows 11 and It is showing you an error, “APACHE needs open port 80 which is already used by System”. It means that port 80 is being used by some other application like Skype or IIS or WAMP etc. To solve this, you need to change MAMP server ports. Let’s see how to do that.
2. How To Change MAMP Server Ports
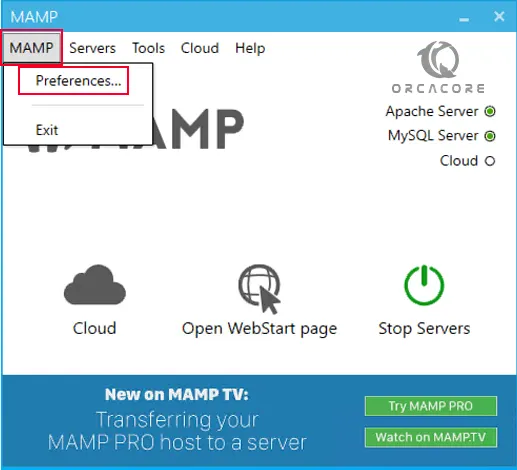
To change MAMP server ports on Windows 11, click MAMP and then preferences.
From there click ports and set MAMP ports to default.
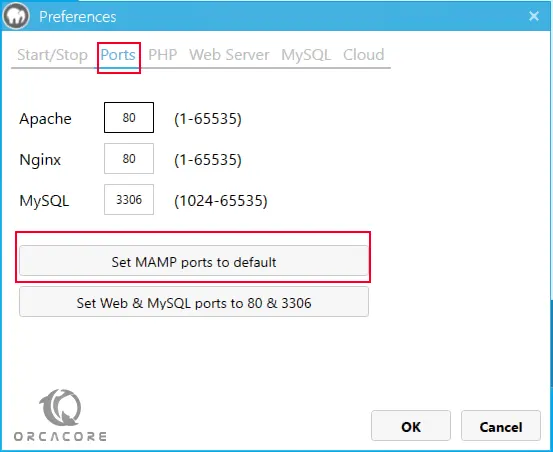
You can see the ports have been changed. Click ok.
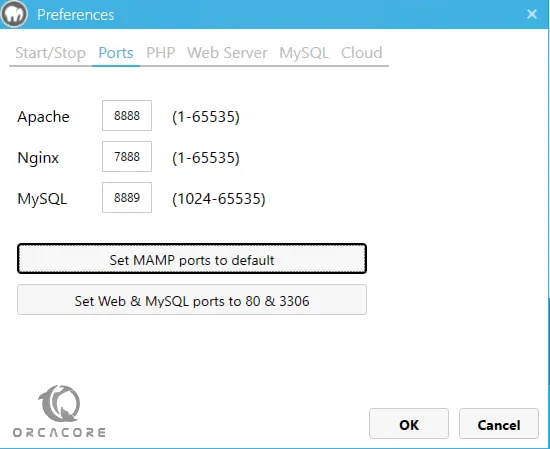
Since the ports have been changed, we need to run the MAMP Server again on Windows 11.
Note: When you restart MAMP it might tell you again that, “APACHE needs open port ‘8888’, which is already used by httpd”. Now click Use next free port. It is suggesting port: 8889. Click Yes.
By default, localhost is accessed by http://localhost/MAMP/. Now the port has been changed so that it can be accessed like http://localhost:8889/MAMP/
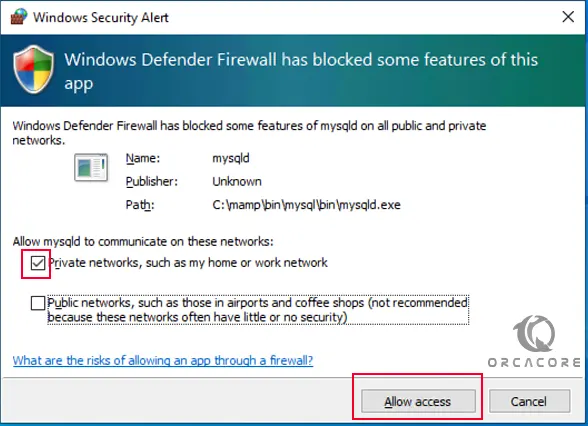
At this point, Windows will ask permission for mysqld. Tick private networks and click allow access.
You can see both Apache Server & MySQL Server are running.
Note: You might get this rubbish information when you open localhost like this:

It shows this raw information because it failed to make a connection with the MySQL database because of port no.
To solve this, you need to change the MySQL port to 3306 as we said in the previous steps.
That’s it, you’re done. MAMP has been installed successfully on Windows 11.
3. Access MAMP Root Directory
MAMPhtdocs is the root directory where you will put or create files. To test it, you can create a new folder named test. Then, create an HTML file, index.html. Don’t forget to remove the .txt extension.
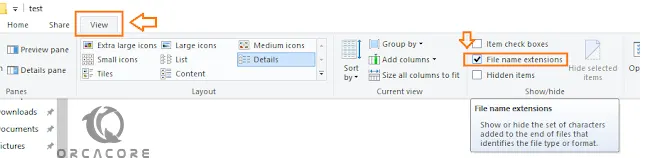
On Windows, click View, and tick File name extensions. It will display the extensions of files.
At this point, open with notepad and type something like, “<h1> Hi, Thanks Orcacore.com </h1>.
My path looks like C:MAMPhtdocstest.
Now run this on localhost. The URL would be: http://localhost:8889/test/
That’s it. You Are Done.
Conclusion
At this point, you have learned to Install and configure MAMP on Windows 11. Also, you have learned to change ports and create a test file for it.
Hope you enjoy it. You may also like these articles:
How To Change Time Zone on Windows 10
How To Install AnyDesk on Windows 11
Clear Recent Files on Windows 11 and Windows 10
Visual C++ build tools for Windows
How do I see my PC specs in Windows 11
How do I check my RAM size on Windows 11