
Share your love
Best Way to Install and Configure Syncthing on AlmaLinux 9

This guide intends to teach you to Install and Configure Syncthing on AlmaLinux 9. Syncthing is an open-source file synchronization tool. It allows users to securely and efficiently sync files and directories across multiple devices or nodes. Also, it provides a decentralized and peer-to-peer approach to file synchronization. It means that there is no central server involved in the process.
In this guide on the Orcacore website, we try to teach you to set up Syncthing on AlmaLinux 9 and access it through the web interface.
Table of Contents
Learn To Install and Configure Syncthing on AlmaLinux 9
Before you start your Syncthing setup, you must access your server as a non-root user with sudo privileges and set up a basic firewall. To do this, you can check the AlmaLinux 9 Initial Setup Guide.
Then, follow the steps below to Install and Configure Syncthing on AlmaLinux 9.
Step 1 – Download and Install the Latest Syncthing on AlmaLinux 9
First, you must run the system update with the following command:
sudo dnf update -yThen, you must visit the GitHub Release Page For Syncthing and use the following command to download the latest source code package:
curl -s https://api.github.com/repos/syncthing/syncthing/releases/latest | grep browser_download_url | grep linux-amd64 | cut -d '"' -f 4 | wget -qi -Once your download is completed, extract it by using the command below:
sudo tar xvf syncthing-linux-amd64*.tar.gzNext, copy your Syncthing binary files to the /usr/bin directory:
sudo cp syncthing-linux-amd64-*/syncthing /usr/bin/At this point, you can verify your Syncthing installation on AlmaLinux 9 by checking its version:
syncthing --versionOutput
syncthing v1.27.3 "Gold Grasshopper" (go1.21.6 linux-amd64) builder@github.syncthing.net 2024-01-15 03:45:19 UTCStep 2 – Manage Syncthing Service with Systemd on AlmaLinux 9
At this point, you can create a systemd unit file to manage your Syncthing service via systemd. First, you must create a user for Syncthing and add it to the wheel group. To do this, you can use the commands below:
# sudo useradd -m syncthing
# sudo usermod -aG wheel syncthing
Then, set a password for your Syncthing user:
sudo passwd syncthingNow you can use your desired text editor like Vi Editor or Nano Editor to create your Syncthing systemd unit file on AlmaLinux 9:
sudo vi /etc/systemd/system/syncthing@.serviceAdd the following content to the file:
[Unit]
Description=Syncthing - Open Source Continuous File Synchronization for %I
Documentation=man:syncthing(1)
After=network.target
StartLimitIntervalSec=60
StartLimitBurst=4

[Service]
User=%i
ExecStart=/usr/bin/syncthing serve --no-browser --no-restart --logflags=0
Restart=on-failure
RestartSec=1
SuccessExitStatus=3 4
RestartForceExitStatus=3 4

# Hardening
ProtectSystem=full
PrivateTmp=true
SystemCallArchitectures=native
MemoryDenyWriteExecute=true
NoNewPrivileges=true

# Elevated permissions to sync ownership (disabled by default),
# see https://docs.syncthing.net/advanced/folder-sync-ownership
#AmbientCapabilities=CAP_CHOWN CAP_FOWNER

[Install]
WantedBy=multi-user.targetNote: To allow listening on all interfaces, you can use the following ExecStart line:
ExecStart=/usr/bin/syncthing --no-browser --gui-address="0.0.0.0:8384" --no-restart --logflags=0Once you are done, save and close the file.
Next, reload the systemd service to apply the changes:
sudo systemctl daemon-reloadYou can start and enable your Syncthing service on AlmaLinux 9 by using the commands below. Remember to specify your Syncthing user:
# sudo systemctl start syncthing@syncthing
# sudo systemctl enable syncthing@syncthing
Verify your service is active and running:
sudo systemctl status syncthing@syncthing
Step 3 – Configure Firewall Rules For Syncthing
At this point, we assumed that you have a running FirewallD. Now you must allow the following ports through your AlmaLinux 9 firewall:
sudo firewall-cmd --add-port={8384,22000}/tcp --zone=public --permanent
Reload the firewall to apply the new rules:
sudo firewall-cmd --reloadStep 4 – Access Syncthing via Web Interface
Now you have learned to Install and Configure Syncthing on AlmaLinux 9. Then, you can access your Syncthing web UI by typing your server’s IP address in your web browser followed by 8384:
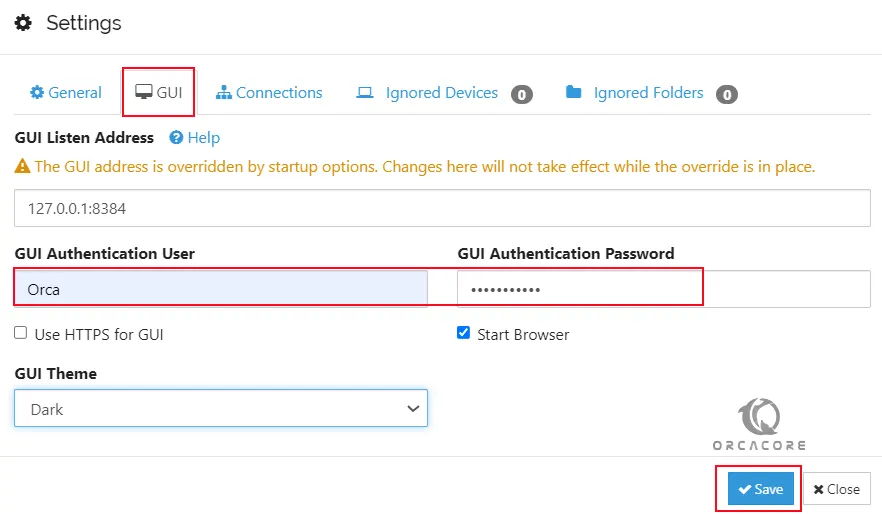
https://localhost_or_ServerIP:8384Once you access your Syncthing Web UI, you will see a warning message to set a GUI Authentication User and Password in the Settings dialog. Click on Settings.

Navigate to the GUI tab. From there, you can set your username and password. Then, click Save.
Next, enter your credentials and click log in.

You will now see your Syncthing Web UI on AlmaLinux 9.
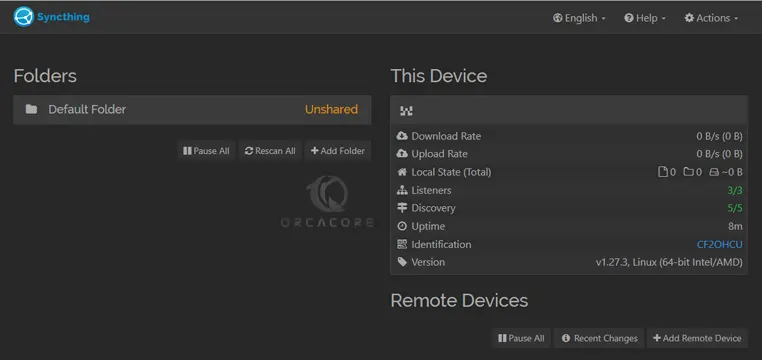
Syncthing web UI offers a comprehensive set of tools for managing and monitoring file synchronization, providing users with control, visibility, and flexibility in managing their data across multiple devices.
Conclusion
At this point, you have learned to Install and Configure Syncthing on AlmaLinux 9 and Access the Syncthing Web UI to manage your files from a graphical user interface. Hope you enjoy it.
Also, you may like to read the following articles:
Install Syncthing on Ubuntu 22.04
Transfer Files from Linux Server to Local Machine
Copy Files and Folders on AlmaLinux


