
Share your love
Install Git on Windows 11 | Best Version Control System
In this guide, you will learn to Install Git on Windows 11. Git is the most commonly used version control system. It tracks the changes you make to files, so you have a record of what has been done, and you can revert to specific versions should you ever need to.
Git also makes collaboration easier, allowing changes by multiple people to all be merged into one source. So regardless of whether you write code that only you will see, or work as part of a team, Git will be helpful for you.
You can now proceed to the guide steps below on the Orcacore website to complete Git Setup on Windows 11.
Table of Contents
Steps To Install Git on Windows 11
To complete this guide, you must log in to your Windows Client and follow the steps below. In this guide, you will learn to use the Chocolatey package manager to install Git.
1. Install Chocolatey For Git Setup on Windows 11
Chocolatey is a command-line package manager for the Windows operating system based on the NuGet package manager. Chocolatey manages its own package feed; however, you can set up your own local repository for the enterprise environment to control the package’s source for installation.
If you are familiar with Linux or macOS environments, Chocolatey is similar to Apt and Homebrew, respectively. To install Chocolatey, run your PowerShell as an administrator and run the following command:
Set-ExecutionPolicy Bypass -Scope Process -Force; [System.Net.ServicePointManager]::SecurityProtocol = [System.Net.ServicePointManager]::SecurityProtocol -bor 3072; iex ((New-Object System.Net.WebClient).DownloadString('https://chocolatey.org/install.ps1'))When you are finished, close the PowerShell and open it again.
2. Installing Git with Choco
At this point, from your PowerShell run the following command to set up Git on Windows 11:
choco install -y gitWhen your installation is completed, close the PowerShell to apply the changes.
To verify your Git installation, you can check its version from the PowerShell:
git --version
3. Configure Git on Windows 11
Before you start to use Git in a project, you need to configure it to your username and email address.
To do this, from your PowerShell run the following commands with your desired username and email address:
# git config --global user.name your_username
# git config --global user.email your_email@example.com
To check the configuration settings for your repository, you can run the following command:
git config --global --listExample Output
user.name=orca
user.email=orca@orcacore.comInitialize a Repository with Git
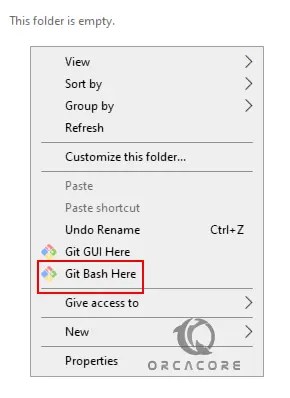
If you have a project folder that is not currently using Git version control, open the folder, right-click on an empty place on the folder and choose the menu item “Git Bash Here“. It will open the Windows Git Bash terminal in your current working directory.
From the terminal that opened for you, run the following command to initialize the new project:
git initOutput
$ git init
Initialized empty Git repository in C:/Users/Administrator/Downloads/Git Repo/.git/The git init command is the command that allows us to create a local repository in Windows 11. The init command creates the .git subfolder (inside your current working directory) that contains all of the folders and configuration files of the local repository.
That’s it, you are done.
Conclusion
The purpose of using Git on Windows 11 is to manage and track changes in code or files, collaborate with others on projects, and maintain version control in software development. It allows developers to easily manage code repositories, revert changes, and integrate with platforms like GitHub or GitLab. At this point, you have learned to complete Git Setup on Windows 11.
Hope you enjoy it. Please subscribe to us on Facebook and YouTube.
You may be like these articles too:
How To Install Dig on Windows 10

How do I fix a corrupted git repository? could you help me?
At First you need to create clone of a known good repository, Then clone as an object alternate to the broken. After that Do a git-repack -a -d to lift the external objects and Remove the clone.