Share your love
Install LEMP Stack Nginx MariaDB PHP on Debian 12

This tutorial intends to teach you to Install LEMP Stack Nginx, MariaDB, and PHP on Debian 12 Bookworm. LEMP Stack can be used for web development. Debian 12 ships with Nginx 1.22, MariaDB 10.11, and PHP 8.2. In this guide, we use MariaDB instead of MySQL. Now you can follow the steps below to complete this guide.
How To Install LEMP Stack Nginx, MariaDB, and PHP on Debian 12?
To set up LEMP Stack, you must have access to your server as a non-root user with sudo privileges and set up a basic firewall. To do this, you can follow this guide on Initial Server Setup with Debian 12 Bookworm.
Also, you need a domain name that is pointed to your server’s IP address.
Step 1 – Install Nginx on Debian 12 Bookworm
First, run the system update by using the following command:
sudo apt updateThen, use the following command to install Nginx on your Debian 12 server:
sudo apt install nginx -yDuring your installation, Nginx must be started, you can verify it by using the following command:
sudo systemctl status nginxOutput
● nginx.service - A high performance web server and a reverse proxy server
Loaded: loaded (/lib/systemd/system/nginx.service; enabled; preset: enable>
Active: active (running) since Thu 2023-06-15 05:58:38 EDT; 42s ago
Docs: man:nginx(8)
Process: 2812 ExecStartPre=/usr/sbin/nginx -t -q -g daemon on; master_proce>
Process: 2813 ExecStart=/usr/sbin/nginx -g daemon on; master_process on; (c>
Main PID: 2838 (nginx)
Tasks: 3 (limit: 4653)
Memory: 2.3M
CPU: 45ms
CGroup: /system.slice/nginx.service
...Step 2 – Configure UFW Firewall for Nginx on Debian 12
Here we assumed that you have enabled UFW firewall. Now you should allow port 80 for Nginx through the firewall. To do this, you can use the following command:
sudo ufw allow 'Nginx HTTP'Reload the firewall to apply the changes:
sudo ufw reloadThen, check your UFW status with the command below:
sudo ufw statusIn your output, you should see that Nginx HTTP is allowed through your firewall:
Output
Status: active

To                         Action      From
--                         ------      ----
Nginx HTTP                 ALLOW       Anywhere
Nginx HTTP (v6)            ALLOW       Anywhere (v6)
Step 3 – Access Nginx Default Page o Debian 12
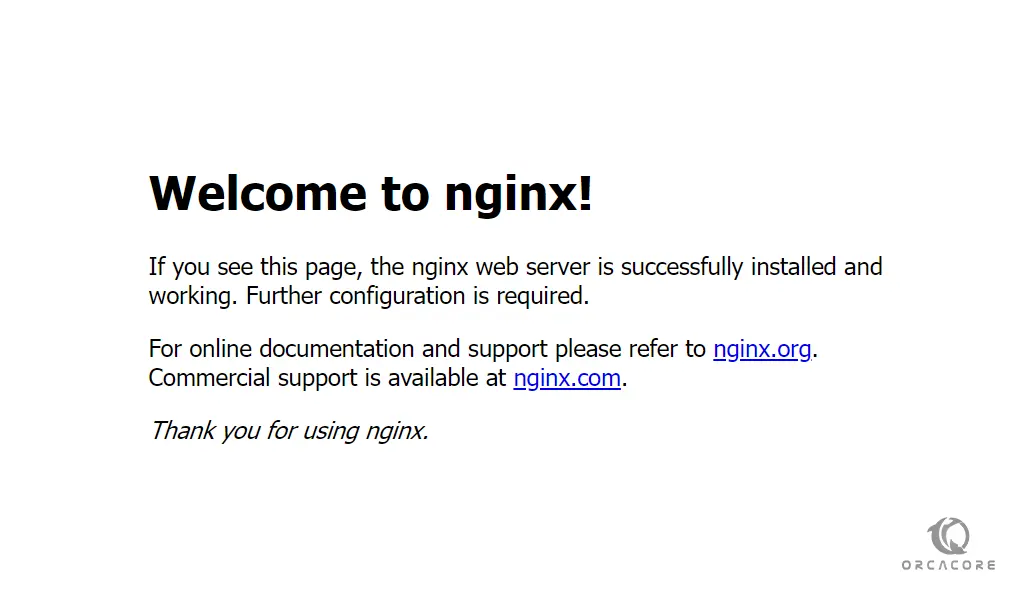
At this point, you can access the Nginx default landing page on Debian 12 by typing your domain name or public IP address in your web browser.
To get your public IP address you can use the following command:
hostname -I
Or you can use this command:
ip addr show eth0 | grep inet | awk '{ print $2; }' | sed 's/\/.*$//'
This will print out a few IP addresses. You can try each of them in turn in your web browser.
http://your_domain_or_IP
If you see this page means that you have installed Nginx correctly.
Step 4 – Install LEMP Stack MariaDB on Debian 12
At this point, you need to install the database system to be able to store and manage data for your site. Here we use MariaDB. To install MariaDB, run the command below in your Debian 12 terminal:
sudo apt install mariadb-server -yVerify your MariaDB is active and running by using the command below:
sudo systemctl status mariadbOuput
● mariadb.service - MariaDB 10.11.3 database server
Loaded: loaded (/lib/systemd/system/mariadb.service; enabled; preset: enab>
Active: active (running) since Thu 2023-06-15 06:06:34 EDT; 26s ago
Docs: man:mariadbd(8)
https://mariadb.com/kb/en/library/systemd/
Main PID: 4752 (mariadbd)
Status: "Taking your SQL requests now..."
Tasks: 15 (limit: 4653)
Memory: 161.6M
CPU: 766ms
CGroup: /system.slice/mariadb.service
...For more security, it’s recommended to run a security script that comes pre-installed with MariaDB. To do this, run the command below:
sudo mysql_secure_installationYou will be asked some questions, answer them as shown below and change your MariaDB root password with a strong password:
Enter current password for root (enter for none):
OK, successfully used password, moving on...
Switch to unix_socket authentication [Y/n] n
Change the root password? [Y/n] y
New password:
Re-enter new password:
Password updated successfully!
Reloading privilege tables..
 ... Success!

Remove anonymous users? [Y/n] y
 ... Success!

Disallow root login remotely? [Y/n] y
 ... Success!

Remove test database and access to it? [Y/n] y
 - Dropping test database...
 ... Success!
 - Removing privileges on test database...
 ... Success!

Reload privilege tables now? [Y/n] y
 ... Success!

Cleaning up...

All done!  If you've completed all of the above steps, your MariaDB
installation should now be secure.

Thanks for using MariaDB!
At this point, you can access your MariaDB shell on Debian 12 by using the command below:
sudo mariadb -u root -pEnter your password and you should access your shell as shown below:
Welcome to the MariaDB monitor.  Commands end with ; or \g.
Your MariaDB connection id is 39
Server version: 10.11.3-MariaDB-1 Debian 12

Copyright (c) 2000, 2018, Oracle, MariaDB Corporation Ab and others.

Type 'help;' or '\h' for help. Type '\c' to clear the current input statement.

MariaDB [(none)]>
YOu can exit from your MariaDB shell with the command below:
MariaDB [(none)]> EXIT;Step 5 – Install the PHP part of the LEMP Stack on Debian 12
Here you can install PHP to process code and generate dynamic content for the web server on Debian 12. Also, you need to install a PHP module that allows PHP to communicate with MariaDB.
To install them, run the following command:
sudo apt install php php-fpm php-cli php-mysql php-zip php-curl php-xml -yVerify your PHP installation by checking its version:
php -vOutput
PHP 8.2.7 (cli) (built: Jun 9 2023 19:37:27) (NTS)
Copyright (c) The PHP Group
Zend Engine v4.2.7, Copyright (c) Zend Technologies
with Zend OPcache v8.2.7, Copyright (c), by Zend TechnologiesStep 6 – Create a Virtual Host for Nginx on Debian 12
At this point, we want to create an example.com directory for hosting a PHP page. You can create it with the following command:
mkdir /var/www/html/example.comNext, set the correct ownership for the directory to www-data with the following command:
sudo chown -R www-data:www-data /var/www/html/example.comThen, you need to create an Nginx virtual host configuration file with the following command, here we use vi editor, you can use your desired editor:
sudo vi /etc/nginx/conf.d/example.confAdd the following content to the file:
server {

  listen 80;
  server_name example.com;

  root /var/www/html/example.com;
  index index.php;
  access_log /var/log/nginx/example_access.log;
  error_log /var/log/nginx/example_error.log;

  client_max_body_size 100M;

  location / {
    try_files $uri $uri/ /index.php$is_args$args;
  }

  location ~ \.php$ {
    try_files $uri =404;
    include fastcgi_params;
    fastcgi_pass unix:/run/php/php8.2-fpm.sock;
    fastcgi_index index.php;
    fastcgi_param SCRIPT_FILENAME $document_root$fastcgi_script_name;
  }

}
When you are done, save and close the file.
Then, verify the Nginx for any configuration error with the following command:
nginx -tOutput
nginx: the configuration file /etc/nginx/nginx.conf syntax is ok
nginx: configuration file /etc/nginx/nginx.conf test is successfulNext, restart the Nginx service to apply the configuration changes:
sudo systemctl restart nginxStep 7 – Verify PHP Installation on Nginx Debian 12
At this point, you will need to create a sample PHP file to serve over the Nginx web server. You can create a phpinfo.php file inside your example.com directory with the command below:
sudo vi /var/www/html/example.com/phpinfo.phpAdd the following PHP script to the file:
<?php phpinfo(); ?>When you are done, save and close the file.
Now you can access your PHP page and see the PHP information:
http://domain-name-or-server-ip/phpinfo.phpConclusion
At this point, you have learned to Install LEMP Stack Nginx, MariaDB, and PHP on Debian 12 Bookworm for your web development. Hope you enjoy using it.
You may be interested in these articles:
Install PostgreSQL on Debian 12 Bookworm


