Share your love
Comprehensive Guide To Install LibreNMS on Rocky Linux 8

In this tutorial, we want to teach you How To Install LibreNMS on Rocky Linux 8. LibreNMS is an auto-discovering PHP/MySQL/SNMP-based network monitoring which includes support for a wide range of network hardware and operating systems including Cisco, Linux, FreeBSD, Juniper, Brocade, Foundry, HP, and many more.
You can now proceed to the guide steps below on the Orcacore website to LibreNMS on Rocky Linux 8.
Table of Contents
Full Steps To Install LibreNMS on Rocky Linux 8
To complete this guide, you must log in to your server as a non-root user with sudo privileges and set up a basic firewall. To do this, you can follow our guide on Initial Server Setup with Rocky Linux 8.
Also, you need a domain name that is pointed to your server’s IP address.
1. Set up LibreNMS on Rocky Linux 8
First, you need to update your local package index with the following command:
sudo dnf update -yInstall Epel Repository
Then, you need to install the Epel repo on your Rocky Linux server:
sudo dnf install epel-release -yInstall Remi Repository
At this point, you need to install the Remi repository to install the latest PHP on your Rocky Linux server:
sudo dnf install dnf-utils http://rpms.remirepo.net/enterprise/remi-release-8.rpmEnable PHP 8.1
Now you need to enable the PHP 8.1 Remi repository. To do this, run the command below:
sudo dnf module enable php:remi-8.1 -yWhen you are done, proceed to the next step to install the required packages and dependencies.
Install Required Packages and Dependencies
Use the following command to install the packages and dependencies that are required for LibreNMS:
sudo dnf install bash-completion cronie fping git ImageMagick mariadb-server mtr net-snmp net-snmp-utils nginx nmap php-fpm php-cli php-common php-curl php-gd php-gmp php-json php-mbstring php-process php-snmp php-xml php-zip php-mysqlnd python3 python3-PyMySQL python3-devel python3-redis python3-memcached python3-pip python3-systemd rrdtool unzip gccWhen you are done, start and enable the following services on Rocky Linux 8:
# sudo systemctl enable nginx php-fpm mariadb snmpd
# sudo systemctl start nginx php-fpm mariadb snmpd
Configure Firewall
Here we assumed that you had enabled firewalld from the requirements. Now you need to allow HTTP and HTTPS traffic to the firewall. To do this, run the commands below:
# sudo firewall-cmd --permanent --zone public --add-service http
# sudo firewall-cmd --permanent --zone public --add-service https
To apply the new rules, reload the firewall:
sudo firewall-cmd --reload2. Create LibreNMS User on Rocky Linux 8
At this point, you need to create a user that is used to run the LibreNMS. To do this, use the following command:
sudo useradd librenms -d /opt/librenms -M -r -s "$(which bash)"3. Download LibreNMS from Sorce on Rocky Linux 8
Here you need to switch to your /opt directory by using the command below:
cd /optThen, use the following command to download the LibreNMS source code from GitHub:
sudo git clone https://github.com/librenms/librenms.gitNext, set the correct ownership and permissions for the /opt/librenms directory:
# sudo chown -R librenms:librenms /opt/librenms
# sudo chmod 771 /opt/librenms
Finally, you need to set the access control lists for some of the LibreNMS directories. This will grant the group ‘librenms‘ to read, write, and execute on some specific LibreNMS directories. To do this, run the commands below:
# sudo setfacl -d -m g::rwx /opt/librenms/rrd /opt/librenms/logs /opt/librenms/bootstrap/cache/ /opt/librenms/storage/

# sudo setfacl -R -m g::rwx /opt/librenms/rrd /opt/librenms/logs /opt/librenms/bootstrap/cache/ /opt/librenms/storage/
4. Install PHP Dependencies for LibreNMS on Rocky Linux
At this point, you need to install PHP dependencies for PHP by running an installer script. To do this, switch to your LibreNMS user and run the command below:
# su - librenms
# ./scripts/composer_wrapper.php install --no-dev
When you are finished, exit from LibreNMS user by typing exit in your terminal.
5. Configure PHP-FPM for LibreNMS
At this point, you need to edit the /etc/php.ini file and set up a specific php-fpm pool for LibreNMS.
First, check your time zone by using the command below:
timedatectlExample Output
Time zone: America/New_York (EST, -0500)Then, open the php.ini file with your favorite text editor, here we use vi:
sudo vi /etc/php.iniUncomment the date.timezone directive and set it to your timezone:
date.timezone = America/New_YorkWhen you are done, save and close the file.
You need to copy the default PHP-FPM pool configuration ‘www.conf‘ to ‘librenms’.conf‘. To do this, run the command below:
cp /etc/php-fpm.d/www.conf /etc/php-fpm.d/librenms.confNow open the PHP-FPM pool configuration /etc/php-fpm.d/librenms.conf file:
sudo vi /etc/php-fpm.d/librenms.confChange [www] pool name to [librenms] as shown below:
[librenms]Find the user and group directives and change their value to librenms:
user = librenms
group = librenms
Finally, change the listen option to ‘/run/php-fpm-librenms.sock‘:
listen = /run/php-fpm-librenms.sockWhen you are done, save and close the file. Restart php-fpm, to apply the changes:
sudo systemctl restart php-fpm6. Configure MariaDB for LibreNMS
The LibreNMS required the MariaDB database server with InnoDB enabled. To do this, open the following file with your favorite text editor, here we use vi:
sudo vi /etc/my.cnf.d/mariadb-server.cnfPaste the following configuration under the ‘[mysqld]’ section:
[mysqld]
....
innodb_file_per_table=1
lower_case_table_names=0
When you are done, save and close the file.
Restart MariaDB to apply the changes:
sudo systemctl restart mariadbNow you need to log in to your MariaDB shell to create a LibreNMS database on Rocky Linux 8:
sudo mysql From your MariaDB shell, run the commands below to create a LibreNMS user and database and grant all the privileges to it:
MariaDB [(none)]> CREATE DATABASE librenmsdb CHARACTER SET utf8mb4 COLLATE utf8mb4_unicode_ci;
MariaDB [(none)]> CREATE USER 'librenmsuser'@'localhost' IDENTIFIED BY 'password';
MariaDB [(none)]> GRANT ALL PRIVILEGES ON librenmsdb.* TO 'librenmsuser'@'localhost';
MariaDB [(none)]> FLUSH PRIVILEGES;
When you are done, exit from your MariaDB shell:
MariaDB [(none)]> exit7. Set up Nginx server block configuration for LibreNMS
At this point, you need to create an Nginx server block configuration for LibreNMS on Rocky Linux 8. To do this, use the command below:
sudo vi /etc/nginx/conf.d/librenms.confAdd the following configuration to the file and be sure to change the domain name with your domain:
server {
    listen      80;
    server_name domain-name;
    root        /opt/librenms/html;
    index       index.php;

    charset utf-8;
    gzip on;
    gzip_types text/css application/javascript text/javascript application/x-javascript image/svg+xml text/plain text/xsd text/xsl text/xml image/x-icon;

    location / {
        try_files $uri $uri/ /index.php?$query_string;
    }

    location ~ [^/]\.php(/|$) {
        fastcgi_pass unix:/run/php-fpm-librenms.sock;
        fastcgi_split_path_info ^(.+\.php)(/.+)$;
        include fastcgi.conf;
    }

    location ~ /\.(?!well-known).* {
        deny all;
    }
}
When you are done, save and close the file.
Ensure the configuration is correct by using the command below:
sudo nginx -tOutput
nginx: the configuration file /etc/nginx/nginx.conf syntax is ok
nginx: configuration file /etc/nginx/nginx.conf test is successfulRestart Nginx to apply the changes on Rocky Linux 8:
sudo systemctl restart nginx8. Set up SELinux Rules For LibreNMS on Rocky Linux 8
In this guide, you will run the LibreNMS with SELinux enabled on the enforcing mode. So you need to set up SELinux Rules For LibreNMS. First, install the following package on your server:
sudo dnf install policycoreutils-python-utilsNext, edit the SELinux file:
sudo vi /etc/selinux/configFind the SELinux directive and change it to enforcing as shown below:
SELINUX=enforcingWhen you are done, save and close the file. Reboot server:
rebootThen, use the following commands to set up SELinux rules for LibreNMS:
# semanage fcontext -a -t httpd_sys_content_t '/opt/librenms/html(/.*)?'
# semanage fcontext -a -t httpd_sys_rw_content_t '/opt/librenms/(rrd|storage)(/.*)?'
# semanage fcontext -a -t httpd_log_t "/opt/librenms/logs(/.*)?"
# semanage fcontext -a -t bin_t '/opt/librenms/librenms-service.py'
# restorecon -RFvv /opt/librenms
# chcon -t httpd_sys_rw_content_t /opt/librenms/.env
Now you need to allow access to some services for Nginx. To do this, run the commands below:
# setsebool -P httpd_can_sendmail=1
# setsebool -P httpd_execmem 1
Next, you need to create a new ‘http_fping.tt‘ file with your favorite text editor:
sudo vi http_fping.ttAdd the following content to the file:
module http_fping 1.0;

require {
type httpd_t;
class capability net_raw;
class rawip_socket { getopt create setopt write read };
}

#============= httpd_t ==============
allow httpd_t self:capability net_raw;
allow httpd_t self:rawip_socket { getopt create setopt write read };
When you are done, save and close the file.
Run the following command to convert the ‘http_fping.tt‘ to the format for the SELinux. Then, add the new compiled rule to the SELinux.
# checkmodule -M -m -o http_fping.mod http_fping.tt
# semodule_package -o http_fping.pp -m http_fping.mod
# semodule -i http_fping.pp
9. Configure LibreNMS on Rocky Linux 8
At this point, you need to make some LibreNMS configurations. First, run the following command to enable the ‘lnms‘ command line and copy the bash completion of the ‘lnms‘ command:
# ln -s /opt/librenms/lnms /usr/bin/lnms
# cp /opt/librenms/misc/lnms-completion.bash /etc/bash_completion.d/
Next, you need to copy the example configuration of the LibreNMS cron to the ‘/etc/cron.d/librenms‘ by using the command below:
sudo cp /opt/librenms/librenms.nonroot.cron /etc/cron.d/librenmsNow you need to use the following command to copy the default logrotate configuration for LibreNMS to ‘/etc/logrotate.d/librenms‘:
sudo cp /opt/librenms/misc/librenms.logrotate /etc/logrotate.d/librenmsThen, copy the default snmpd service configuration to ‘/etc/snmp/snmpd.conf‘ with the command below:
sudo cp /opt/librenms/snmpd.conf.example /etc/snmp/snmpd.confEdit the ‘/etc/snmp/snmpd.conf‘ file:
sudo vi /etc/snmp/snmpd.confChange the default community password for the snmpd service ‘RANDOMSTRINGGOESHERE‘ with your password:
# Change RANDOMSTRINGGOESHERE to your preferred SNMP community string
com2sec readonly  default         RANDOMSTRINGGOESHERE
When you are done, save and close the file.
Next, download the binary file that will be used by LibreNMS for automatically detecting the operating system of every target host. Then, make it executable by changing the default permission by using the following commands:
# curl -o /usr/bin/distro https://raw.githubusercontent.com/librenms/librenms-agent/master/snmp/distro
# chmod +x /usr/bin/distro
Restart snmpd to apply the changes:
sudo systemctl restart snmpd10. Access LibreNMS Dashboard Web GUI
At this point, you can access LibreNMS dashboard web interface. First, you need to edit your /etc/hosts file and define the local domain name of your LibreNMS installation.
sudo vi /etc/hostsyour-server-ip your-domainWhen you are done, save and close the file.
Now you can access the LibreNMS web interface by typing your domain name in your web browser:
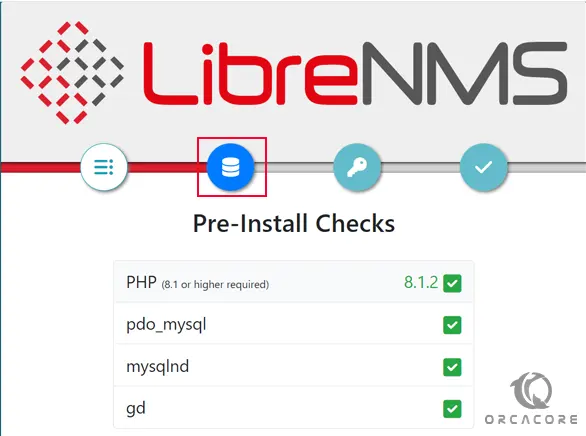
http://your-domainYou will see the LibreNMS pre-install checks. Ensure all requirements are marked as green and click on the database icon.
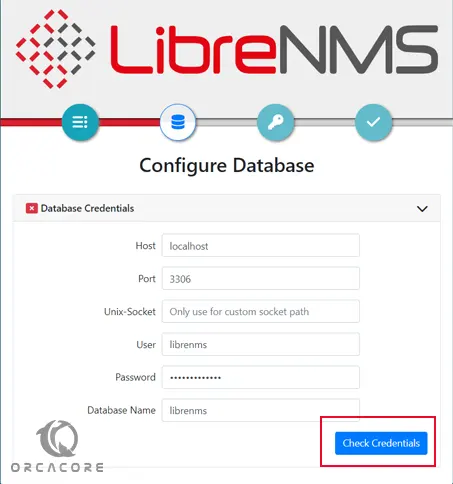
In the Database screen, enter your database credentials and click on the check credentials.
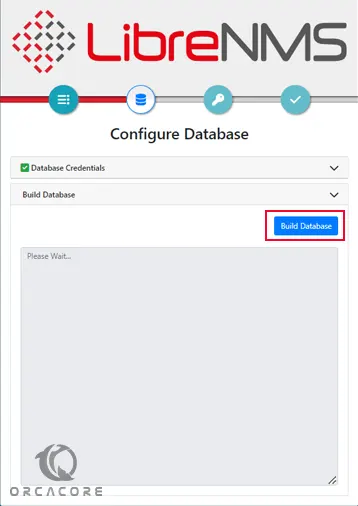
Once it’s successful, you should see the following page, click on the Build Database button.
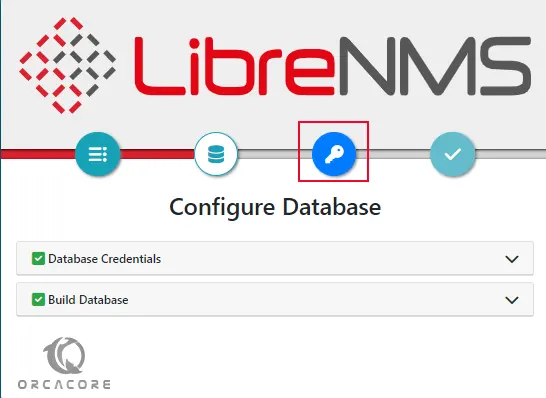
Then, you will see the following screen, you need to click on the key icon.
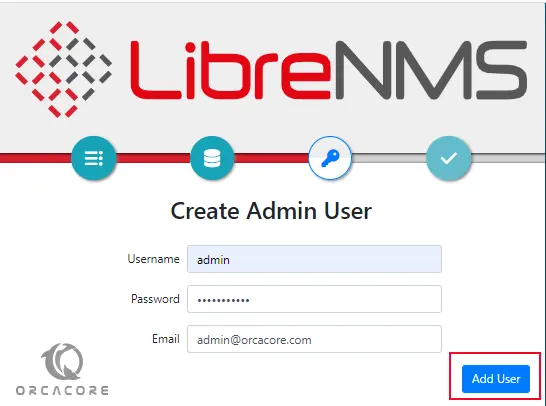
Now provide your admin username, email, and password, and click on the Add User button.
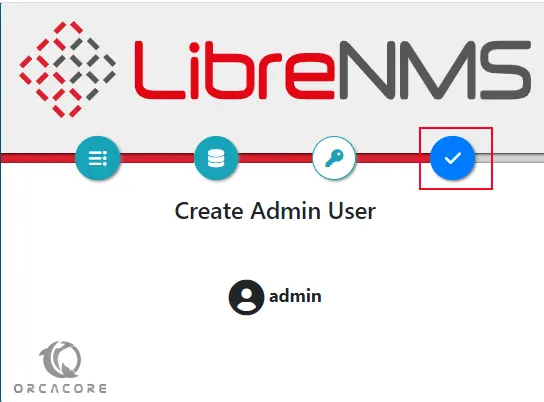
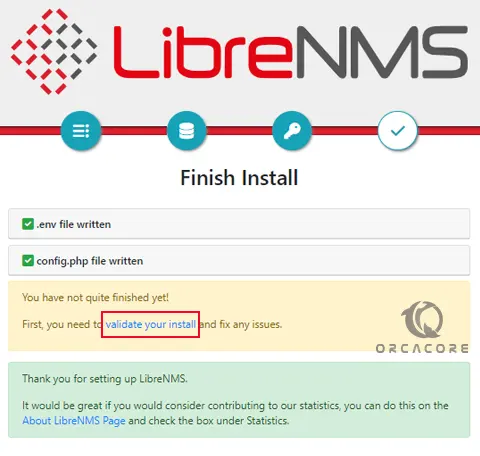
Next, click on the Finish installation button.
Next, click on “validate your install”.
You should see the LibreNMS login page. Provide your LibreNMS admin username, and password, and click on the Login button.
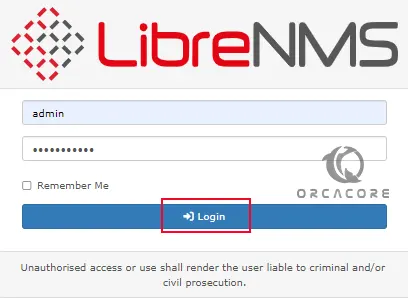
Now you will see your LibreNMS dashboard on Rocky Linux 8.

That’s it, you are finished. For more information, you can visit the LibreNMS Documentation page.
Conclusion
At this point, you have learned to Install and Configure LibreNMS on Rocky Linux 8. LibreNMS on Rocky Linux 8 is used for network monitoring and management. It provides automatic network discovery, real-time monitoring, and alerting for servers, switches, routers, and other network devices.
Hope you enjoy it. You may also like these articles:
Install and Configure LibreNMS on Ubuntu 22.04
Install and Configure LibreNMS on Debian 11
Install Python 3.13 on Rocky Linux