Share your love
Efficient Steps To Install XPS Viewer on Windows 10

This tutorial intends to teach you to Install XPS Viewer on Windows 10. XPS is a file format that is used to print content to a file similar to PDF. It was created by Microsoft. XPS Viewer is an app that can open to print content to a file similar to PDF.
You can follow this guide on the Orcacore website to see how to install XPS viewer on Windows 10.
Table of Contents
Step To Manually Install XPS Viewer on Windows 10
To complete this guide, you must have access to your Windows client and follow the steps below.
Step 1 – XPS Viewer Installation on Windows 10
As we said, newer versions of Windows 10 won’t have the app installed out of the box but you can still install it. To do this, follow the steps below:
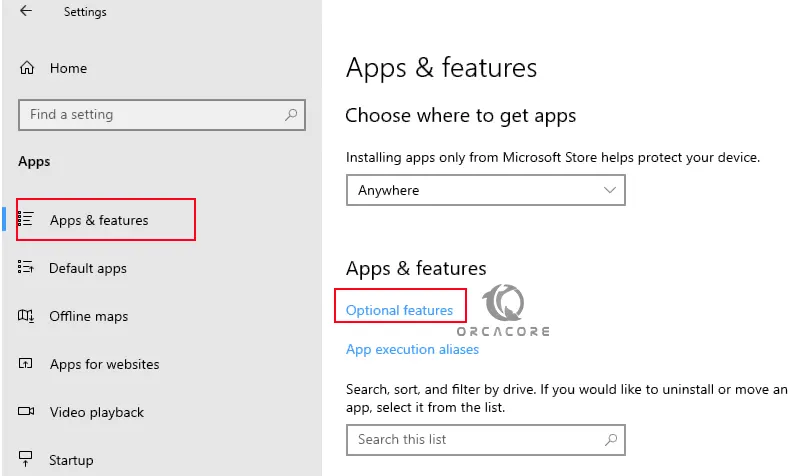
First, you must open Windows Settings by using the Win + I key.
Then, navigate to the Apps.
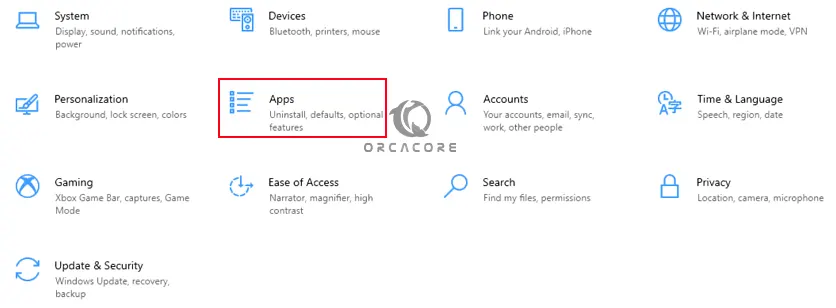
From the right side of the window, click on Apps and Features and select Optional Features.
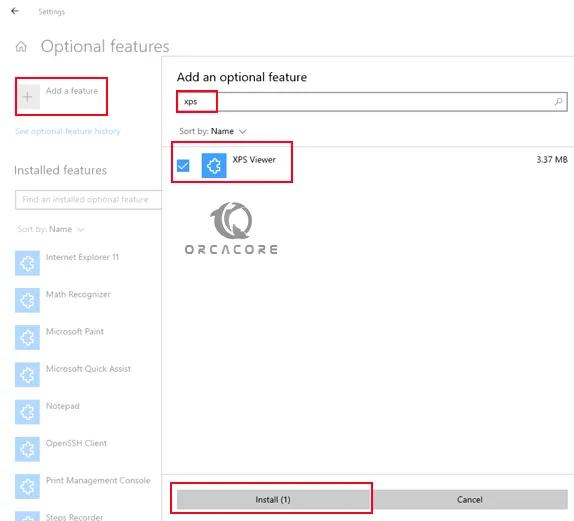
Next, click on Add a Feature and search for the XPS viewer. Check the box next to it and click Install.
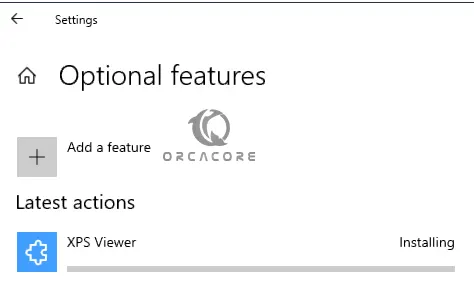
The installation process may take some time to complete.
Step 2 – How To Open an XPS File?
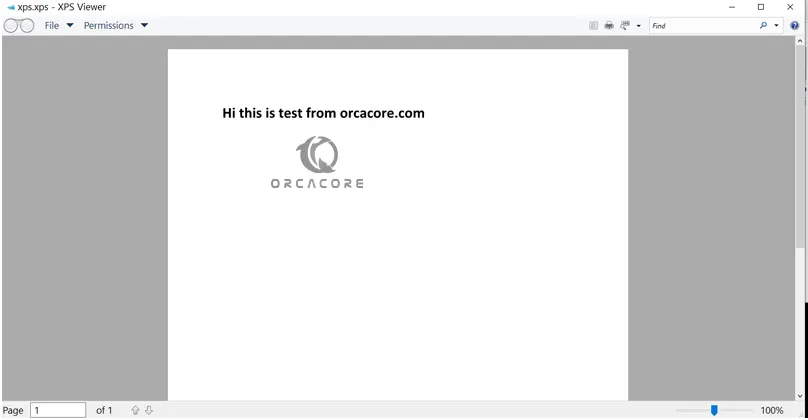
When your XPS viewer installation is completed on your Windows 10, right-click on an XPS file and select Open with XPS Viewer. Here we open a Word XPS file.
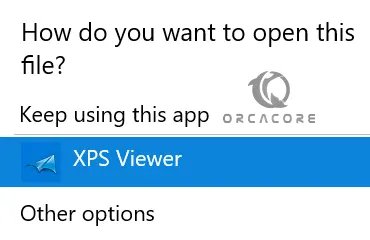
Your file should be open in the XPS viewer.
Conclusion
At this point, you have learned to Install and Enable XPS Viewer on Windows 10 and Open a sample XPS file with it. Hope you enjoy using it.
Also, you may also interested in these articles:
Connect Remote Desktop Without a Password in Windows
How To Change Mouse Speed on Windows 10
Please Subscribe to us on Facebook, Instagram, and Twitter.
FAQs
Is XPS Viewer free?
Yes. This software is available for free on Windows.
What software can open XPS?
Windows 11 and Windows 10 can open XPS files using Microsoft’s Reader app. You can use Pagemark to open XPS files on a Mac and the Pagemark XPS Viewer plug-in for Firefox and Safari web browsers. Linux users can use Pagemark’s programs to open XPS files, too.
Is XPS better than PDF?
If you want to save your publication in a format that can be easily shared and is used by many commercial printers, it’s better to choose PDF.
If you want to save your publication with even greater compression than PDF format, it’s recommended to choose XPS.
Does Windows 10 support XPS Viewer?
At the current time, new versions of Windows 10 don’t have XPS viewer installed. But if you want to use this app, you can install it on your system.