Share your love
Comprehensive Guide Jenkins Server Installation on Debian 12
In this article, you will learn Jenkins Server Installation on Debian 12 Bookworm. Jenkins is an open-source automation server. It is used to build, test, and deploy software projects. With Jenkins, you can easily automate different tasks including compiling code, running tests, and deploying apps.
You can now follow the rest of the article from the Orcacore website to start your Jenkins Server installation and configuration on Debian 12 Bookworm.
Table of Contents
A Step-by-Step Guide For Jenkins Server Installation on Debian 12
Before you start your Jenkins server setup, you must access your server as a non-root user with sudo privileges. To do this, you can check the Debian 12 Initial Setup Guide.
Also, you must install Java on your server. For this purpose, you can check Java Installation with APT on Debian 12. Jenkins supports OpenJDK 17 which is the default Java version on Debian 12.
Then, follow the steps below to complete the Jenkins server installation on Debian 12.
Step 1. Add Jenkins Repository To Debian 12
The first step is to add the official Jenkins repository to your Debian 12. Add the GPG key repo with the following wget command:
sudo wget -O /usr/share/keyrings/jenkins-keyring.asc \
  https://pkg.jenkins.io/debian/jenkins.io-2023.key
Then, add the long-term support version of the Jenkins repo with the command below:
echo deb [signed-by=/usr/share/keyrings/jenkins-keyring.asc] \
  https://pkg.jenkins.io/debian binary/ | sudo tee \
  /etc/apt/sources.list.d/jenkins.list > /dev/null
Step 2. Command to Jenkins server installation on Debian 12
Once you are done, run the system update:
sudo apt updateThen, use the following command to install Jenkins on Debian 12:
sudo apt install jenkins -yStep 3. Start and Enable Jenkins Service on Debian 12
During your installation, the Jenkins service must be enabled and activated on your server. To verify this, you can run the command below:
sudo systemctl status jenkinsIn your output, you will see:
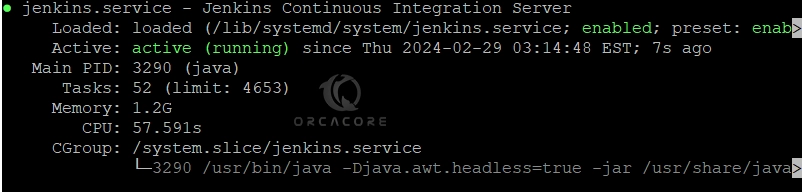
If your service is not enabled, you can run the command below:
sudo systemctl enable --now jenkinsStep 4. Display Jenkins Initial Admin Password
You need your Jenkins admin password to access your dashboard via the web interface on Debian 12. To get your admin password, you can run the command below:
sudo cat /var/lib/jenkins/secrets/initialAdminPasswordExmaple Output
6e50220a1b304287bfa8743146a1a022Step 5. Configure Jenkins Server Through Web UI
At this point, you can access your Jenkins web interface on Debian 12 by typing your server’s IP address in your web browser followed by 8080:
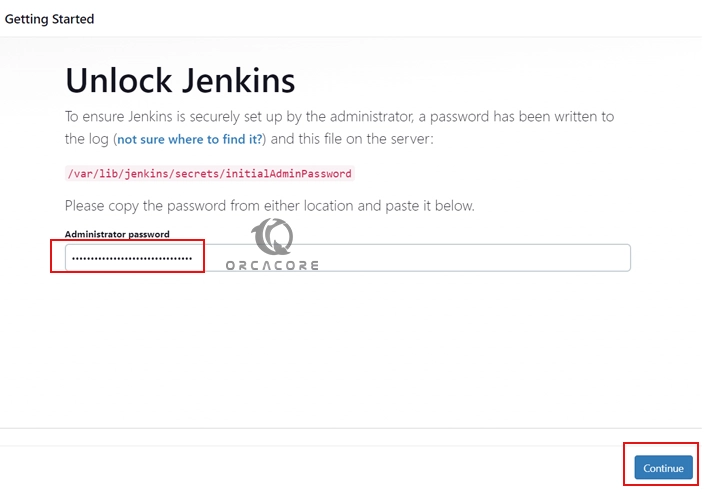
http://your-server-ip:8080You will see the Unlock Jenkins page. Enter your Jenkins initial admin password and click Continue.
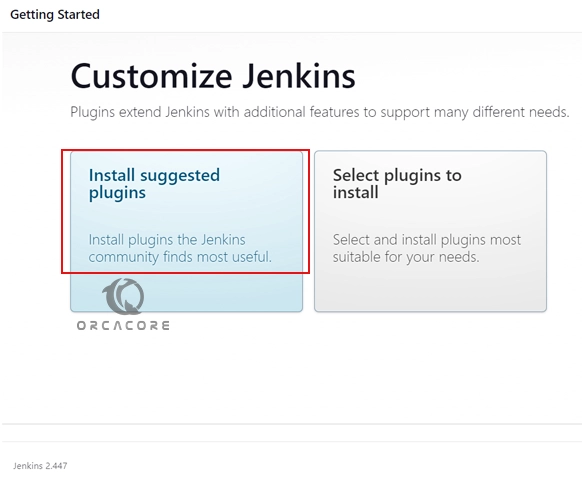
Next, you should choose which Jenkins plugins you want to install on Debian 12. You can select plugins or the recommended ones. Here we choose Install suggested plugins.
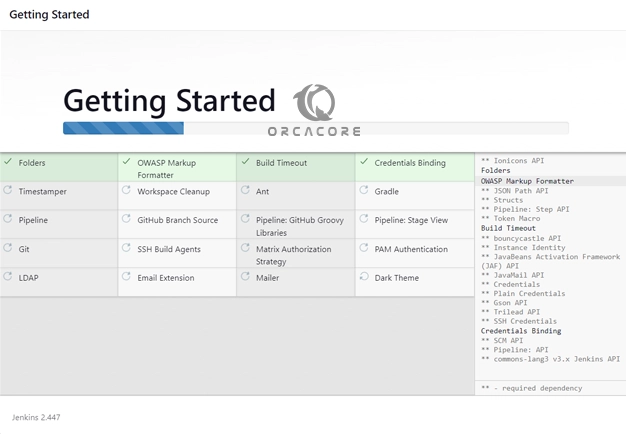
Wait until your installation is completed.
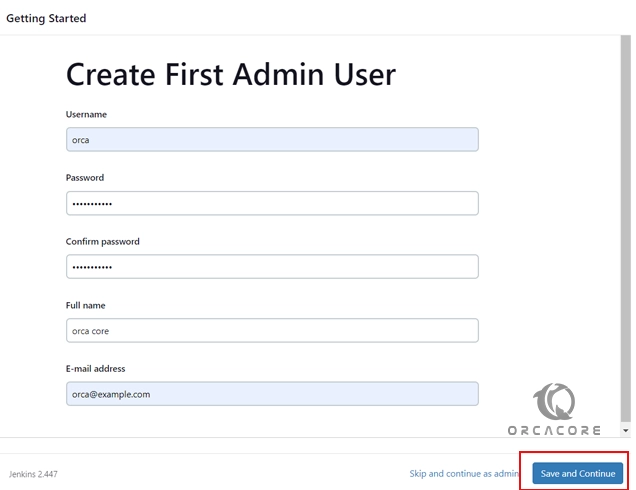
Then, you can create your first admin user. You can use this to log in and use Jenkins in the future. Click Save and Continue.
Step 6. Access Jenkins Server Dashboard
Finally, after following the other few steps you will have your Jenkins Dashboard on Debian 12 to start creating projects for testing and developing along with your developer’s Team.
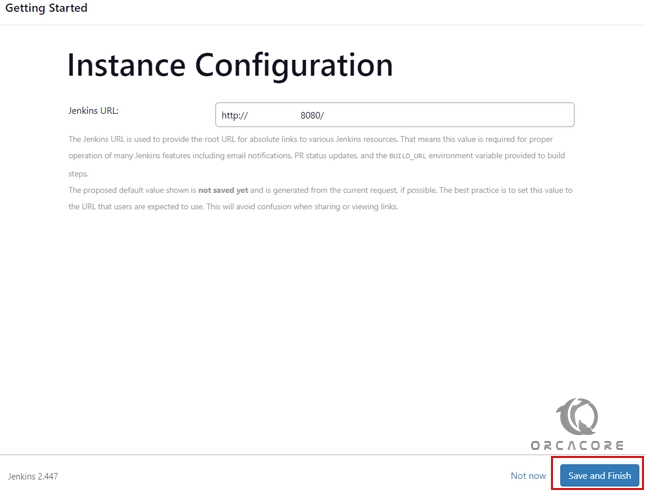
Verify Jenkins URL:
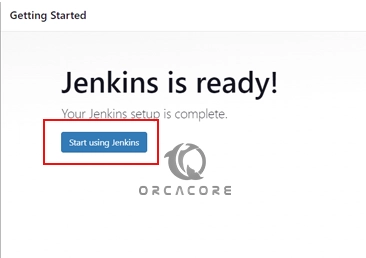
Start using Jenkins Server:
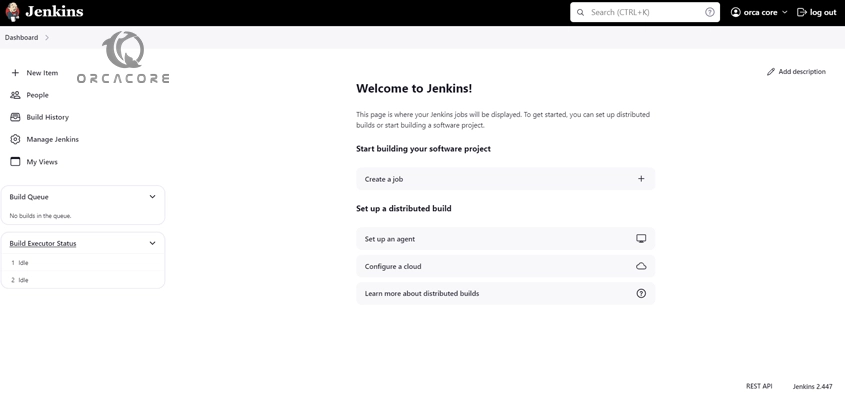
Now you will see your Jenkins Server dashboard on Debian 12:
Jenkins server can perform a variety of tasks related to software development and deployment. Some of its key capabilities include:
- Continuous Integration (CI)
- Continuous Deployment (CD)
- Automated Testing
- Scheduled Jobs
- Notifications and Reporting
- Integration with Tools
To get more info, you can visit the official docs page.
Conclusion
The Jenkins server serves as a central hub for automating various aspects of the software development lifecycle, ultimately improving productivity, efficiency, and collaboration within development teams. At this point, you have learned Jenkins server installation on Debian 12 Bookworm.
Hope you enjoy using it. Also, you may like to read the following articles:
Install Tesseract OCR on Debian 12 via Terminal
Comprehensive Guide To Install XWiki on Debian 12