Share your love
SMTP Setup on Windows Server 2022
This guide intends to show you SMTP Server Installation and Configuration Setup on Windows Server 2022. SMTP server stands for Simple Mail Transfer Protocol Server. It is an essential component in the process of sending and receiving emails. It acts as a postal service for email communications. When you send an email, your email client interacts with the SMTP server to handle the outgoing mail.
Now you can follow the steps below to enable and configure SMTP through IIS on Windows Server 2022.
A Comprehensive Guide For SMTP Server Setup on Windows Server 2022
Before you start the SMTP server setup, you need to access your Windows Server as a user with admin privileges or as an administrator.
Then, you need to enable IIS on Windows Server 2022. To do this, you can check this guide on Install IIS on Windows Server 2022.
Now follow the steps below to complete this guide.
Step 1 – Install SMTP Server Tools on Windows Server 2022
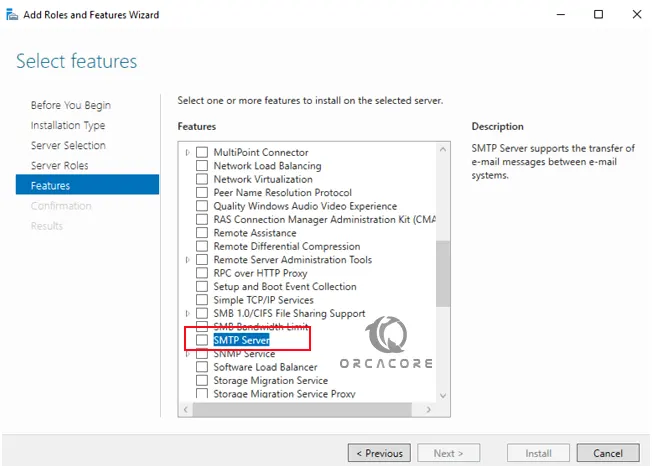
Like IIS setup, open the Server Manager and click next to get through the Select Features screen. From there, click on SMTP Server.
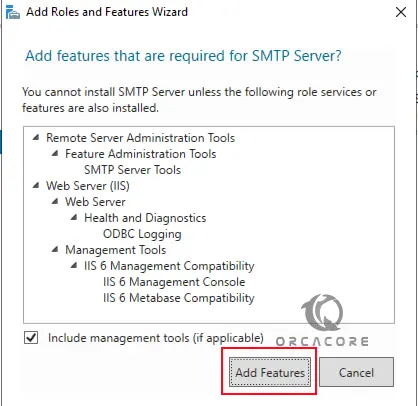
It will open a pop-up window. From there Add the Required Features.
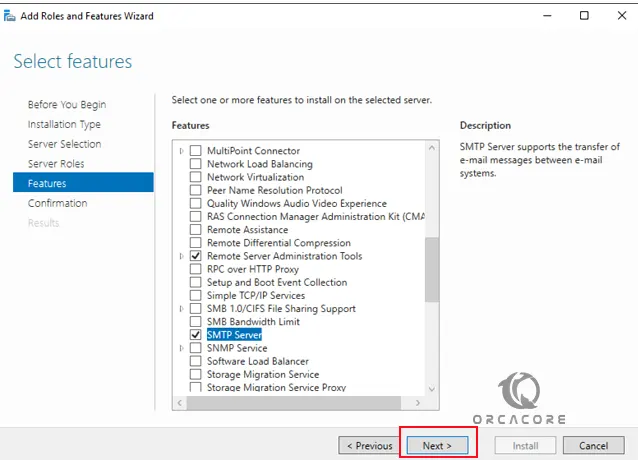
Then, click Next to continue.
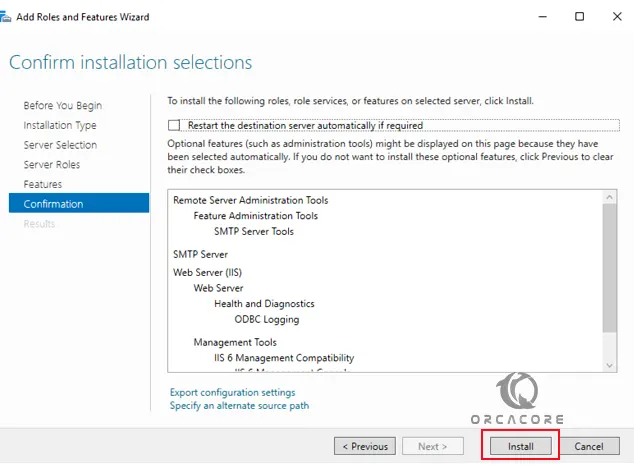
Review the package details and click Install. Make sure that the Restart the destination server automatically if required option is checked.
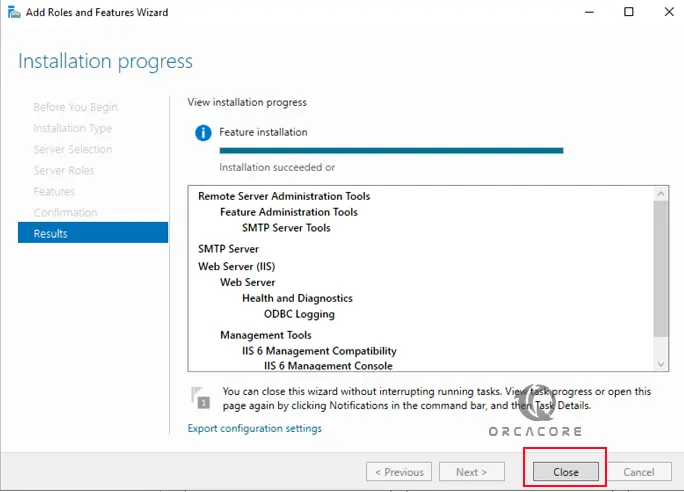
Wait until your installation is completed. Then, click Close.
Step 2 – Configure SMPT on Windows Server 2022
At this point, from your server manager, you need to open the IIS 6.0 Manager. To do this, select the Tools tab, and open Internet Information Services (IIS) 6.0 Manager.

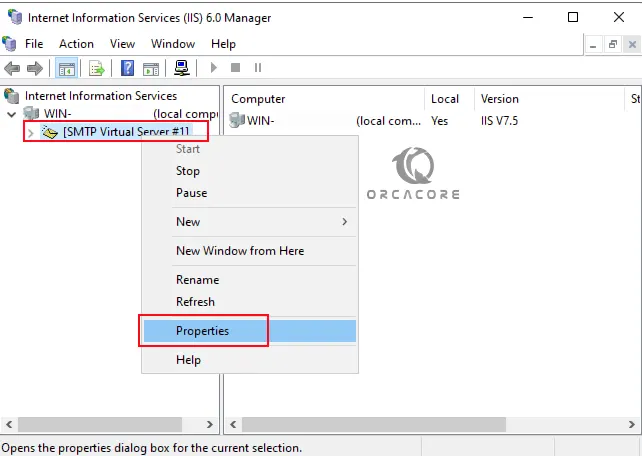
From your IIS 6.0 Manager dashboard, you need to expand your computer, right-click on SMTP Virtual Server #1, and select properties.
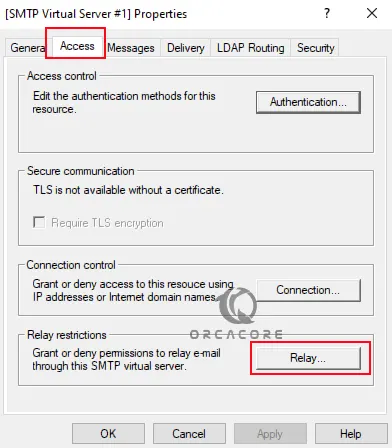
Then, click on the Access tab and select Relay.
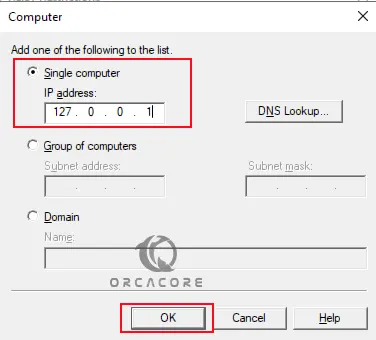
Next, click on Add which is used to set which computer is allowed to relay emails through the SMTP server.
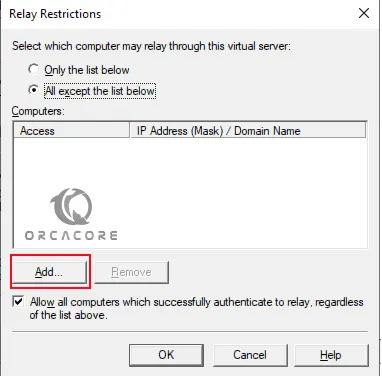
As you can see, you can add a single, group of computers or domain. In this guide, we enter 127.0.0.1 to allow the local host to relay emails through the SMTP server. Click OK.
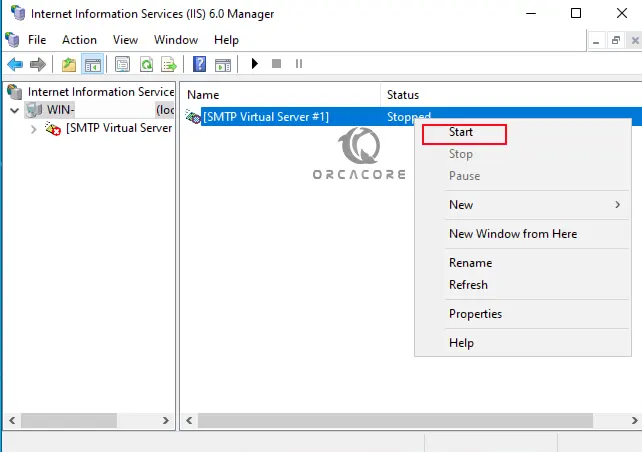
To apply the changes, right-click [SMTP Virtual Server #1], select Stop, and then select Start.
Step 3 – Test SMTP Server with Telnet
At this point, you can test your SMTP server setup by using Telnet. To do this, run the PowerShell as an administrator. Then, run the following command:
telnet localhost 25Now start the communication SMTP server:
EHLO server
Then, you can use the following syntax for Email sender and recipient:
MAIL FROM: [sender_email_address@domain.com]

RCPT TO: [recipient_email_address@domain.com]
Next, enter the following command to start writing your email:
DATAAdd your subject:
Subject: Test MessagePress Enter twice to move on to the email body. Type in the message body and press Enter to finish.
Finally, send the email by entering a (.) and pressing Enter.
Now check the recipient’s inbox to see if the email was delivered.
Conclusion
The SMTP server is essential for email communication over the Internet. It ensures that emails are correctly sent from one user to another, handling millions of email transfers daily with efficiency and reliability. Hope you enjoy this guide on SMTP Setup on Windows Server 2022. If you need any help, please comment for us.
Also, you may like to read the following articles:
Enable TLS 1.3 on Windows Server 2022

