Share your love
Configure BitLocker Encryption on Windows 11 Pro Best Guide
In this guide, we want to show you how to Configure BitLocker Encryption on Windows 11 Pro including enabling, using, and disabling it on your system. Windows 11 has a security option called BitLocker. It is an extra layer that protects your hard device and no one else can access it even if it is stolen. This option is available in Windows 11 Pro. However, in the Home edition, you can use device encryption (a limited version of BitLocker).
Note: To get a Windows 11 Editions Comparison, check Windows 11 Home vs Pro Edition.
Now you can proceed to the next steps on the Orcacore website to Configure BitLocker Encryption on Windows 11 Pro.
Table of Contents
Steps To Configure BitLocker Encryption on Windows 11 Pro
At this point, you must log in to your Windows Client machine and follow the steps below to turn on the BitLocker encryption option on Windows 11 and start to configure it.
Step 1 – Enable or Turn On BitLocker on Windows 11 Pro
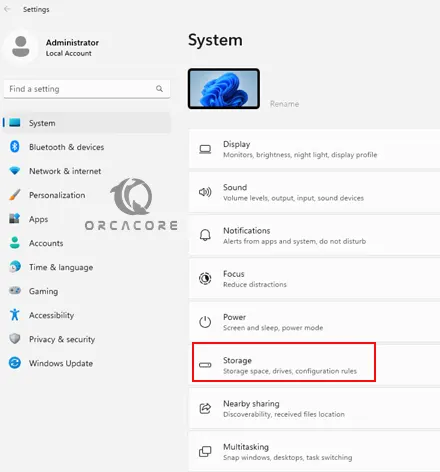
First, from your search bar, look for settings and open it. From your Windows 11 Settings, click on System. Then, click on Storage on the right side of the panel.
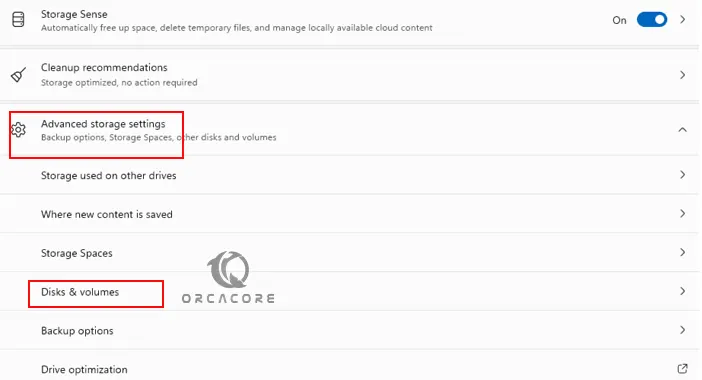
Under the Storage Management section, click on Advanced Storage Settings. Next, click on Disks and Volumes.
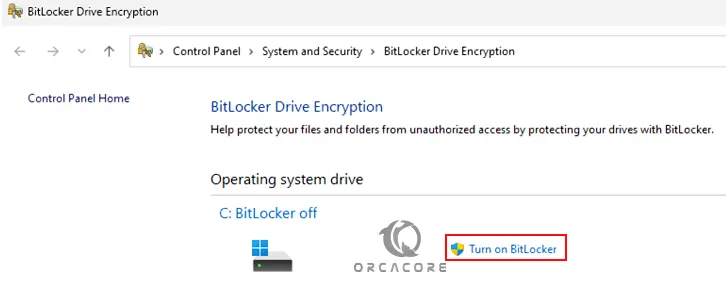
From there, choose the drive with the partition to encrypt. Click on properties. Turn on BitLocker option on Windows 11 Pro.
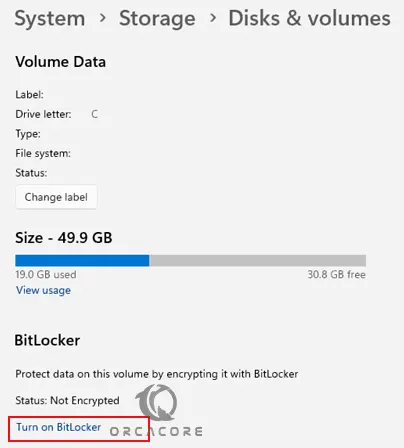
This will open a new window for you. Click on Turn on BitLocker.
Step 2 – Start the Drive Encryption Process on Windows 11 Pro
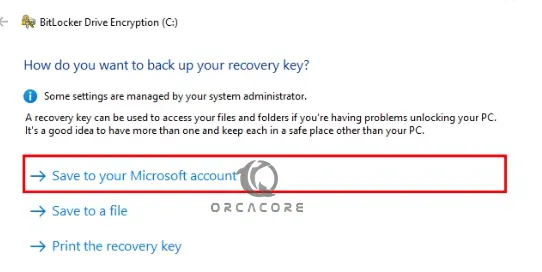
Then, it will ask you how to save your recovery key. You can back up it on your Microsoft Account. Or choose your desired recovery option.
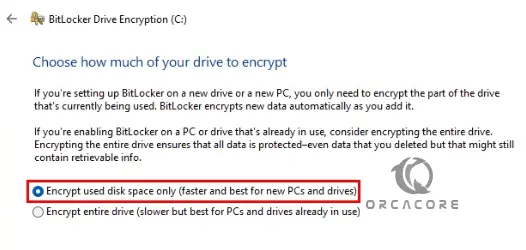
At this point, you must select Encrypt used disk space only to encrypt your drive faster and click Next.
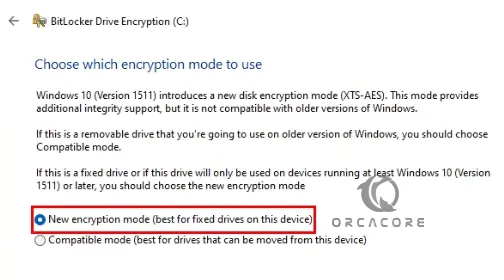
Next, choose the default encryption mode which is New Encryption mode, and click Next.
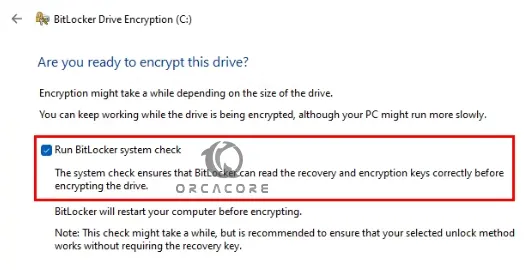
Now you are ready to encrypt your drive. Check the box next to Run BitLocker System Check and click Continue.
Finally, you will be asked to restart your system, and your encryption process on Windows 11 Pro will be started. That’s it. You can now find your encryption key on your Microsoft account.
Step 3 – Disable or Turn Off BitLocker on Windows 11
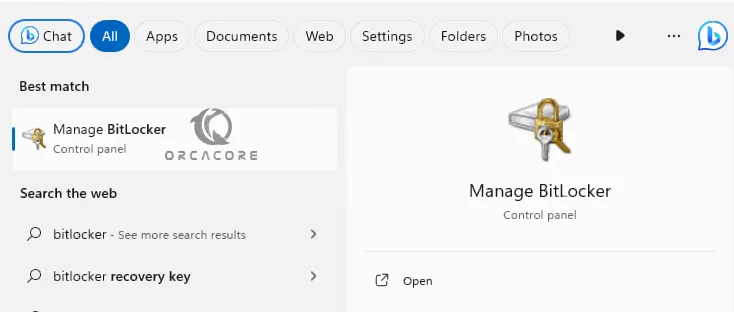
If you plan to disable your BitLocker encryption, you can follow the steps below. From your settings, you can search for BitLocker and open the app.
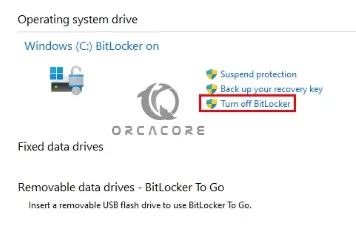
From there, click Turn off BitLocker next to the drive you want to decrypt.
Confirm your request by clicking on Turn off BitLocker.
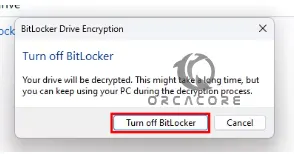
At this point, your decryption process will start. It may take some time to complete depending on your data.
Conclusion
At this point, you have learned to Configure your BitLocker Encryption option on Windows 11 Pro. You can easily choose the drive you want to encrypt and turn on the BitLocker option to start your encryption process. Every time you want to disable it, you can easily turn off the BitLocker to decrypt your drive.
Hope you enjoy it. Also, you may interested in these articles:
Encrypt a File with Gpg4win on Windows