Share your love
Enable Telnet on Windows 10: Easy Network Protocol
In this guide, we want to teach you How To Enable Telnet on Windows 10. Telnet is a network protocol used to virtually access a computer and to provide a two-way, collaborative, and text-based communication channel between two machines.
It follows a user command Transmission Control Protocol/Internet Protocol (TCP/IP) networking protocol for creating remote sessions. On the web, Hypertext Transfer Protocol (HTTP) and File Transfer Protocol (FTP) simply enable users to request specific files from remote computers, while, through Telnet, users can log on as regular users with the privileges they are granted to the specific applications and data on that computer.
Telnet (client) is not enabled by default on Windows 10. You can easily follow this guide on the Orcacore website to do it.
Table of Contents
Steps To Enable Telnet on Windows 10
To complete this guide on enabling Telnet on Windows 10, you must log in to your Windows Client and follow the steps below.
Method 1. Enabling Telnet From PowerShell
The first method to enable your Telnet is to use the PowerShell Admin. Right-click the Start button, and choose Windows PowerShell (Admin).
Then, run the following command from your PowerShell Admin:
Enable-WindowsOptionalFeature –Online –FeatureName TelnetClient –AllWith this command, your Telnet is available on both PowerShell and CMD.
Method 2. Enabling Telnet From the Control Panel
Alternatively, you can install Telnet Client by going to Control Panel | Programs and Features | Turn Windows features on and off. From there, you need to check the box next to Telnet (client) and click Ok.
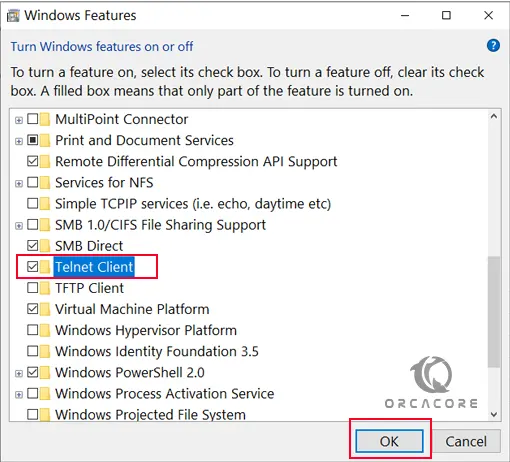
At this point, your telnet client is enabled and available to use.
How to Use Telnet on Windows 10?
At this point, we want to show you the basic usage of Telnet to check open ports.
The General Telnet syntax for testing open ports is:
telnet <address> <port number>The command accepts both symbolic and numeric addresses. For example:
telnet 127.0.0.1 80After running the Telnet command on Windows, one of the following three options happen:
1. The command throws an error, indicating the port is not available for connection.
2. The command goes to a blank screen, indicating the port is available.
3. Running the command on an open port 23 displays the screen of the telnet host, confirming an established Telnet connection.
Conclusion
At this point, you have learned to Enable Telnet on Windows 10 and see how to check open ports. Telnet in Windows 10 is a command-line tool used for remote access to servers and network devices over a text-based interface. It allows users to execute commands on a remote system but lacks encryption, making it less secure than modern alternatives.
Hope you enjoy it. Please subscribe to us on Facebook, YouTube, and X.
You may also like these articles:
Disable Administrator Account on Windows 11
Change Mouse Speed on Windows 10
How To Install Winget on Windows 10
Install and Configure MAMP Stack on Windows 10
FAQs
Is Telnet enabled by default in Windows 10?
No, Telnet is disabled by default and must be manually enabled.
Is Telnet secure to use?
No, Telnet transmits data in plain text without encryption, making it vulnerable to security threats.
What is the alternative to Telnet in Windows 10?
Secure Shell (SSH) is a more secure alternative for remote access.
Can I use Telnet to check open ports on a remote server?
Yes, you can test if a specific port is open on a remote server.