Share your love
How To Install Winget on Windows 10
In this guide, we want to teach you How To Install Winget on Windows 10.
The Winget command line tool is the Windows Package Manager launched by Microsoft. It enables you to discover, install, upgrade, remove and configure applications on Windows 10 computers. This tool is the command line tool client interface to the Windows Package Manager service.
Simply put, it is basically a way to automate the installation and updating of Windows applications that you obtain from outside the Microsoft Store.
Steps To Install Winget on Windows 10
In this tutorial, you will learn to install and use the Winget package manager for Windows Client.
There are two ways to install it:
- From the Microsoft Store.
- Manually, using a package installer from GitHub.
Let’s see how to do it.
Check Winget Status
If you are already running Windows 10 1809 or newer, the client may already be available on your system.
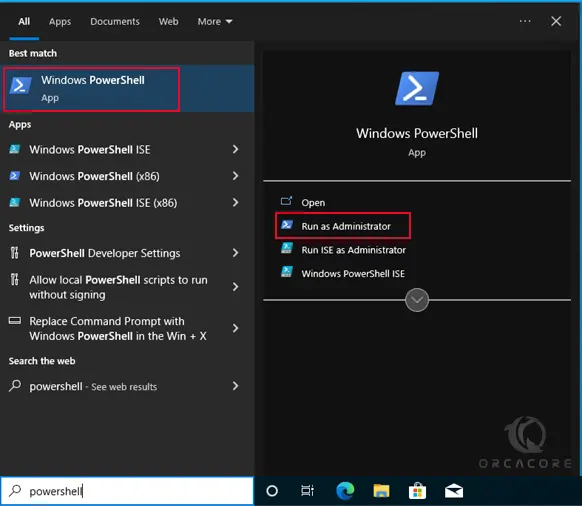
To check that you have Winget installed on your server, you need to open your PowerShell.
Open the Windows Start menu, type PowerShell as an Administrator, and press Enter.
From your PowerShell command line, enter the Winget command to see if it is installed on your system or not:
wingetOutput
winget : The term 'winget' is not recognized as the name of a cmdlet, function, script file, or operable program.
Check the spelling of the name, or if a path was included, verify that the path is correct and try again.
At line:1 char:1
...In our case, the Winget command is not recognized, so we have to install it on our Windows 10 system.
Install Winget From Microsoft Store
To install Winget from Microsoft, follow the steps below.
First, open the Windows Start menu, type store, and press Enter to open the Microsoft Store app.

At this point, in the search bar, type Winget and press Enter. In the results, click the App Installer application.
Note: The Winget client is distributed within the App Installer package.
Next, from the App Installer page, click Get to install the app.
When your installation is completed, run the Winget command in your PowerShell:
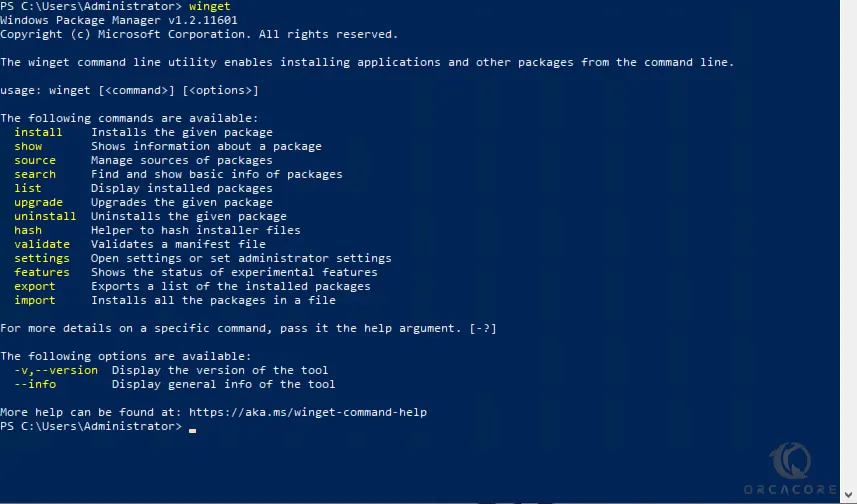
The command prints the program version, syntax, and available options.
Install Winget from GitHub
Another way to install it on your system is to use GitHub.
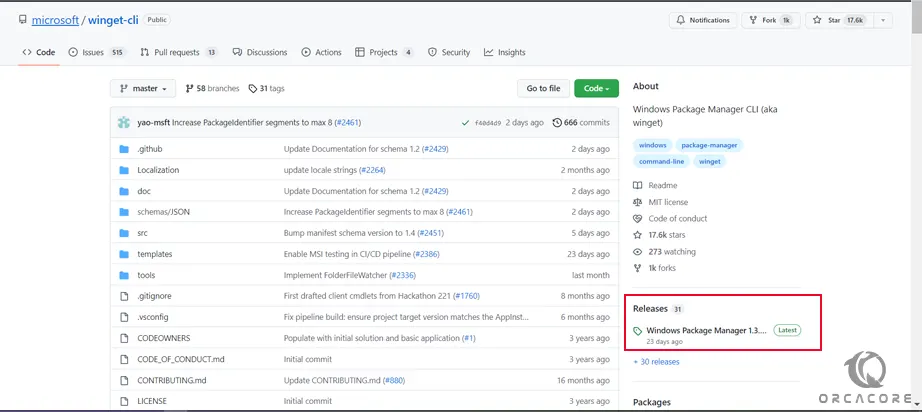
To do this, navigate to the Winget GitHub page. Then, under the Releases section, click the latest available release.
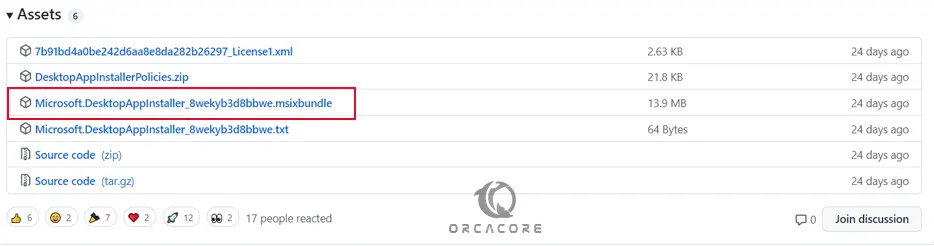
On the Version page, scroll down to the Assets section and click the .msixbundle file to start the download.
When your download is completed, open your file and click Update.
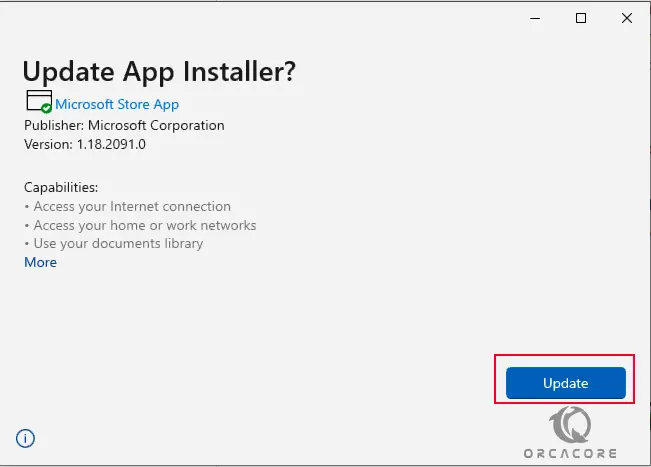
Wait for the installation process to finish. The app may automatically install additional dependencies required for the Winget to work.
Finally, run Winget in your PowerShell to verify your installation.
How To Use Winget on Windows 10
At this point, you can use Winget to search, install, update, and remove packages.
To install a package, you can use the following syntax:
winget install [package_name]For example, install Notepad++ by running the command below:
winget install Notepad++The first time you use Winget, a prompt appears asking if you agree to Microsoft’s transaction terms. This is because the Microsoft Store repository requires your geographic region to function correctly.
Read the terms, and if you agree, type y and press Enter to confirm.
When you are finished, you will get the following output:
Output
Successfully verified installer hash
Starting package install…
Successfully installed
Also, you can use Winget to search for available packages in the public Windows Package Manager Community repository or in the Microsoft Store. The syntax for the search is like this:
winget search [package_name]For example, to search for MySQL, run the command below:
winget search mysqlIn your output, you will see:
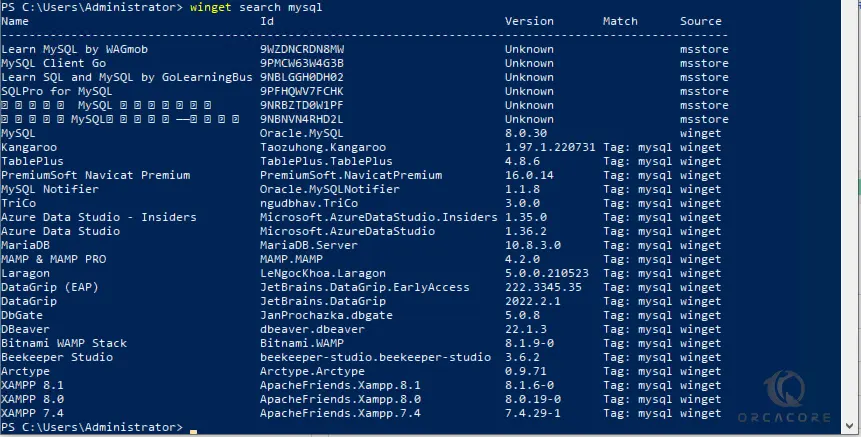
As you can see, the output list all available packages containing the mysql keyword.
Another usage of Winget is to display information about installed packages. The syntax of it is like this:
winget show [package_name]For example:
winget show Notepad++Output
Found Notepad++ [Notepad++.Notepad++]
Version: 8.4.4
Publisher: Notepad++ Team
Publisher Url: https://notepad-plus-plus.org
Publisher Support Url: https://notepad-plus-plus.org/online-help
Author: Don Ho
Moniker: notepad++
Description: Notepad++ is a free (as in “free speech” and also as in “free beer”) source code editor and Notepad replacement that supports several languages. Running in the MS Windows environment, its use is governed by GNU General Public License.
Homepage: https://notepad-plus-plus.org
License: GPL-3.0-or-later
License Url: https://raw.githubusercontent.com/notepad-plus-plus/notepad-plus-plus/master/LICENSE
Copyright: Copyright (C)2021 Don HO don.h@free.fr.
Copyright Url: https://raw.githubusercontent.com/notepad-plus-plus/notepad-plus-plus/master/LICENSE
Installer:
Type: nullsoft
Download Url: https://github.com/notepad-plus-plus/notepad-plus-plus/releases/download/v8.4.4/npp.8.4.4.Installer.x64.exe
SHA256: 638bd860149703820bf605e1098d9fa158982281cc7cfda788416c1fd3093931The output shows the specified app information, including the program version, publisher, author, and program description.
Also, you can list all of the installed packages, by running the command below:
winget listIf you plan to uninstall a package by using the Winget on Windows 10, run the following command:
winget uninstall package_nameManage Sources with Winget on Windows 10
At this point, you can use it to add, remove, list, or update the repositories.
Winget installs packages from online repositories. The two official Winget repositories are:
msstore. The Microsoft Store repository.winget. Thewingetsoftware repository maintained by Microsoft.
To see which repositories it is using, you can run the command below:
winget source listIn your output, you will see:
Output
msstore https://storeedgefd.dsx.mp.microsoft.com/v9.0
winget https://winget.azureedge.net/cache
To add a third-party repository to Winget, use the following syntax:
winget source add --name [name] [url]For [name], specify the name you want for the repository, and for [url], specify the repository URL.
To update your existing repositories, you can use the command below:
winget source updateAlso, you can easily remove your desired repository by running the following command:
winget source remove --name [name]If you plan to reset winget back to its original configuration, removing all third-party repositories and setting the sources to the default ones, run the command below:
winget source reset --forceThat’s it, you are done.
Conclusion
At this point, you learn to Install and Use Winget on Windows 10.
Hope you enjoy it.
You may be interested in these articles:
How To Remove Malware From Windows