Share your love
How To Enable NTP in Debian 13 | Synchronize Systems Time
This tutorial intends to show you how to enable NTP in Debian 13 Trixie. The Network Time Protocol (NTP) enables companies to synchronize clocks across all systems. Time synchronization is important to make sure app timestamps are correct, security works properly, and log entries are reliable. If one of the systems has a different clock time, it becomes very hard to troubleshoot issues.
With NTP, organizations can easily keep all systems on the same time, which makes much easier to keep track of systems for administrators and support teams.
You can now proceed to the guide steps below on the Orcacore website to enable the NTP server and client on Debian 13.
Table of Contents
How To Enable NTP in Debian 13?
To complete the guide steps, you must have SSH access to your Debian 13 as a non-root user with sudo privileges. Then, follow the rest of the article to start enabling the NTP server on Debian 13.
1. Installing NTP Server
In Debian 13, NTP has been replaced by ntpsec. Or you can use the OpenNTPD package. Run the system update and install NTP on Debian 13 with the command below:
# sudo apt update
# sudo apt install ntpsec -y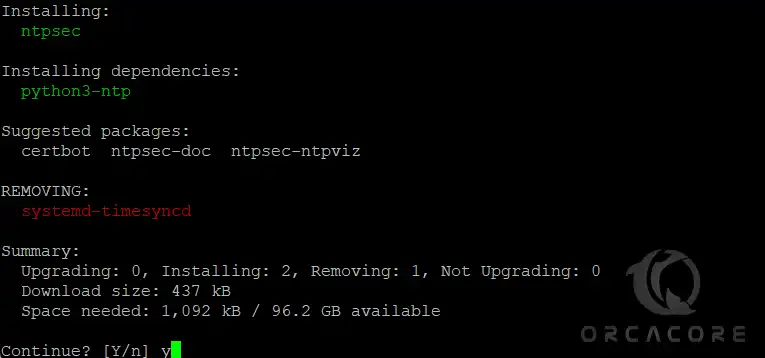
Verify NTP is installed successfully by checking its version:
ntpd --versionOutput
ntpd ntpsec-1.2.3Once your installation is completed, start and enable the NTP service with the following commands:
# sudo systemctl start ntp
# sudo systemctl enable ntp
Check the NTP server is active and running on Debian 13:
sudo systemctl status ntp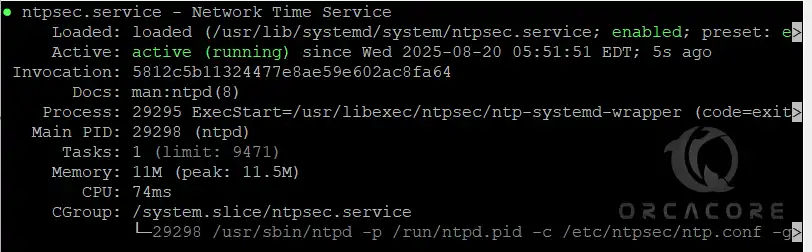
2. Allow NTP Server Through Firewall
In this step, you must configure iptables on the NTP server to allow NTP clients to access it. First, install iptables on Debian 13 with the command below:
sudo apt install iptables -yNTP uses 123/UDP ports. To allow the firewall rules, you need to run the following commands:
# sudo iptables -A OUTPUT -p udp --dport 123 -j ACCEPT
# sudo iptables -A INPUT -p udp --sport 123 -j ACCEPT
3. Setting Up NTP Client
At this point, you can configure the NTP client to sync with the NTP server. Here we assumed the NTP client machine is also a Debian 13. Install the NTP client with the command below:
# sudo apt update
# sudo apt install ntpsec -y
Sync NTP Client with NTP Server
Now you must open the NTP client config file with your desired text editor, like Vi Editor or Nano Editor:
sudo vi /etc/ntpsec/ntp.confIn the file, look for the pool lines and comment on them. Then, add the “server server-ip-address prefer iburst” to the file as shown below. Remember to put the NTP server’s IP address.
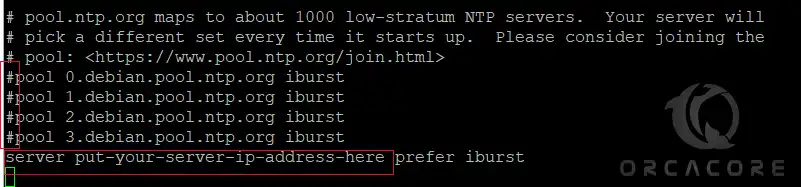
When you are done, save and close the file.
Restart the NTP client service with the command below:
sudo systemctl restart ntpFinally, check the status clock that is synced with the NTP server on Debian 13:
sudo ntpq -pIn your output, you should see something similar to this:
 Output
remote           refid      st t when poll reach   delay   offset   jitter
===============================================================================
ntp-server-ip-address     ...
FAQs
Does Debian 13 still use the old ntp package?
No. The traditional NTP package has been replaced by alternatives such as ntpsec, openntpd, or chrony. On Debian 13, ntpsec or chrony are the recommended options.
Can I use NTP with virtual machines or cloud servers?
Yes. Using NTP is highly recommended for VMs and cloud servers, as clock drift is common in virtualized environments.
How do I check if my system is syncing time?
You can use: ntpq -p
Conclusion
In Debian 13, enabling NTP is simple with modern tools like ntpsec. With NTP, your systems will always stay in sync with trusted time servers, reducing errors and making system administration much easier. Hope you enjoy it. Please subscribe to us on Facebook, X, and YouTube.
You may also like to read the following articles:
Install and Configure PostgreSQL 17 on Debian 13