Share your love
Install Podman on Centos 7 | Best Docker Alternative
In this guide, we want to teach you How To Install Podman on Centos 7. Podman is an open-source container management tool for developing, managing, and running OCI containers. Here are the advantages of using Podman:
- Images created by Podman are compatible with other container management tools
- It can be run as a normal user without requiring root privileges
- It provides the ability to manage pods
- It only runs on Linux-based systems
- There is no alternative for Docker Compose
You can now proceed to the guide steps below on the Orcacore website to set up Podman on Centos 7.
Table of Contents
Steps To Install and Use Podman on Centos 7
To complete this guide, you have to log in to your server as a non-root user with sudo privileges. To do this, you can follow our guide on Initial Server Setup with Centos 7.
Install Podman on Centos 7
First, you need to update your local package index with the following command:
sudo yum update -yThen, you need to install the Epel repository on your Centos 7 server by using the command below:
sudo yum install epel-release -yNow you can use the following command to install Podman:
sudo yum install podman -yThen, verify your installation by checking its version:
podman --version
To get full information about Podman, you can use:
podman info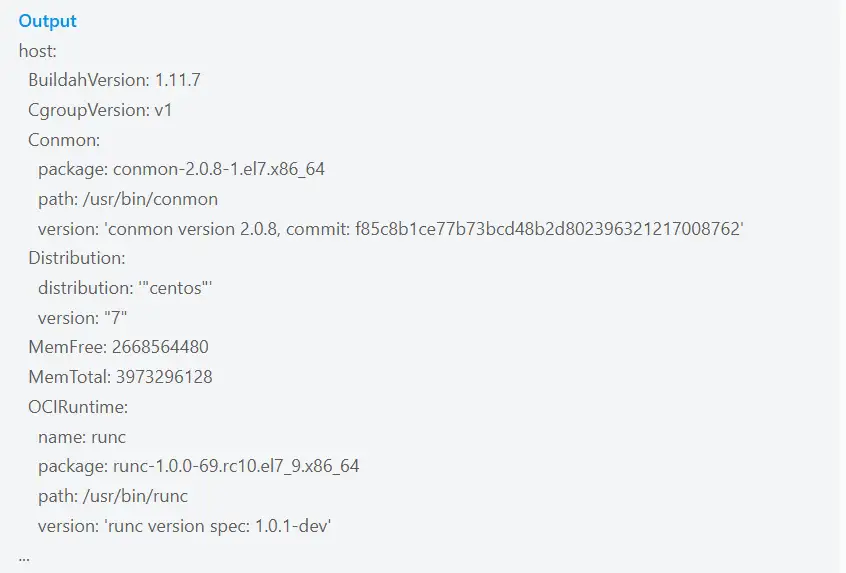
When your installation is completed, you can proceed to the next step to see how to use Podman.
How To Use Podman on Centos 7?
Now that you have installed Podman on your server let’s see How To Use Podman.
Search and pull images with Podman
Just like Docker, you can use the Podman command line to search Images but from different repositories. For example, if you want to install a Centos container using Podman, then you can search what are the images available through the different repositories.
podman search centosThen, you can download and pull images with the following command:
podman pull centosList all Images with Podman
If you have downloaded multiple images and now want to see what are the available images on your system, you can list all of them using the following command:
podman imagesIn my case:
Output
REPOSITORY                 TAG      IMAGE ID       CREATED         SIZE
docker.io/library/centos   latest   5d0da3dc9764   13 months ago   239 MB
Create a Container with Podman
Once you have the image of the application that you want, you can create a container with it. Here we have downloaded the Centos image with Podman. Now we will show how to use it to create a container using Centos Image.
To do this, you can use the following command:
podman run -dit --name orca centosNote: –name is a parameter to give the container whatever friendly name you want to assign.
To access your Container command line, use the following command:
podman attach orcaYou will see that your command prompt changes to your container ID:
[daniel@f420884c0802 /]#To start your container, you can use the command below:
podman start container-id or nameTo stop your container, you can use the following command:
podman stop container-id or nameFor more information, you can visit the Podman Documentation page.
Conclusion
At this point, you have learned to Install and Use Podman on Centos 7. Podman on Centos 7 is used to run and manage containers as a Docker alternative without a daemon, enhancing security and performance.
Hope you enjoy it. You may also like these articles:
Install and Use Podman on AlmaLinux 8