Share your love
2 Best Ways To Test Hard Disk Speed in Windows
This guide intends to teach you 2 Ways To Test Hard Disk Speed in Windows 10 and Windows 11. If you want to run a Hard Disk Drive Speed Test, you can follow this guide provided by the Orcacore team to test your speed by using PowerShell commands and the Disk Crystal Mark app.
Table of Contents
2 Ways To Test Hard Disk Speed in Windows
To complete this guide, you must log in to your Windows Client and follow the steps below. You can simply test your Hard disk speed by using the following methods:
- Using PowerShell Commands
- Using Disk Crystal Mark
Method 1 – Run a Hard Disk Speed Test on Windows with PowerShell
In this way, you must open your Windows PowerShell as an administrator. To do this, you can check this guide on Run PowerShell as Administrator on Windows.
Once you open your Windows PowerShell, you can use the winsat command to test your hard disk speed.
To get the read speed of the hard disk, you can run the following command in your Windows PowerShell:
winsat disk -ran -read -drive location-of-hard-driveFor example:
winsat disk -ran -read -drive cExample Output:
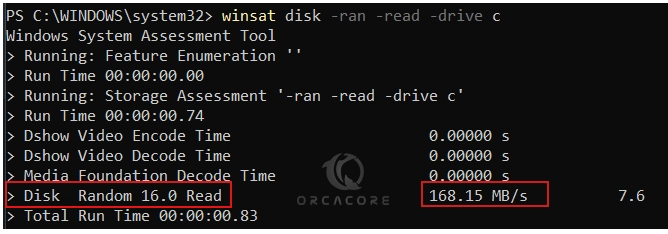
As you can see the reading speed of drive c in this example is shown on Disk Random Read speed.
If you want to get the write speed of the hard disk, you can simply use the following command:
winsat disk -ran -write -drive location-of-hard-driveFor example:
winsat disk -ran -write -drive c
Example Output:
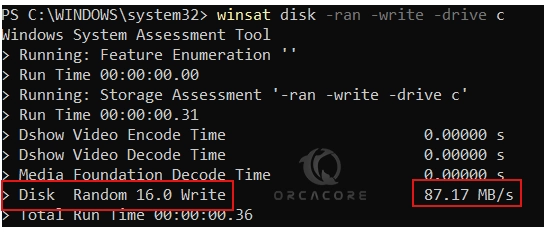
From the output, you can see your Disk Random Write speed.
With this option, you can easily measure your Hard Disk Read and Write speed from the Windows PowerShell.
Method 2 – Measure Windows Hard Disk Speed with Crystal Disk Mark
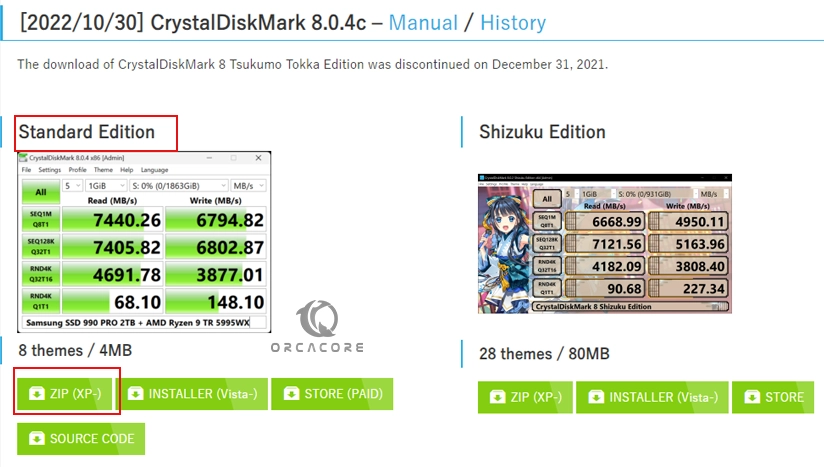
Alternatively, you can use an app to measure your hard disk speed in Windows. Crystal Disk Mark is an open-source disk drive benchmark tool for Windows. You can simply download the Crystal Disk Mark Standard edition from the official site and start using it. To do this, visit the official site and get the standard edition Zip file.
When your download is completed, extract your downloaded file to your desired folder.
You will see the DiskMark32 and DiskMark64 bits. Here we run the DiskMark64 bit.

Once you run the DiskMark, you will see the following screen:
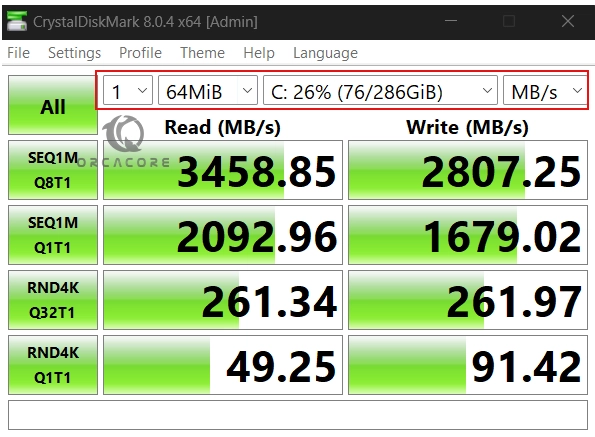
From there, you can choose your disk drive, and your speed test per MB/s or GB/s or IOPs. For better performance, you can set your Test size to 1GB. Also, you can set your test count to your desired one. This will simply, measure your Hard Disk speed depending on your settings.
Conclusion
At this point, you have learned 2 Ways To Test Hard Disk Speed in Windows. One of them is to use PowerShell Commands to measure your Hard Disk read and write speed, another one is to use Crystal Disk Mark benchmark tool for Windows.
Hope you enjoy using it. Also, you may interested in the following articles: