Share your love
Alpine Linux Installation for Beginners – 4 Easy Steps

If you are looking for a lightweight and efficient Linux system, Alpine Linux is a great choice. Alpine Linux is known for its simplicity. If you are new to installing Linux distributions, this guide from the Orcacore team will teach you the process of Alpine Linux Installation For Beginners step-by-step.
Here are the most important advantages of Alpine Linux:
- Lightweight and Minimal
- Security-Focused
- Efficient Package Management
- Customizable
- Great for Containers
- Fast Boot Time
- Active Community and Regular Updates
Let’s start the installation process and guide steps.
Table of Contents
Steps To Alpine Linux Installation for Beginners – First Installation
Before beginning the Alpine Linux Installation for beginners, you must pay attention to the hardware requirements. Let’s see what we need.
Hardware requirements for Alpine Linux installation
Here are the hardware requirements for Alpine Linux installation:
Processor (CPU): A 64-bit x86 processor (x86_64 architecture) is recommended.
RAM (Memory): A minimum of 256 MB of RAM is required, but 512 MB or more is recommended for smoother performance.
Storage (Disk Space): Alpine Linux is lightweight, requiring as little as 130 MB of disk space for a minimal installation. However, it’s recommended to have at least 1 GB available.
Network Interface: A network connection is recommended for downloading additional packages and updates during or after installation. But it is not required for offline setup.
Now you can start the process of Alpine Linux Installation for Beginners.
Step 1 – Easily Download the Alpine Linux Installation ISO Image
As the first step, you must visit the Alpine Downloads Page and download the latest Standard X86-64 Iso Image.
Once your download is completed, you can proceed to the next step and prepare your bootable USB.
Step 2 – Prepare Bootable USB For Alpine Installation
At this point, you can use VMWare Workstation for Alpine Linux Installation for Beginners. For this purpose, you can check this guide on Create virtual machine in VMware Workstation.
If you prefer to Boot from a USB drive, you can download and install Rufus or you can use Etcher. Then, insert your USB flash drive. Open Rufus and in the “Device” section, select your USB drive.
In the “Boot selection” section, click “Select” and choose the Alpine ISO file.
Click “Start” and wait for the process to complete.
Next, insert the bootable USB drive into the computer where you want to install Alpine.
Restart the computer and enter the BIOS/UEFI settings (usually by pressing a key like F2, F10, F12, or Esc during startup).
Then, change the boot order to prioritize the USB drive. Finally, save the changes and exit the BIOS/UEFI settings. Your computer should now boot from the USB drive.
Once you have booted into the Alpine ISO, you should see the following screen:
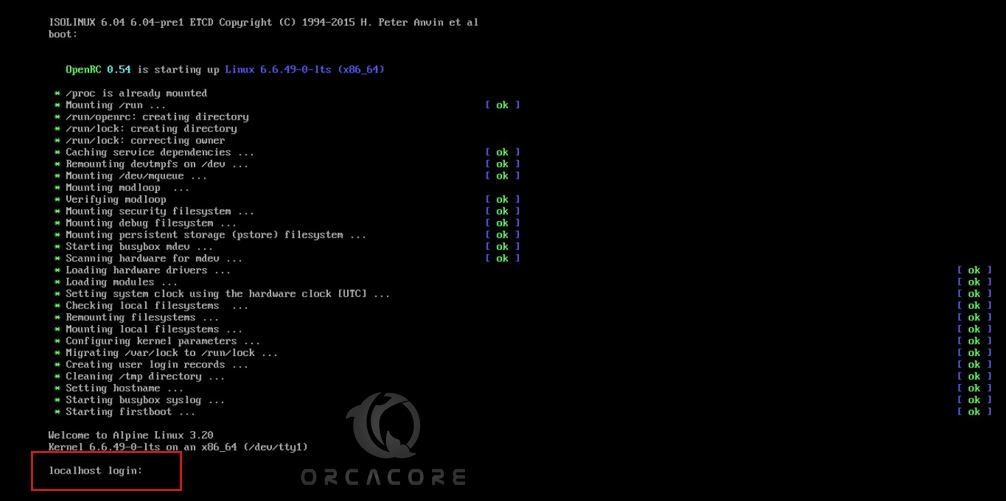
As you can see, the installation process of Alpine is command-line based. It is an easy process. To start, in the localhost login, you must enter root and press enter to continue.
Step 3 – Start Alpine Linux Setup
Once you have logged in as the root user, you will see the following screen. You must run the setup-alpine command to start the Alpine Linux Installation for Beginners.

During the installation process, you will be asked to do the following tasks:
- Configure Keyboard Settings
- Assign a Hostname
- Establish Network Connection
- Create a Root Password
- Configure Time Zone
- Select an Alpine Linux Mirror
- Create a Regular User Account
- Select a Secure Shell (SSH) Daemon
- Partition the Disk
Let’s see how we can do it step by step.
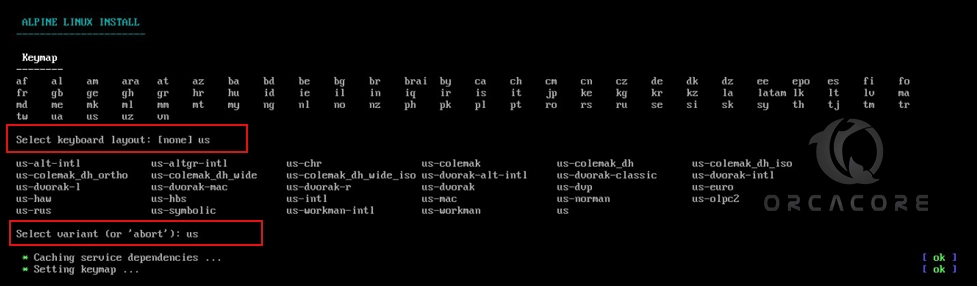
Configure Keyboard Settings
First, you must choose your keyboard layout and keyboard variant. We want to choose the US. So simply enter the US and press enter to continue. You can choose your desired layout.
Assign a Hostname
At this point, you must provide a hostname. For example, we choose the Orcacore, you can set another hostname.

Establish Network Connection and Set Root Password
At this step of Alpine Linux Installation for Beginners, Alpine tries to detect the network interface automatically. Here we get eth0. So easily confirm it by pressing enter.
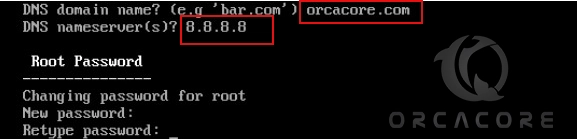
In the next step, you can manually set the IP address of your network interface as shown in the image.

We accept the above question since we want to make extra manual network interface configurations. Enter the DNS Domain Name and Name Server. Finally, set a root password and confirm it by re-type it again.
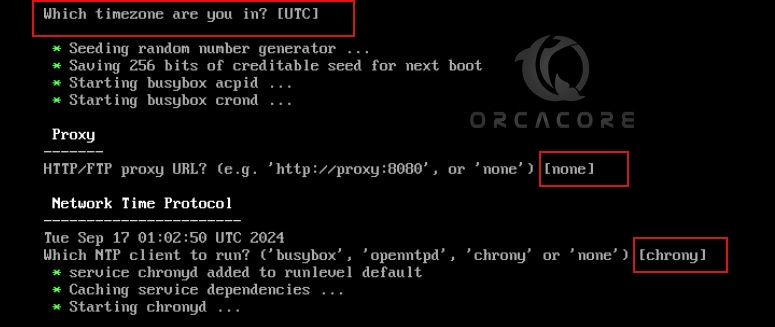
Configure Time Zone
At this point, you must set the time zone. You choose your desired and correct time zone. Here we choose UTC. For the proxy configuration, you can accept the default value which is none. Also, you can configure the Network Time Protocol. In this case, we choose Chrony.
Select an Alpine Linux Mirror
At this step of Alpine Linux Installation for beginners, you must choose the appropriate Alpine Linux mirror. An Alpine Linux Mirror is a server that hosts and distributes the packages, updates, and installation files for Alpine Linux. Here we choose the default one which is number 1.

Once it is completed, you can proceed to the next step.
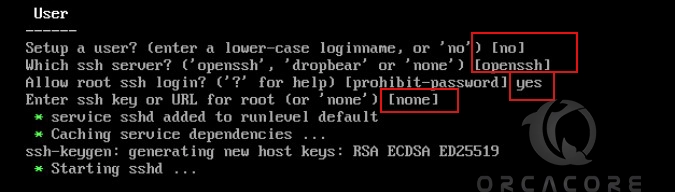
Create a Regular User Account And Set up SSH
At this point, you can create a regular user. You can enter the username and password for it. In this guide, we don’t create it. Then, select the OpenSSH for your SSH server. Then, you can allow root access by pressing Yes.
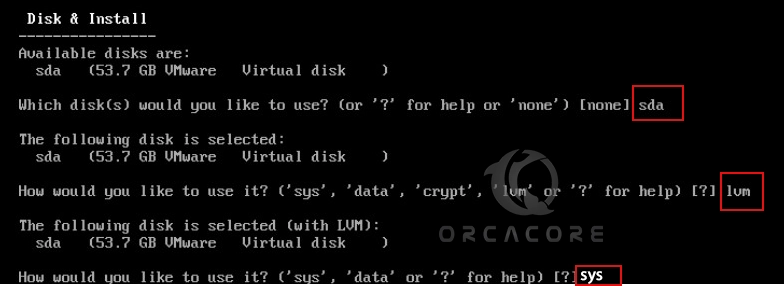
Partition the Disk
At this step, you must choose the available disk. In this case, we have sda. Then, you must choose how you want to use the disk. Here we choose LVM. It enables logical volume manager and ask again for “sys” or “data” mode.
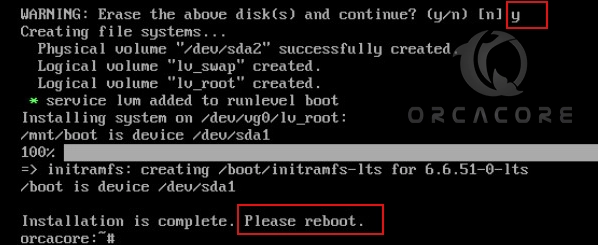
Then you will be informed to erase the disk and continue. Press Y to continue. Once it is completed, reboot the system by using the reboot command.
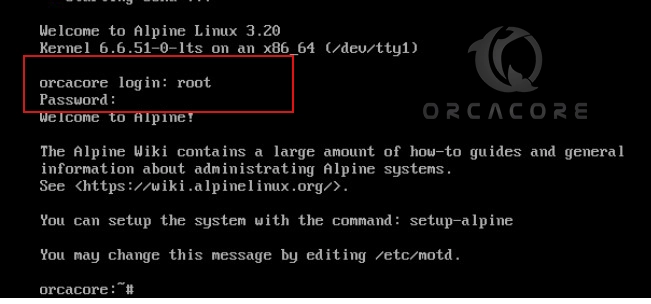
Step 4 – Log Into Alpine Linux
Once your system is rebooted, you must see the login screen. Enter the root user and the password you have configured for it.
That’s it, you have finished the Alpine Linux installation for beginners. You can now start using your Alpine Linux.
Conclusion
At this point, you have learned the process of Alpine Linux Installation for Beginners. By following this guide, you have a minimal and powerful Linux system that is highly customizable. Alpine Linux is perfect for users who want efficiency and control. With this installation guide, you can explore Alpine features, optimize the setup, and take full advantage of this secure, powerful distribution.
Hope you enjoy it. You may also like the following articles:
Ubuntu 24.04 LTS Desktop Installation Made Easy
Linux Mint 21 Cinnamon Setup on VMware Workstation
Install Windows Server 2022 in Vmware Workstation 17
Install Fedora Linux 39 on VMware Workstation
FAQs
Can I install Alpine Linux on a virtual machine?
Yes, Alpine Linux works on virtual machines like VirtualBox and VMware.
How do I create a bootable USB drive for installing Alpine Linux?
You can create a bootable USB using tools like Rufus on Windows or the dd command on Linux.
Is Alpine Linux suitable for beginners?
Alpine Linux requires more manual configuration than other distributions, but it is beginner-friendly for users who want to begin learning.
Can I install additional software after installing Alpine Linux?
Yes, after installation, you can use Alpine’s apk package manager to install additional software and customize your system.
What should I do after completing the first installation of Alpine Linux?
You can update your system, install any needed software, and configure security settings.