Share your love
Install Bitwarden on AlmaLinux 9 / Rocky Linux 9 – Full Guide
This guide intends to teach you to Install Bitwarden on AlmaLinux 9 / Rocky Linux 9. Bitwarden is an open-source password manager that allows users to securely store, manage, and generate passwords across multiple devices and platforms. Also, it is available for free and premium versions. Bitwarden provides amazing features including:
- Password Vault
- Cross-Platform Compatibility
- End-to-End Encryption
- Two-factor authentication (2FA)
- Password Generator
- Secure Sharing
- Self-Hosted Option
You can follow this step-by-step guide on the Orcacore website to quickly install the Bitwarden password manager on Rocky Linux 9 and AlmaLinux 9.
Table of Contents
Step-by-Step Guide To Install Bitwarden on AlmaLinux 9 / Rocky Linux 9
Before you start to Install Bitwarden on AlmaLinux 9 / Rocky Linux 9, you need some requirements. Let’s see what we need.
Requirements For Bitwarden Setup
First, you must access your server as a non-root user with sudo privileges and set up a basic firewall. Then, you must install Docker and Docker Compose on your server.
To show you the guide steps, we use Rocky Linux 9. For this purpose, you can check the following guides:
Initial Server Setup with Rocky Linux 9
Install Docker on Rocky Linux 9
Set up Docker Compose on Rocky Linux
Also, you need a valid domain name that is pointed to your server’s IP address.
Now follow the steps below to Install Bitwarden on AlmaLinux 9 / Rocky Linux 9.
Step 1 – Set Firewall Rules for Bitwarden on AlmaLinux 9 / Rocky Linux 9
Here we assumed that you have a running firewalld service. Now you need to allow ports 80 and 443 through your firewalld. To do this, you can run the following commands:
# sudo firewall-cmd --permanent --zone=public --add-service=http
# sudo firewall-cmd --permanent --zone=public --add-service=https
# sudo firewall-cmd --zone=public --add-masquerade --permanent
To apply the new rules reload the firewall:
sudo firewall-cmd --reloadStep 2 – Get Bitwarden Setup ID and Key on Rocky Linux 9 / AlmaLinux 9
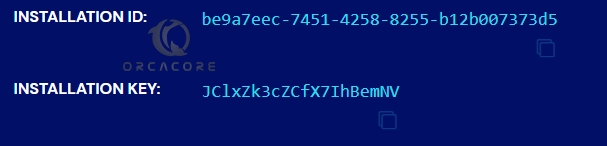
At this point, you need to visit the Bitwarden Host page and request a key for your installation. Enter your Email address and click Submit.
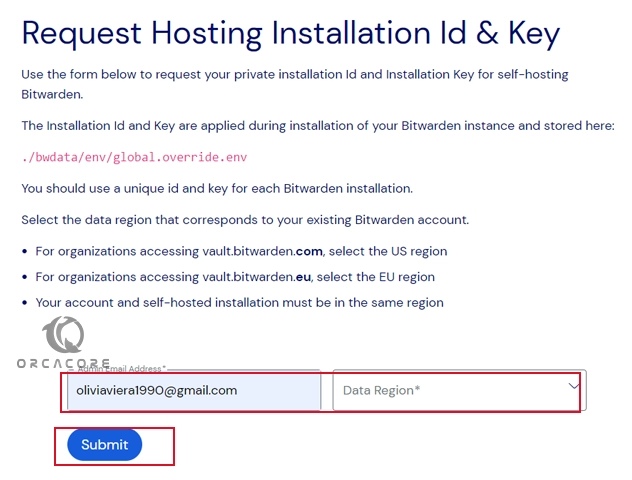
You will get your installation ID and Key.
Step 3 – Download and Run Bitwarden Password Manager Installer Script
At this point, you must use the following curl command to download the Bitwarden installer script:
sudo curl -Lso bitwarden.sh https://go.btwrdn.co/bw-shThen, make your Bitwarden installer script executable with the following command:
sudo chmod +x bitwarden.sh
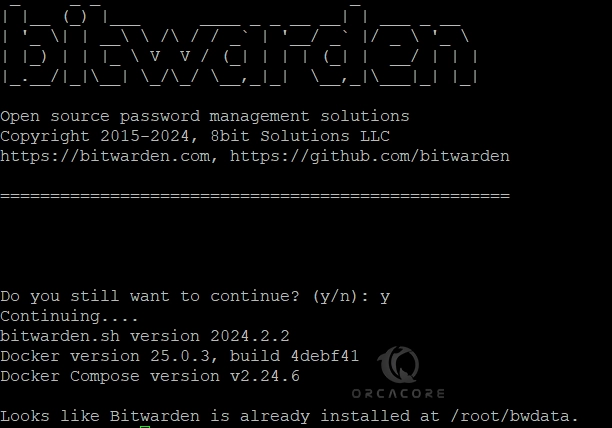
Now you can run the Bitwarden installer to Install Bitwarden on AlmaLinux 9 / Rocky Linux 9:
sudo ./bitwarden.sh installIn the first step, you will be asked for your domain name, enter your domain name, and continue. Next, you will be asked to use Let’s Encrypt or not, here we enter N and continue. Then, you need to set a database name for Bitwarden.
Now you will be asked to enter your ID and Key installation. Also, you can generate a self-signed certificate for Bitwarden.
In case you get an error after entering the installation key – “Unable to validate installation ID, Problem contacting Bitwarden server. “ You can re-run the command, it will be ok.
Then, run the rebuild command before you start your Bitwarden service:
sudo ./bitwarden.sh rebuildNow you can start your Bitwarden service on Rocky Linux 9 / AlmaLinux 9:
sudo ./bitwarden.sh startIf you get the following error:
ERROR: Failed to Setup IP tables: Unable to enable DROP INCOMING rule: (iptables failed: iptables --wait -I DOCKER-ISOLATION-STAGE-1 -i br-7b222b804172 ! -d 172.18.0.0/16 -j DROP: iptables: No chain/target/match by that name.
(exit status 1))
Restart your Docker service to resolve this problem:
sudo systemctl restart dockerThen, start the Bitwarden again:
sudo ./bitwarden.sh start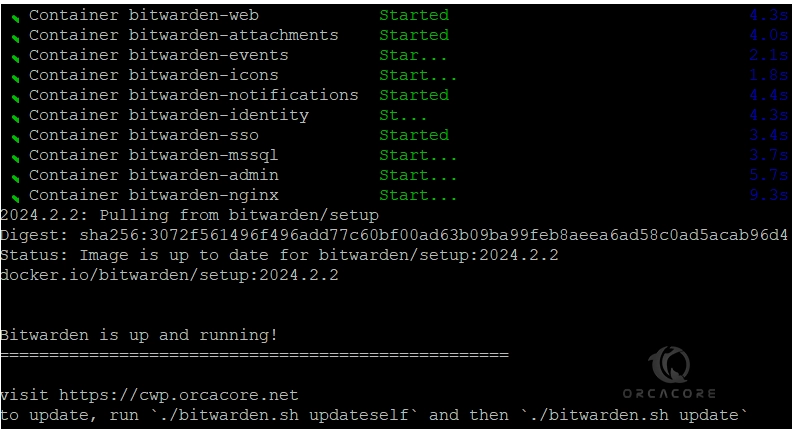
Step 4 – Access Bitwarden Web UI on AlmaLinux 9 / Rocky Linux 9
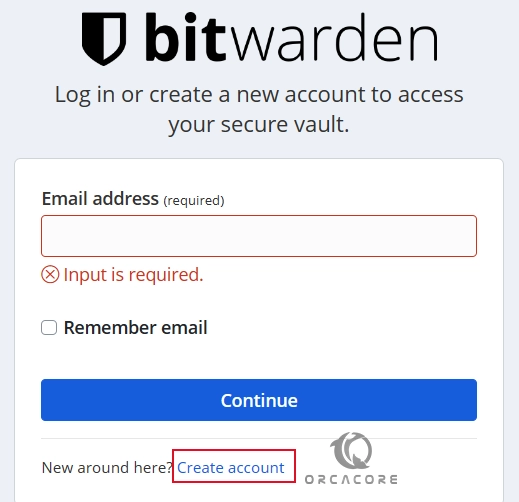
At this point, you can access your Bitwarden Web interface by typing your domain name in your web browser:
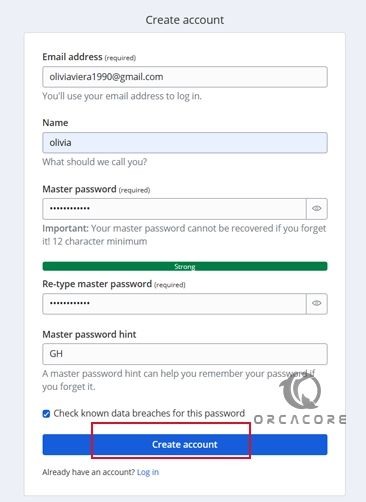
https://your-domainYou will see the Bitwarden login screen, Click Create Account.
Then, provide the information and click Create Account.
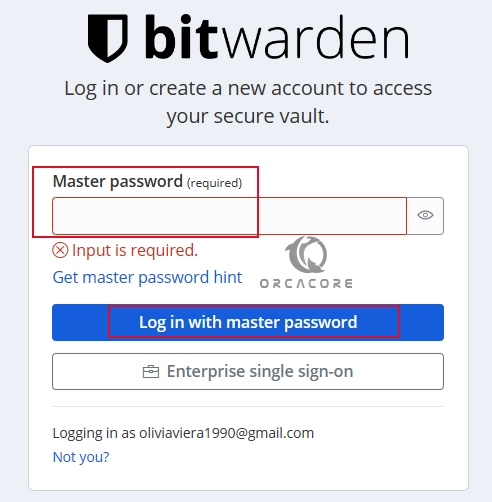
You will be redirected to the Bitwarden login page. Enter the Email and master password and click login with a master password.
You should see the Bitwarden dashboard on Rocky Linux 9 / AlmaLinux 9. From there, you can verify your email address to access all features.
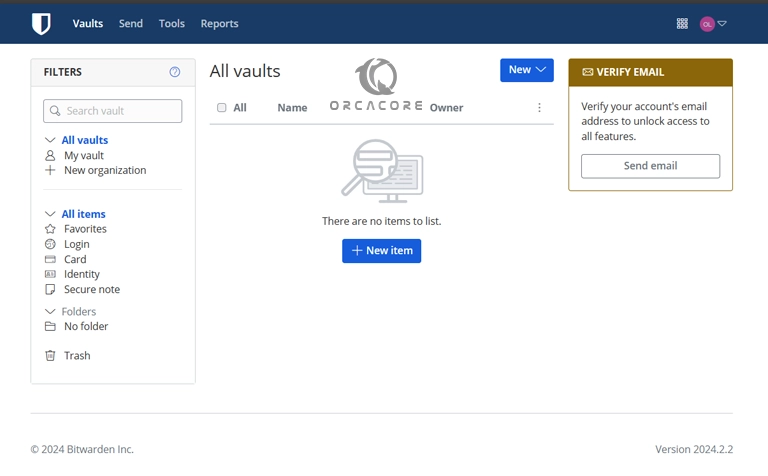
The Bitwarden features help users securely store, generate, share, and monitor passwords and other sensitive information across various platforms and devices.
Conclusion
Bitwarden is a powerful password management solution that offers several key features to help users securely manage their passwords and sensitive information.
At this point, you have learned to Install Bitwarden on AlmaLinux 9 / Rocky Linux 9 and Access your password manager dashboard via the web interface.
Hope you enjoy using it. Also, you may like to read the following articles:
Installing GitLab Community Edition on Rocky Linux 9
Install and Configure Syncthing on AlmaLinux 9