Share your love
Best Way To Install Fathom Analytics on Debian 12

In this guide, you will learn to Install Fathom Analytics on Debian 12. Fathom is an open-source and easy-to-use web analytics platform. Fathom Analytics focuses on essential metrics and omits tracking features that collect user’s privacy. It offers a privacy-focused alternative to traditional web analytics platforms like Google Analytics. So if you are looking for privacy-based web analytics, it’s a good choice to choose Fathom Analytics.
Now you can proceed to the following steps on the Orcacore website to Install Fathom Analytics on Debian 12.
Table of Contents
Step-by-Step Guide to Install Fathom Analytics on Debian 12 Server
Before you start to Install Fathom Analytics on Debian 12, you must log in to your server as a non-root user with sudo privileges and set up a basic firewall. For this purpose, you can check the Debian 12 Initial Setup Guide.
Also, you need a valid domain name that is pointed to your server’s IP address.
Then, follow the steps below to Install Fathom Analytics on Debian 12.
Step 1 – Download and Install Fathom Analytics on Debian 12
At this point, you need to visit the GitHub Release Page for Fathom and use the following curl command to download the latest package:
sudo curl -L -O https://github.com/usefathom/fathom/releases/download/v1.3.1/fathom_1.3.1_linux_amd64.tar.gzThen, extract your downloaded file to the /usr/local/bin directory:
sudo tar -C /usr/local/bin/ -xzf fathom*.tar.gz fathomNext, you must set the correct permissions to your Fathom file with the command below:
sudo chmod +x /usr/local/bin/fathomNow you can verify that you successfully Install Fathom Analytics on Debian 12 by checking its version:
fathom --versionOutput
Fathom version 1.3.1, commit...Step 2 – Full Configuration of Fathom Analytics on Debian 12
At this point, you have learned to Install Fathom Analytics on Debian 12. Now you must configure your Fathom service on Debian 12. To do this, you can follow the steps below.
Create a Dedicated User For Fathom
First, you must create a user For Fathom to run the service. To do this, you can use the command below:
sudo adduser --system --group --home /opt/fathom fathom
Next, navigate to the Fathom user’s home directory on Debian 12:
cd /opt/fathomAt this point, you must configure your Fathom service as the Fathom user. First, open a bash shell with the Fathom user:
sudo -u fathom bashGenerate Secret String for Fathom
Then, you must generate a secret string that Fathom will use for signing and encryption purposes with the command below: Remember to run the commands as the Fathom user.
openssl rand --base64 32Your output will be similar to this:
Output
ZCfLxAplsLiml+vASYRyU5lot9CA5R0EzXPm1ItF1Uo=
Create a Fathom Analytics Env File
Next, you need to create a new env file for the configuration file with your favorite text editor like Vi editor or Nano editor:
vi /opt/fathom/.envThen, add the following contents to the file and replace the Fathom secret with the string that you have generated before:
FATHOM_SERVER_ADDR="127.0.0.1:8080"
FATHOM_DATABASE_DRIVER="sqlite3"
FATHOM_DATABASE_NAME="fathom.db"
FATHOM_SECRET="your-secret-string"
When you are done, save and close the file.
Add First User To Fathom Instance
Now that your database is configured, you can add the first user to your Fathom instance:
fathom user add --email="your_email" --password="your_password"In your output you will see:

Start Fathom Analytics Server on Debian 12
At this point, you can start your Fathom server on Debian 12 with the following command:
fathom serverYour output will be similar to this:

Then, open another terminal that is connected to your server, and from the Fanthom instance run the following command:
curl localhost:8080You will see a few lines of HTML code, which means that the server is up and responding to requests on localhost.

Exit from the Fathom server by pressing the CTRL+C, and exit from the Fathom user shell with the command below:
exitStep 3 – Start and Enable Fathom Analytics on Debian 12
At this point, you must create a system unit file for your Fathom Analytics service. To do this, you can use the following command:
sudo vi /etc/systemd/system/fathom.serviceAdd the following content to the file with the exact path and values of the Fathom configuration on Debian 12:
[Unit]
Description=Fathom Analytics server
Requires=network.target
After=network.target

[Service]
Type=simple
User=fathom
Group=fathom
Restart=always
RestartSec=3
WorkingDirectory=/opt/fathom
ExecStart=/usr/local/bin/fathom server

[Install]
WantedBy=multi-user.target
When you are done, save and close the file.
Next, reload the systemd config to apply the changes:
sudo systemctl daemon-reloadThen, enable and start the Fathom service on Debian 12:
# sudo systemctl enable fathom.service
# sudo systemctl start fathom
Check that the Fathom service is active and running on your Debian 12:
sudo systemctl status fathom
Step 4 – Set up Nginx as a Reverse Proxy For Fathom on Debian 12
At this point, you need to configure Nginx as a reverse proxy for the Fathom service on Debian 12. First, install Nginx with the following command:
sudo apt install nginx -yNext, you need to create a new Nginx configuration file for the Fathom analytics:
sudo vi /etc/nginx/sites-available/fathom.confAdd the following contents to the file and replace the server name with your domain name:
server {
    listen 80;
    server_name your-domain-name;

    location / {
        proxy_set_header X-Real-IP $remote_addr;
        proxy_set_header X-Forwarded-For $remote_addr;
        proxy_set_header Host $host;
        proxy_pass http://127.0.0.1:8080;
    }
}
Once you are done, save and close the file. Enable the Fathom config file with the command below:
sudo ln -s /etc/nginx/sites-available/fathom.conf /etc/nginx/sites-enabled/Check the file for any syntax errors:
sudo nginx -tOutput
nginx: the configuration file /etc/nginx/nginx.conf syntax is ok
nginx: configuration file /etc/nginx/nginx.conf test is successful
Then, reload Nginx to apply the changes:
sudo systemctl reload nginxStep 5 – Access Fathom Analytics via Web Interface
At this point, you have learned to Install Fathom Analytics on Debian 12. You can now access your Fathom analytics dashboard by typing your domain name in your web browser:
http://your-domainNote: If you have a running firewall, remember to open the following port:
# sudo ufw allow "Nginx Full"
# sudo ufw reload
You will see your Fathom login screen. Enter the first Fathom user and password, then, click Sign in.
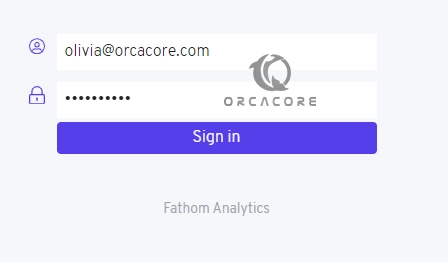
From there, you can create, add your site, and analyze your website with Fathom analytics on Debian 12.

It offers amazing features including:
- Simple Dashboard
- Real-Time Data
- Privacy Protection
- Minimalistic Design
- Customizable Reports
- Geolocation Tracking
- Referral Tracking
- Event Tracking
- Data Export
- Subscription-Based Model
Step 6 – Secure Fathom Analytics with Let’s Encrypt on Debian 12
It is recommended to secure your Fathom service. To do this, follow the steps below:
First, you need to install Certbot and its Nginx plugin with the command below:
sudo apt install certbot python3-certbot-nginx -yThen, run the Certbot with your domain:
sudo certbot --nginx -d your_domain_hereYou will be asked to enter your Email address and agree with the terms of services.
In your output you will see:

Now you can access the Fathom web interface again by https and you will see the lock icon in your browser bar.
Let’s Encrypt certificates are only valid for 90 days. You can run a script to /etc/cron.d. This will run twice a day and will automatically renew any certificate that’s within thirty days of expiration.
Run the command below to test the renewal process:
sudo certbot renew --dry-runIn your output, you will see:
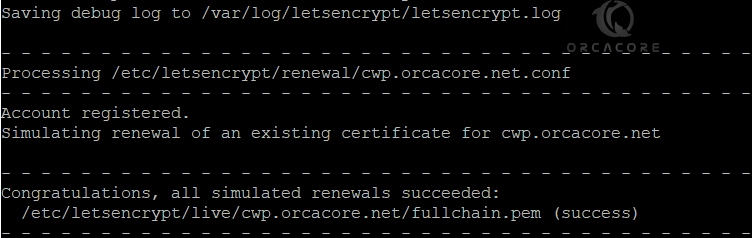
Final Words to Fathom Analytics Setup on Debian 12
By following the guide steps, you can easily Install Fathom Analytics on Debian 12 and access your web dashboard. Fathom Analytics provides a comprehensive yet privacy-focused solution for website analytics, empowering users to understand their audience while respecting their privacy rights.
Hope you enjoy this guide Install Fathom Analytics on Debian 12.
Also, you may like to read the following articles:
TCP BBR Congestion Control Setup Guide for Debian 12
Install Zenmap on the Debian 12 Linux Terminal
Set up Elasticsearch on Debian 12 Bookworm
Install Sniffnet on AlmaLinux 9 – Network Traffic Analysis