Share your love
How To Install Node.js on Windows Server 2019
In this article, we want to teach you How To Install Node.js on Windows Server 2019.
Node.js is a single-threaded, open-source, cross-platform runtime environment for building fast and scalable server-side and networking applications. It runs on the V8 JavaScript runtime engine, and it uses event-driven, non-blocking I/O architecture, which makes it efficient and suitable for real-time applications.
How To Install Node.js on Windows Server 2019
To start programming with Node.js, you must first install it on your Windows server. Node can be installed on various operating systems such as Windows, Ubuntu, OSX, etc. Once the Node.js installation is complete, you can start your projects using it.
Now you can follow the steps below to complete this guide.
Installing Node.js on Windows server 2019
First, you need to visit the Node.js Downloads page and select the version related to your operating system and download it.
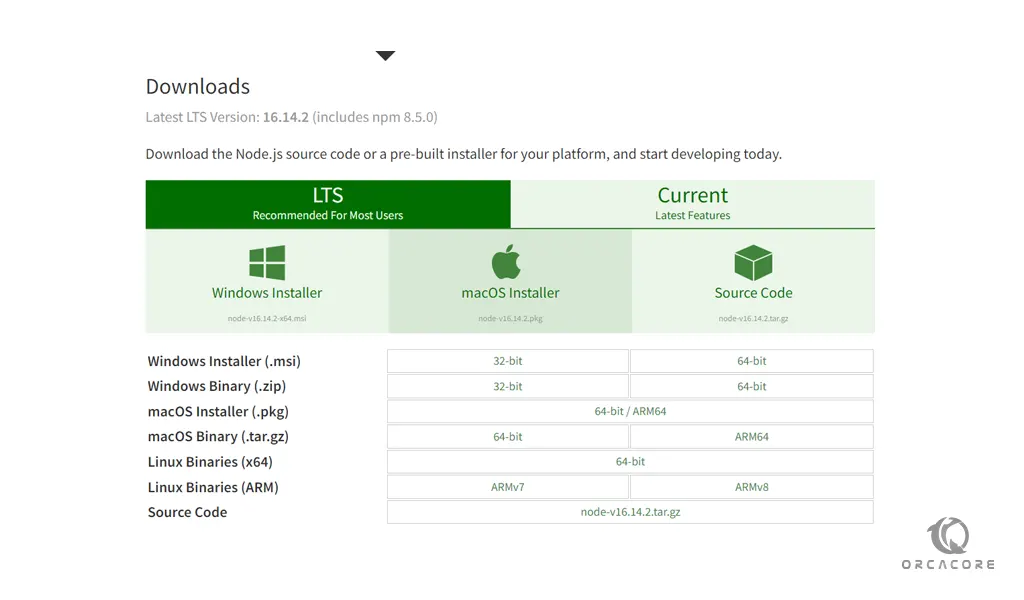
We will download the Windows Installer (.msi) 64-bits. To do this, click on the link to complete the download.
When your installation is completed, click on your downloaded file. You will see the node.js welcome wizard setup click Next to continue.
Node.js 2019
Then, you need to accept the License Agreement and click Next.
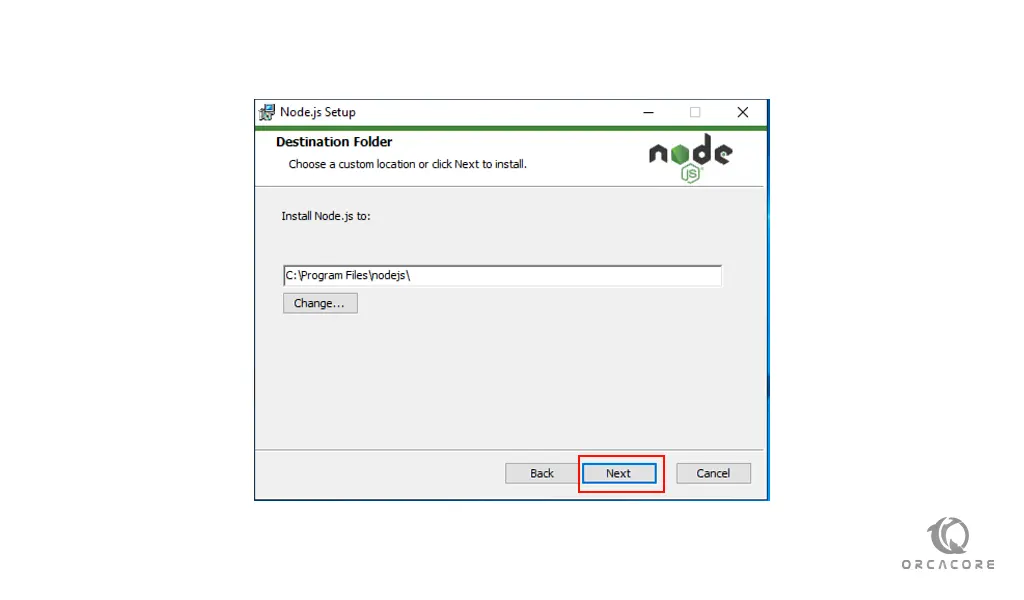
At this point, you need to choose a custom location and click Next to install.
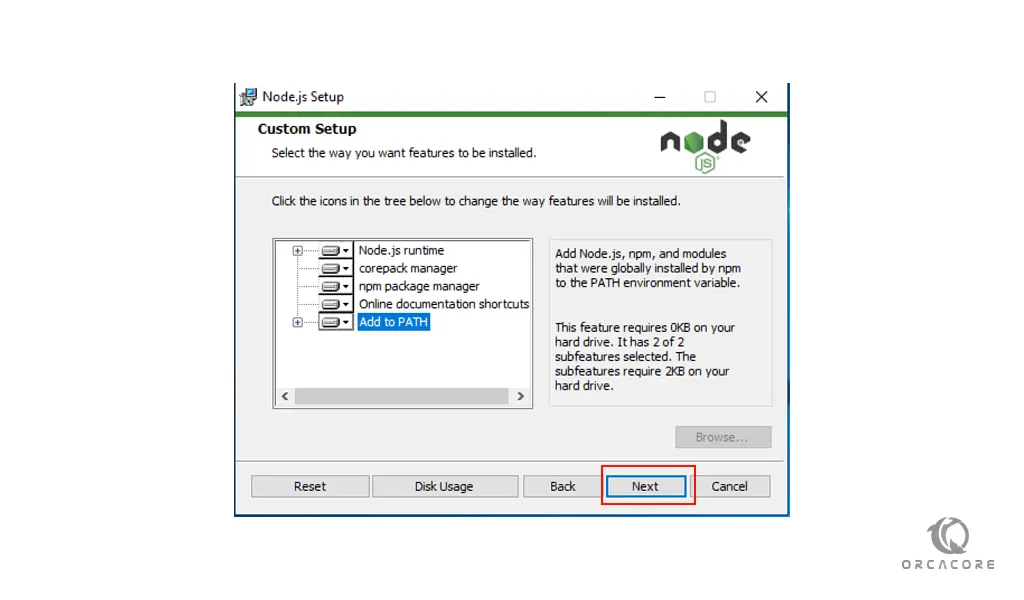
Next, you need to select the Node.js features that you want to be installed on your server. We select Add to Path and click Next.
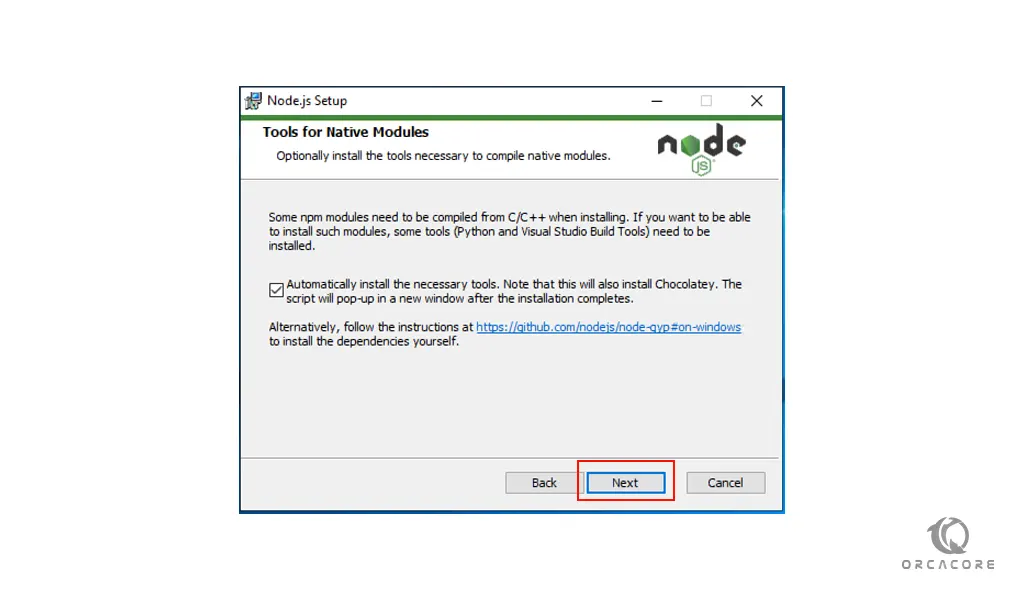
At this point, you can check the box next to Automatically install the necessary tools and click Next. Node.js will do everything for you by default.
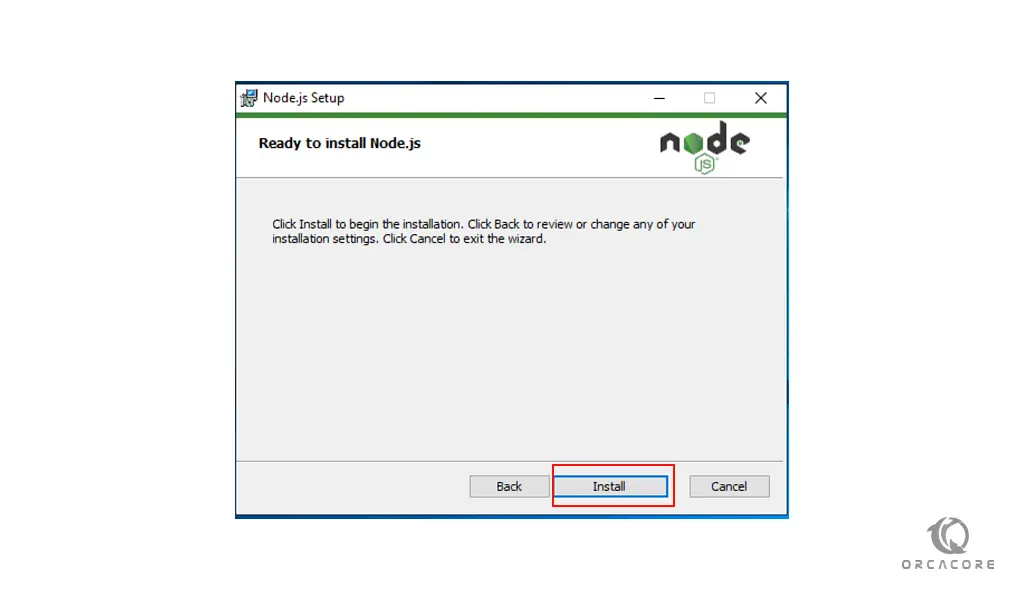
Now you are ready to install Node.js on your Windows server 2019. Click Install.
When your installation is completed, click Finish to exit from the setup wizard.
At this point, you will get into the command line press any key to continue, and your administrative PowerShell will open. This will install your required packages and tools.
To verify that you have correctly installed Node on your Windows server 2019, check the Node and NPM versions from a command line:
node -vnpm -vNow you can start working with your Node.js on Windows server 2019.
Conclusion
At this point, you learn to Install Node on Windows Server.
Hope you enjoy it.
You may be like this article: