Share your love
Easy Steps to Install 7-zip on Windows 10/11

This guide will teach you How To Install 7-zip on Windows. 7-Zip is a file archive with the highest compression ratio. It works on the 7z format, which is the successor to the zip format. This format enables it to achieve more than a 1350 percent compression ratio compared to the zip format.
7-Zip consists of an integrated decompressor, and archiver, and can work with 7z, zip, rar, gzip, bzip2, and tar formats. If you are looking for a file compression and management product, then 7-Zip is one of the first options you should consider.
The 7-Zip compression tool ensures the safety of your files by enforcing the 7-Zip password protection feature. This feature is highly acclaimed for protecting your files from unauthorized access and prying eyes.
Step 1 – Install 7-zip on Windows
To install 7-Zip on Windows, you must log in to your Windows Client machine and follow the steps below.
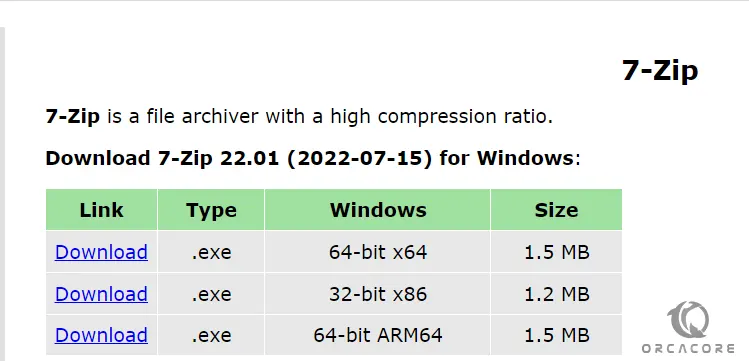
Download 7-Zip For Windows
The first step of installing 7-Zip is to download it on your system. To do this, visit the 7-Zip official page and click on the Download button if your operating system works on 32-bit kindly select 32-bit otherwise select 64-bit.
When your download is completed, follow the steps below to install 7-Zip on your system.
Installing 7-Zip on Windows
At this point, you need to find the executable file in the downloads folder in your system and open it.
The screen will be of the installing location, so you can select the drive in which you want to install and click the Install button.
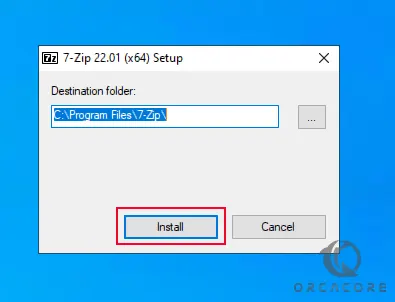
When your installation is completed, click on the Close button.
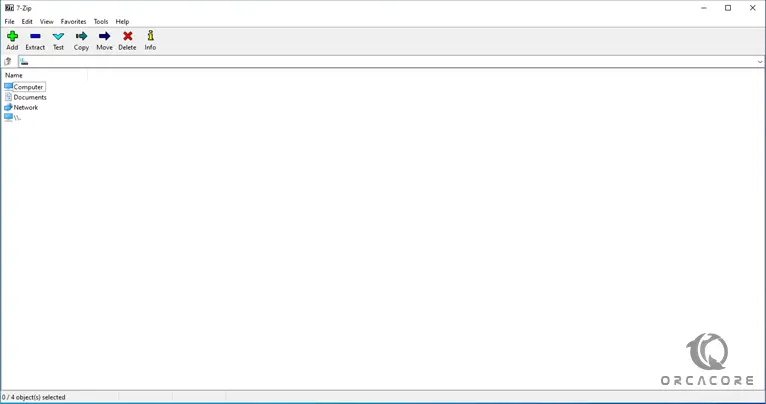
7-Zip is now successfully installed on your Windows server and an icon is created on the desktop. Or you can search it from your start menu, run the 7-Zip software, and see the interface.
Congratulations!! At this point, you have successfully installed 7-Zip on your Windows client machine.
Step 2 – How To Use 7-zip on Windows
Now that you have 7-zip on your Windows system, we want to show you how to use it. First, let’s proceed with compressing files.
Compress Files with 7-zip
Open 7Zip File Manager.
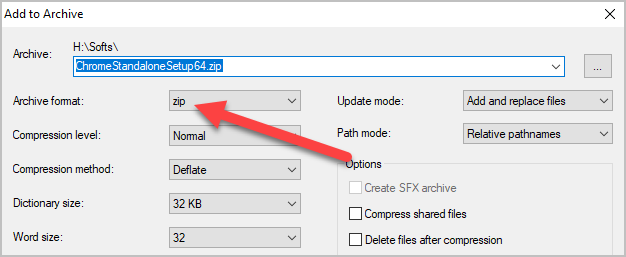
Then, click on what file you wish to compress and click “Add”. This will identify the file that you need to compress.
The “Add to Archive” window is going to pop up. Ensure that your Archive format is set to “Zip” and then hit the “OK” button.
7-zip will now process the file and compress it into a zip file that’s located at the same destination where the original file is on Windows.
Extract Files with 7-zip
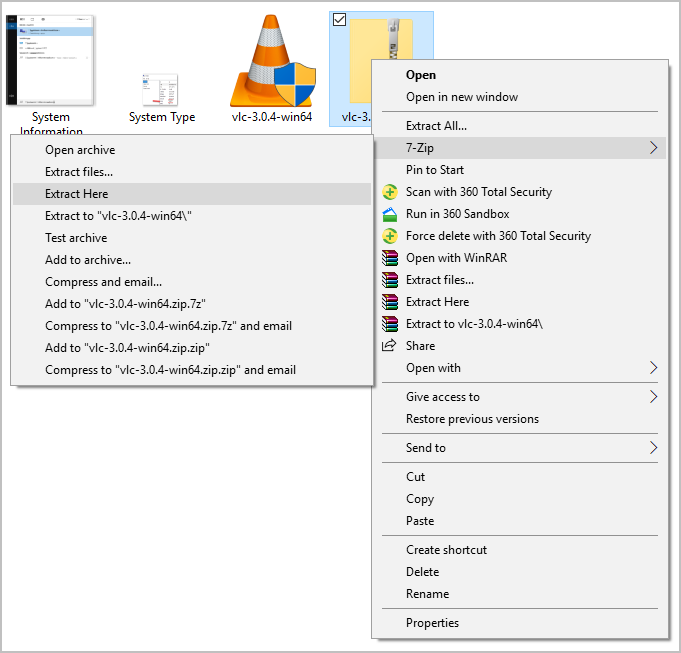
First, you need to select the file that you want to extract. Choose files you wish to extract and press right-click. This will open a new menu. From there, click on the 7-zip and choose “Extract Here”.
This brings up a new window that shows the progress as well as the remaining time before extracting the file. Wait for it to finish. The extracted file will appear in the same directory where you have all RAR or 7Zip files.
Conclusion
7-zip file compression and management tools such as WinZip are the ideal solutions for any organization or individual looking to compress data. It comes with a simple interface that makes it easy for you to operate.
At this point, you have learned to download and install 7-Zip on Windows 10/11. Hope you enjoy it.
Also, you may like these articles:
Introduce and Use KiTTY SSH on Windows
Set up Windows Admin Center on Windows 10