Share your love
Installing Monitorix Tool on Centos 7 – Easy Monitoring

In this tutorial, you will learn a step-by-step setup guide for Installing Monitorix Tool on Centos 7. You can easily use this open-source and lightweight monitoring tool on Centos 7. Monitorix allows you to track all your system services and resources. Also, it provides features to track your hardware data.
Now you can follow the rest of the article on the Orcacore website for Installing Monitorix Tool on Centos 7.
Table of Contents
Easy Steps for Installing Monitorix Tool on Centos 7
Before you start your Monitorix setup on Centos 7, you must log in to your server as a non-root user with sudo privileges and set up a basic firewall. For this purpose, you can check the Centos 7 Initial Setup Guide.
Also, you can check FirewallD Setup on Centos 7.
Once you are done, follow the steps below for Installing Monitorix Tool on Centos 7.
Step 1 – Install Required Packages for Monitorix Setup
First, you must run the system update with the command below:
sudo yum update -yThen, you need some required packages and dependencies for installing Monitorix on your Centos 7 server. To do this, run the following commands:
# sudo yum install epel-release -y

# sudo yum install rrdtool-perl perl-Config-General perl-LWP-Protocol-https perl-LWP-UserAgent-Determined perl-XML-LibXML perl-HTTP-Server-Simple -y
Step 2 – Install Monitorix Tool on Centos 7
At this point, you can easily run the following command to install Monitorix on your server:
sudo yum install monitorix -yThen, you can verify your Monitorix installation by checking its version:
monitorix -vExample Output
Monitorix version 3.15.0 (07-Dec-2022)
Step 3 – Start and Enable Monitorix Service on Centos 7
Once your installation is completed, you can use the following command to start and enable your Monitorix service:
sudo systemctl enable --now monitorix
Then, verify Monitorix is active and running on Centos 7:
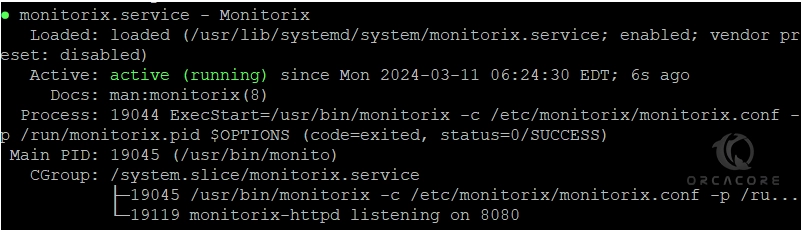
sudo systemctl status monitorixIn your output, you should see:
Step 4 – Monitorix Setup Configuration on Centos 7
Before you start using the Monitorix service, you need to make some configuration changes to the /etc/monitorix/monitorix.conf file. First, take a copy of your Monitorix config file with the command below:
sudo cp /etc/monitorix/monitorix.conf /etc/monitorix/monitorix.conf.backupThen, open the config file with your desired text editor like Vi editor or Nano editor:
sudo vi /etc/monitorix/monitorix.confIn the file, look for the following line and make the changes according to your desired settings:
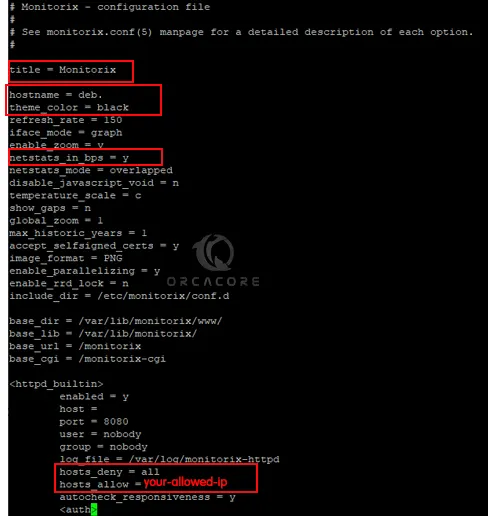
Once you are done, save and close the file.
Next, restart the Monitorix service to apply the changes:
sudo systemctl restart monitorixStep 5 – Set up Firewall Rules For Monitorix Service
Here we assumed that you have a running firewalld on Centos 7. To enable Monitorix access, you need to allow port 8080 through your firewalld:
sudo firewall-cmd --add-port=8080/tcp --permanentThen, reload the firewall to apply the new rules:
sudo firewall-cmd --reloadStep 6 – Monitor Centos 7 with Monitorix via Web UI Dashboard
At this point, you can access your Monitorix via the web interface by typing your server’s IP address in your web browser followed by 8080/monitorix:
http://server-ip:8080/monitorixAt the first, you will see the following screen. Choose the graph and your time.
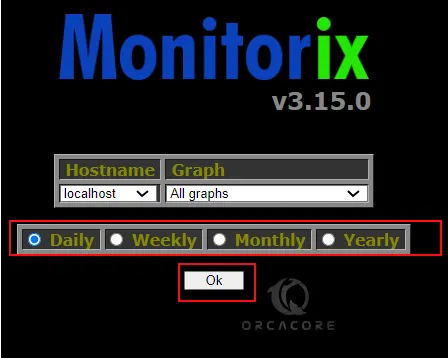
From there, you can see your graphics and track your server.
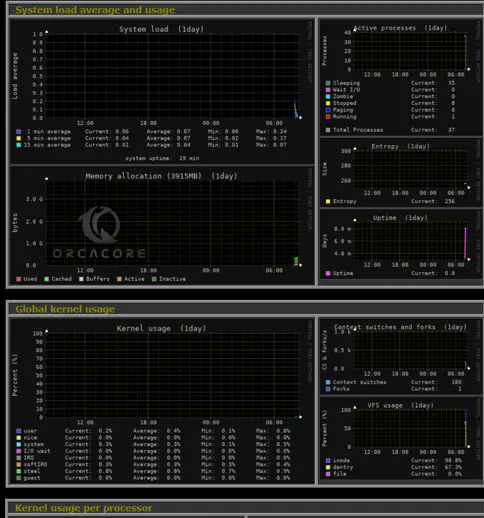
That’s it, you are done. You can now easily track your system resources and services through your Monitorix dashboard. For more information, you can visit the official website.
Conclusion
At this point, you have learned to Installing Monitorix Tool on Centos 7 and access your dashboard via the Web interface to track all your data. Hope you enjoy using it. Also, you may interested in these articles:
Install PowerDNS and PowerAdmin on Centos 7
Install Nessus Scanner on Centos 7