Share your love
Install and Use Cockpit on Ubuntu 20.04

In this guide, we want to teach you How To Install and Use Cockpit on Ubuntu 20.04.
Cockpit is a web-based Linux server administration tool for managing and monitoring your servers remotely. Cockpit allows you to see your server in a web browser and perform system tasks using both graphical and terminal tools.
Also, you can use Cockpit to manage containers, administer storage, configure networks, and inspect system log messages.
How To Install and Use Cockpit on Ubuntu 20.04
To install Cockpit, you must log in to your server as a non-root user with sudo privileges and set up a basic firewall. To do this, you can follow our guide the Initial Server Setup with Ubuntu 20.04.
Set up Cockpit on Ubuntu 20.04
By default, the Cockpit packages are available in the default Ubuntu repository. First, update your local package index with the following command:
sudo apt update
Then, use the following command to install Cockpit on your server:
sudo apt install cockpit -y
Next, start your Cockpit service with the following command:
sudo systemctl start cockpit.socket
Enable it to start on system boot:
sudo systemctl enable cockpit.socket
Now verify your Cockpit service is active and running on Ubuntu 20.04 with the command below:
sudo systemctl status cockpit.socketOutput ● cockpit.socket - Cockpit Web Service Socket Loaded: loaded (/lib/systemd/system/cockpit.socket; enabled; vendor preset> Active: active (listening) since Sun 2022-06-26 13:17:52 CEST; 21s ago Triggers: ● cockpit.service Docs: man:cockpit-ws(8) Listen: [::]:9090 (Stream) Tasks: 0 (limit: 2282) Memory: 1.2M CGroup: /system.slice/cockpit.socket
At this point, you need to configure the firewall for Cockpit. We assumed that the UFW firewall is installed and configured on your system then you will need to allow ports 80 and 9090 through the UFW firewall. To do this, run the commands below:
# sudo ufw allow 9090
# sudo ufw allow 80
Then, reload the firewall to apply the new rules:
sudo ufw reload
You can check your UFW firewall status with the following command:
sudo ufw status
Output
Status: active

To Action From
-- ------ ----
OpenSSH ALLOW Anywhere
9090 ALLOW Anywhere
80 ALLOW Anywhere
OpenSSH (v6) ALLOW Anywhere (v6)
9090 (v6) ALLOW Anywhere (v6)
80 (v6) ALLOW Anywhere (v6)
Access Cockpit Web Interface
At this point, you can access the Cockpit web interface by typing your server’s IP address in your web browser followed by 9090:
http://your-server-ip:9090
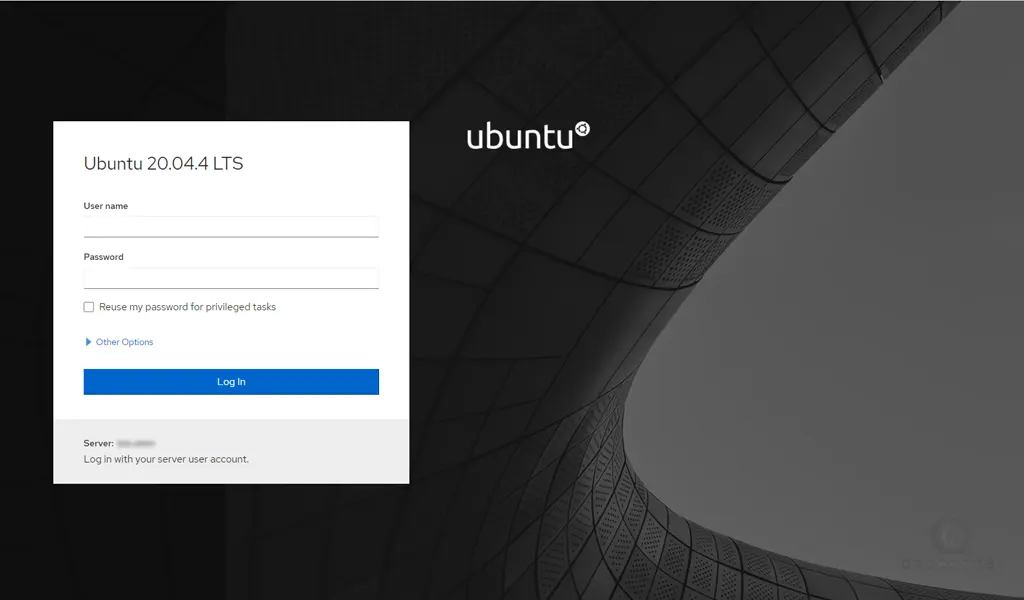
You should see the Cockpit login screen. Provide your root username, and password and click on Login.
Now you will see your Cockpit dashboard:
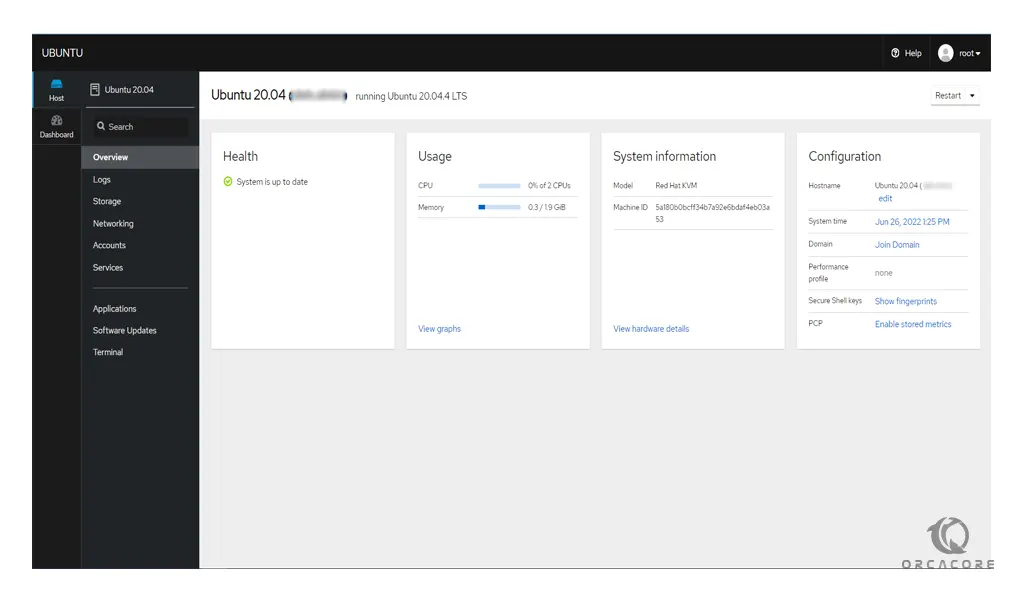
To see your system’s partition information, click on Storage in the left pane.
Also, you can see the network-related information by clicking on Networking.
Click on the Services. You should see all system services.
From the Applications, you should see all installed applications.
Click on the Software Updates. You should see all available updates.
Also, you can connect to your server’s command-line interface by clicking on the Terminal.
Conclusion
At this point, you learn to Install and Use Cockpit on Ubuntu 20.04.
Hope you enjoy using it.
You may also be interested in these articles:
Install and Use Rust Programming Language on Ubuntu 22.04